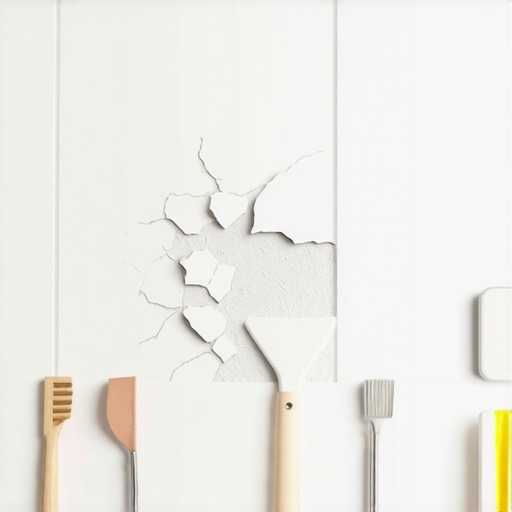
The physics of the impact site
Fixing a chipped porcelain tile requires a moisture-resistant epoxy resin, color-matching pigments, and a high-grit diamond sanding pad to restore the vitreous surface. You must clean the substrate with denatured alcohol and ensure the porcelain body is dry before applying any polyester-based filler or UV-cured acrylic to the shower wall or floor.
I smell like WD-40 and oak dust most days. My knees ache from thirty years of dragging them across subfloors that were never flat to begin with. Most people look at a chip in their shower tile and see an eyesore. I see a breach in a structural system. Porcelain is a dense, non-porous beast born from high-fire kilns. When it chips, you aren’t just looking at a cosmetic flaw. You are looking at the exposed, vulnerable heart of a material that is supposed to be a fortress against water. Most guys skip the leveling compound. They think the underlayment will hide the dip. It won’t. I spent three days grinding concrete on a job last month just so the floor wouldn’t click like a castanet. That same obsession with the foundation applies to a tiny chip. If you don’t prep the site like a surgeon, your repair will pop out the first time the steam hits it. That is the reality of residential engineering. You do it right, or you do it twice.
Why your subfloor is lying to you
Subfloor deflection and joist spacing directly impact porcelain tile integrity because vertical movement causes stress fractures and surface spalling. If your thin-set mortar lacks polymer modifiers, the bond strength fails under hydrostatic pressure, leading to delamination and chips in the glaze layer of the ceramic tile or natural stone.
“A floor is only as good as the subfloor beneath it; deflection is the enemy of every joint.” – Master Flooring Axiom
The chip in your shower tile likely came from a dropped shampoo bottle or a heavy handheld sprayer, but the reason it took a chunk out instead of just bouncing off involves the internal tension of the tile itself. Porcelain is rated on the PEI scale for hardness, but it is brittle. It lacks the ductility of metal. When an object hits the surface, the energy has nowhere to go. If there is a void in the thin-set behind that tile, the porcelain flexes into the air pocket and snaps. This is why I always back-butter my tiles. I want 100 percent coverage. You can tell a hack job by the hollow sound when you tap the wall. A solid installation sounds like a single block of granite. If your tile is chipping easily, you might have a hollow spot. Fixing the chip is a temporary fix if the tile is bouncing every time you step on it. You need to understand the chemistry of what you are about to put into that hole. Most big-box repair kits are garbage. They are nothing more than glorified nail polish that will yellow in six months under the harsh alkaline environment of a shower.
The chemistry of the bond
Epoxy resins and cyanoacrylate adhesives provide the tensile strength necessary for tile repair by creating a cross-linked molecular structure that resists thermal expansion. Using a two-part resin ensures the filler material achieves a Shore D hardness comparable to the porcelain glaze, preventing re-chipping in high-moisture environments like walk-in showers.
| Material Type | Janka Hardness / PEI Rating | Moisture Absorption | Repair Complexity |
|---|---|---|---|
| Porcelain Tile | PEI 4-5 | Less than 0.5% | High |
| Ceramic Tile | PEI 3 | 3% to 7% | Medium |
| Laminate Floor | N/A (AC3-AC5) | High (Swells) | Moderate |
| Hardwood Floors | 1290 (Red Oak) | Hygroscopic | Expert |
To get a repair that lasts, you have to think about the refractive index. Light travels through the glaze of the porcelain and hits the clay body beneath. If your repair material is opaque, it will look like a blob of gum. You need a translucent resin that you can tint with minute amounts of pigment. I keep a kit of thirty different colors. I mix them on a scrap piece of cardboard until I get a match that disappears under the harsh LED lights of a modern bathroom. You have to account for the way the resin shrinks as it cures. A cheap acrylic will lose 10 percent of its volume as the solvent evaporates. A true two-part epoxy stays exactly where you put it because it is a chemical reaction, not an evaporation process. This is the difference between a repair that stays put and one that falls down the drain during your next deep clean. You also need to consider the pH of your shower cleaners. Many people use acidic sprays that eat away at grout and weak resins. You want a repair that can handle the chemicals.
The 1/8 inch that ruins everything
Precision depth in the repair site is vital because a filler that is too thin will delaminate, while a mounded repair prevents flush sanding. You must use a carbide burr to remove loose fragments from the chip and create a mechanical key for the adhesive to bite into the porcelain body.
- Remove all soap scum using a heavy duty degreaser or denatured alcohol.
- Use a dremel with a small diamond bit to widen the base of the chip slightly.
- Mix the two-part epoxy according to the manufacturer weight ratios.
- Apply the tinted resin in thin layers using a toothpick or small spatula.
- Level the repair with a fresh razor blade before it fully hardens.
- Buff the surface with progressive diamond polishing pads up to 3000 grit.
While most people want the thickest underlayment or the heaviest layer of glue, too much cushion actually causes the locking mechanisms on LVP to snap under pressure, and in the world of tile, too much resin in a chip creates a weak point. You want the minimum amount of material necessary to fill the void. The edges of the chip are the most dangerous part. They are sharp and prone to further spalling. I take a fine-grit sandpaper and lightly ease those edges before I ever touch the resin. It is about creating a transition. If the resin has to bridge a sharp 90-degree cliff, it will fail. If it flows into a gentle bevel, it locks. This is the same reason we leave expansion gaps at the perimeter of a room. Materials need a place to go when they get warm. In a shower, the temperature can swing from 60 degrees to 105 degrees in a matter of seconds. That thermal shock is brutal on a repair. If your resin has a different coefficient of expansion than the porcelain, it will eventually shear off. That is why matching the material density is more important than matching the color.
The ghost in the expansion gap
Silicone caulk and flexible sealants are required at change-of-plane joints to accommodate structural movement without cracking the grout or chipping the tile. A movement joint prevents compressive stress from transferring through the tile assembly, which is the primary cause of edge chipping in showers and backsplashes.
“Movement joints are not optional; they are the lungs of the tile system.” – TCNA Handbook Reference
I often see chips at the very edge of the tile where it meets the tub or the corner. This is almost always because some rookie filled that gap with hard grout. Houses move. They breathe. The wood studs swell in the summer and shrink in the winter. If you have a hard line of grout in a corner, that pressure has nowhere to go but into the edge of the porcelain. It will crush the edge of the tile. I see it every single day. You have to use a 100 percent silicone sealant in those corners. It acts as a shock absorber. When I am fixing a chip in those areas, I first check if the joint is restricted. If it is, I dig out the old grout before I even worry about the chip. You have to fix the cause of the problem, not just the symptom. If you just fill the chip and leave the hard grout in the corner, the tile will just chip again next month. It is about understanding the systemic pressures of the building. Your shower is a machine, and every part has a job to do. When the grout fails, the tile takes the load. When the tile takes the load, it breaks. It is a simple chain of failure that starts with a lack of understanding of basic physics. Don’t be the person who ignores the mechanics of the room.