I have spent twenty-five years on my knees with a moisture meter and a level. My back hurts when it rains. My hands are permanently stained with the scent of oak dust and WD-40. I view a floor as a performance surface. It is a structural engineering challenge. Most homeowners see a floor as a decoration. They are wrong. I once walked into a house where a $15,000 wide-plank walnut floor was cupping so bad it looked like a potato chip because the installer didn’t check the crawlspace humidity. The homeowner tried to sand it themselves to fix it. They did not use a vacuum. They ended up with walnut dust in their HVAC system, their lungs, and even inside their sealed cereal boxes in the pantry. This was a failure of physics. This was a failure of respect for the material. Hardwood floors require a surgical approach to refinishing. You must understand the cellular structure of the wood. You must understand the chemistry of the finish. You must understand the physics of airflow. This guide is for those who want to do it right. It is for those who hate the grit of a poorly sanded surface. It is for those who value their lungs and their property. We will not take shortcuts here. We will not use builder-grade equipment. We will treat the floor like the architectural masterpiece it should be.
The ghost in the expansion gap
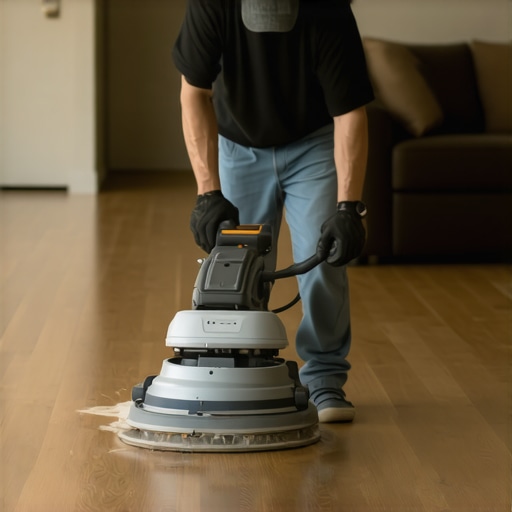
Dustless sanding requires a high-performance cyclonic vacuum system and high-efficiency particulate air filtration to capture wood particles at the source of friction. The microscopic reality of a floor is a battleground. When you run a drum sander over 3/4 inch solid white oak, you are not just removing wood. You are generating billions of particles. Some are large. Some are invisible. The invisible ones are the problem. These PM2.5 particles stay airborne for hours. They settle in your ductwork. They ruin your paint. To stop this, you need a vacuum that moves at least 200 cubic feet per minute. The hose must be grounded. Static electricity is your enemy. It makes dust stick to the walls. It makes dust stick to you. I use a weighted vacuum hose that follows the sander like a shadow. This is the only way to keep the site clean. Laminate floors do not have this issue because they are a sandwich of plastic and fiberboard. You cannot sand them. If you try, you will destroy the wear layer. Hardwood is different. It is alive. It breathes. It moves with the seasons. You must respect the expansion gap at the perimeter. This gap is the floor’s lungs. If you fill it with dust during sanding, the floor will buckle when the humidity hits 60 percent. It will fail. I have seen it happen a hundred times. A professional understands that the perimeter is the most critical part of the dust containment strategy. You must seal the baseboards with low-tack tape. You must block the vents. You must create a pressurized environment. This is not just cleaning. This is environmental control. This is the difference between a master and a weekend warrior.
“A floor is only as good as the subfloor beneath it; deflection is the enemy of every joint.” – Master Flooring Axiom
Why your subfloor is lying to you
Subfloor levelness must be within 1/8 inch over a 10 foot radius to prevent the sander from digging into high spots and creating uneven wear. Most guys skip the leveling compound. They think the underlayment will hide the dip. It will not. I spent three days grinding concrete on a job last month just so the floor would not click like a castanet. If your subfloor is not flat, your sanding will be a disaster. The drum sander will skip over the low spots. It will gouge the high spots. This creates chatter marks. Chatter marks are the hallmark of an amateur. They are tiny ripples in the wood. They show up once you apply the stain. Then it is too late. You cannot hide them. You have to start over. This is why I use a three-head planetary sander for the final passes. It levels the wood at a molecular level. It follows the contours of the floor without digging in. The physics of a planetary sander are superior to a drum sander. The heads rotate in opposite directions. This cancels out the torque. It creates a surface so smooth it looks like glass. Before you even touch a sander, you must check for moisture. A concrete slab should not exceed 4 percent moisture content. Plywood subfloors should be within 2 percent of the hardwood moisture levels. If they are not, the floor will move after you finish it. The grout in a nearby tile shower will crack if the floor shifts. Everything is connected. A house is a system. If the floor fails, the system fails.
The 1/8 inch that ruins everything
Proper grit sequencing starts with a coarse abrasive to remove the old finish and moves progressively to finer grits to eliminate scratches. Skipping a grit is a sin. If you start at 36 grit and jump to 80 grit, the 36-grit scratches will stay. They will be invisible until the finish goes on. Then they will look like canyons. You must go from 36 to 50 to 80 to 100. For a truly professional finish, you end at 120 on a buffer. This is the structural zooming I talk about. You are looking at the scratch pattern. You are looking at how the wood fibers react to the friction. White oak is harder than red oak. It has a Janka rating of 1360. Red oak is 1290. This matters. White oak has tyloses in its pores. This makes it more water-resistant. It also makes it harder to sand. It produces a finer, sharper dust. This dust is more dangerous to your lungs. You need a HEPA H13 filter. Anything less is a joke. I have seen guys use shop vacs with paper filters. The dust goes in the front and comes out the back. They are just moving the dust around. They are painting the house with oak flour. It is a mess. It is unprofessional. If you are doing a job near showers or wet areas, you must be even more careful. Moisture from the bathroom will migrate into the wood. This can cause the wood to swell. If you sand it while it is swollen, it will shrink later. You will get gaps. Large gaps are ugly. They collect dirt. They ruin the aesthetic. You must acclimate the wood for at least two weeks before you even think about sanding.
| Sander Type | Dust Recovery Rate | CFM Requirement | Primary Use Case |
|---|---|---|---|
| Drum Sander | 85 percent | 150 CFM | Initial flattening and finish removal |
| Edge Sander | 70 percent | 100 CFM | Perimeters and closets |
| Orbital Buffer | 95 percent | 150 CFM | Fine smoothing and grit blending |
| Planetary Sander | 99 percent | 250 CFM | Professional grade leveling and finishing |
Microscopic warfare against silica and lignin
Chemical bonds between the wood lignin and the polyurethane finish are strongest when the surface is free of micro-dust and oils. The sanding process is only half the battle. Once the wood is smooth, you have to clean it. Do not use a tack cloth with wax on it. The wax will contaminate the wood. It will cause the finish to peel. This is called a fisheye. It is a disaster. I use a microfiber mop and denatured alcohol. It evaporates fast. It picks up the microscopic dust that the vacuum missed. Look at the wood under a raking light. If you see a single hair or a speck of dust, it will be trapped forever in the finish. The finish is the shield. A good water-based polyurethane has a high solids content. It is harder than the oil-based stuff from the old days. It also dries faster. This means you have less time to work. You have to be fast. You have to be precise. If you leave a lap mark, it is there for life. This is where the minimalist curator persona comes in. You want zero-threshold transitions. You want the floor to flow from the hallway into the bedrooms without those ugly T-moldings. This requires a level of precision that most installers cannot achieve. It requires a subfloor that is perfectly flat across the entire house. It requires a master’s touch. Hardwood floors are a legacy. If you treat them right, they will last 100 years. If you treat them like laminate, they will be ruined in five.
“The Janka scale is the definitive measure of wood resistance; ignore it at your own peril when selecting abrasives.” – Hardwood Selection Guide
The physics of the final pass
The final pass with a high-grit abrasive must be done in the direction of the grain to prevent cross-grain scratching. If you sand across the grain, you tear the wood fibers. This makes the stain soak in unevenly. The floor will look blotchy. It will look cheap. I always finish with a screen. A 100-grit or 120-grit screen on a buffer blends everything together. It removes the transition marks between the drum sander and the edger. The edger is a beast. It rotates at high speed. It is easy to leave swirl marks. You have to be careful. You have to be patient. My knees are a testament to the hours spent edging. But the perimeter is what people see. They see where the floor meets the wall. If that area is rough, the whole job is a failure. In regions like Houston, the humidity is a constant threat. You cannot fight the humidity. You have to work with it. You need an engineered core if you want wide planks in a swamp. Solid wood will expand too much. It will lift the baseboards off the wall. It will pop the nails. In dry climates like Phoenix, the wood will shrink. You will get gaps you can fit a coin into. You have to maintain the humidity in the house between 30 and 50 percent. This is the golden rule. If the homeowner won’t commit to a whole-house humidifier, I won’t do the job. I don’t want my name on a floor that fails because the air is too dry. It is about professional pride. It is about knowing the limits of the material. Hardwood is a structural engineering challenge. It is not just a surface. It is the foundation of the home’s interior environment.
- Verify subfloor moisture content is within tolerance.
- Seal all HVAC supply and return vents with plastic.
- Use a 4-mil plastic barrier for room containment.
- Vacuum the walls and ceilings before the final pass.
- Inspect the floor with a 500-watt halogen light.
- Apply the first coat of sealer within two hours of sanding.
The sanding process is a transformation. You are taking something old and worn and making it new. But you are also preserving the history of the house. Every time I sand a floor, I think about the people who walked on it before. I think about the trees that grew for eighty years to provide the timber. It is a responsibility. You do not rush a legacy. You do not cut corners on a structural element. The dust you create is a byproduct of progress, but it must be managed. It must be contained. It must be respected. When the job is done, and the house is clean, and the floor is glowing under the lights, that is when I know I have done my job. There is no feeling like walking across a perfectly sanded floor in clean socks. It is smooth. It is solid. It is right. The chemistry of the bond is perfect. The physics of the surface are sound. The air is clean. This is the master flooring architect engine at work. This is the standard. Anything less is just sawdust in the wind.