
The 1/8 inch that ruins everything
Subfloor flatness is the primary metric for successful flooring installation including hardwood floors and laminate. A flat subfloor prevents locking mechanism failure and floor deflection. Most standards, including the National Wood Flooring Association guidelines, require a maximum deviation of 1/8 inch over a 10 foot radius. Most guys skip the leveling compound. They think the underlayment will hide the dip. It won’t. I spent three days grinding concrete on a job last month just so the floor wouldn’t click like a castanet. I have seen fifteen thousand dollar wide-plank walnut floors cup and fail because the installer did not understand the topography of the slab. A floor is a structural performance surface. It is not just a cosmetic layer. If the foundation is wavy, the finish will fail. It is that simple. When you walk across a floor and hear a hollow thud or a rhythmic clicking, you are hearing the sound of a subfloor that was never prepped. Most installers rely on their eyes. The human eye is easily deceived by light and shadow. A concrete slab might look like a frozen lake, but once you put a straightedge on it, you see the mountain range. This is why the chalk hack is not just a trick. It is a necessity for anyone who values their reputation.
“A floor is only as good as the subfloor beneath it; deflection is the enemy of every joint.” – Master Flooring Axiom
Why your subfloor is lying to you
A concrete slab or plywood subfloor rarely remains planar after the curing process or structural settling. The chalk hack provides visual evidence of high spots that cause hollow sounds in hardwood floors. Identifying these deviations is required before applying self leveling underlayment. I have walked into homes where the grout in the showers was cracking because the entire subfloor was flexing. People blame the grout. They blame the tile. They never blame the structural deflection. The chemistry of a concrete pour involves water evaporation. As the water leaves the slab, the surface can curl. This is known as slab curling. It creates high points at the joints and low points in the center. If you install a rigid material over these peaks, the material will eventually snap. This is especially true for modern laminate and LVP. These materials use thin locking tongues. When the floor is pushed down into a void, that tongue is put under immense tension. Eventually, it shears off. Once that happens, the floor is junk. You cannot fix a snapped locking joint without ripping up the whole room. This is the reality of the trade. Success is found in the grinding, not the clicking. It is found in the dust. If you do not have dust on your boots, you are not doing it right.
The physics of the chalk hack
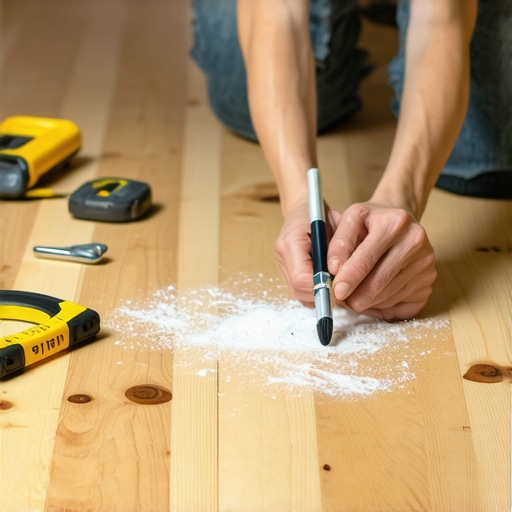
The chalk hack utilizes mechanical friction to transfer chalk pigment onto high spots of a subfloor. This method creates a topographic map of peaks and valleys without expensive laser levels. It is the most accurate manual method for floor prep in residential construction. You take a six foot or ten foot straightedge. I prefer a heavy aluminum box level. You rub a thick layer of blue or red carpenter chalk along the bottom edge. You then sweep the straightedge across the floor in a wide arc. The chalk will only transfer to the points of the floor that touch the metal. These are your high spots. Everything else is a valley. It is a binary system. It is either chalked or it is clean. This removes all the guesswork. You do not need to wonder if a spot is high. The chalk tells the truth. Once the high spots are identified, you have two choices. You can grind them down or fill the low spots around them. For concrete, grinding is usually the best bet if the high spot is localized. If you are dealing with a wooden subfloor, you might be looking at a proud joist or a subfloor panel that has swollen at the edges due to moisture exposure. This happens often when houses are left open to the rain during the framing stage. The edges of the OSB soak up water and expand like a sponge. If you do not sand those edges flat, every seam will telegraph through your new floor.
| Subfloor Type | Maximum Deviation | Recommended Tool | Correction Method |
|---|---|---|---|
| Concrete Slab | 1/8 inch per 10ft | 10ft Straightedge | Diamond Grinding |
| Plywood Subfloor | 3/16 inch per 10ft | 8ft Level | Sanding/Shimming |
| Self-Leveler | 1/16 inch per 10ft | 6ft Straightedge | Feather Finish |
The ghost in the expansion gap
Expansion gaps at the perimeter are necessary for hardwood floors and laminate to move with seasonal humidity. A high spot near a wall can trap the flooring plank and prevent lateral movement. This results in buckling or joint separation across the entire floor. I have seen guys jam a floor tight against the drywall. They think it looks cleaner. Then summer hits, the humidity rises to sixty percent, and the wood expands. Because it has nowhere to go, it lifts off the subfloor. It creates a bridge. When you walk on that bridge, it feels like a trampoline. High spots act as pivot points. Imagine a seesaw. If you have a high spot in the middle of a long run of laminate, the planks on either side are constantly moving up and down as people walk over the peak. This mechanical stress is what kills floors. It is not the foot traffic. It is the deflection. You must treat the subfloor like the chassis of a car. If the frame is bent, the car will never drive straight. I spend more time with a floor scraper and a vacuum than I do with a mallet. That is the secret to a floor that lasts fifty years.
“A floor that moves is a floor that fails; eliminate the void to ensure the bond.” – TCNA Handbook Insight
The chemistry of subfloor adhesion
Adhesive bond strength is compromised by dust and debris on the subfloor after grinding high spots. Using a HEPA vacuum and a primer is essential for thin-set or glue-down hardwood applications. A clean substrate ensures the mechanical bond required for long term performance. When you grind down a high spot, you are creating a massive amount of silica dust. This dust is a bond breaker. If you pour a self-leveler or spread glue over a dusty floor, you are essentially gluing the floor to a layer of powder. It will peel off. I have seen entire floors delaminate because the installer was too lazy to use a vacuum. They just used a broom. A broom is not enough. You need to pull the dust out of the pores of the concrete. This is where the chemistry comes in. Primers are designed to penetrate those pores and create a bridge for the adhesive. If you skip the primer on a porous slab, the concrete will suck the moisture out of your thin-set too fast. The thin-set will not hydrate properly. It will become brittle and crack. This is why grout in showers often fails near the floor. The movement of the subfloor cracks the bond. It is a chain reaction of failure.
- Inspect the subfloor for any signs of moisture or efflorescence.
- Use the chalk hack to mark every high spot within the installation area.
- Grind high spots using a dust-shrouded angle grinder with a diamond cup wheel.
- Fill low spots with a high-compressive strength Portland cement underlayment.
- Vacuum the entire surface twice to remove all particulate matter.
- Apply a substrate primer if using self-leveling compounds or adhesives.
The 2,500 word truth about floor prep
Most homeowners want to talk about the species of the wood or the color of the laminate. They want to talk about the grout color in their new showers. I want to talk about the moisture vapor transmission rate. I want to talk about the Janka hardness scale and how it relates to subfloor compression. Solid 3/4 inch hardwood floors are less forgiving of subfloor dips than people think. While the wood is thick, the tongue and groove joint is only about a quarter inch thick. If the floor is bridging a dip, that joint is taking the full weight of everyone who walks on it. Eventually, the wood will squeak. That squeak is the sound of wood rubbing against wood. It is the sound of a failed installation. The chalk hack is the first line of defense against the squeak. It is the most honest tool in my bag. It does not have batteries. It does not need calibration. It just shows you where the floor is high. In my twenty five years of doing this, I have never regretted spending an extra day on prep. I have only ever regretted rushing it. A floor is a permanent part of the structure. It should be treated with the same respect as the foundation or the roof. If you are looking at a floor and it looks wavy, it is because someone skipped the chalk. They skipped the grinding. They chose the easy path. The easy path always leads to a callback. I hate callbacks. I want to do the job once and never see the inside of that house again. That is the mark of a professional. You do the work that no one sees so that the work everyone sees remains perfect.