
Most guys skip the leveling compound. They think the underlayment will hide the dip. It won’t. I spent three days grinding concrete on a job last month just so the floor wouldn’t click like a castanet. That job taught me that if the slab is out by even 3/16 of an inch over 10 feet, your locking system is eventually going to fail. I am a floor installer with a quarter century of sawdust under my nails, and I am here to tell you that a hallway is not just a walkway. It is a high-stress structural corridor. If you treat it like an afterthought, you are going to be ripping it up in two years. People obsess over the species of oak or the color of the vinyl, but they ignore the geometry of the installation. A hallway is the spine of the house. It carries the most traffic and experiences the most concentrated footfalls per square inch. When you lay planks in a narrow space, you are managing visual perception and mechanical integrity at the same time.
The long run toward the light
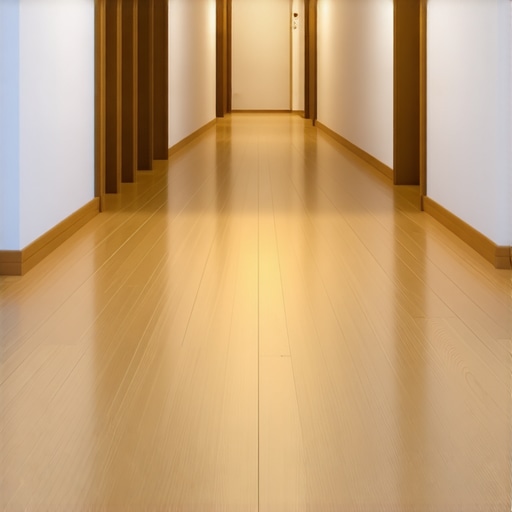
Laying floor planks parallel to the longest wall is the industry standard for narrow hallways because it reduces visual clutter. This orientation elongates the space. It minimizes the number of cuts required at the ends of the boards. Professional installers always prioritize this linear alignment for structural stability. When you walk into a hallway, your eyes naturally follow the lines of the floor. If those lines are running across the width, the hallway feels like a series of hurdles. It feels choppy. It feels small. But when you run them down the length, you create a sense of infinite progression. This is not just about looks. It is about the physics of the material. Most planks, especially solid hardwood, expand more across their width than their length. By running the length of the plank down the length of the hallway, you are placing the most stable dimension of the wood in the direction where there is the most distance to cover.
[image-placeholder]
The subfloor secret no one tells you
Subfloor preparation for narrow hallways requires a tolerance of no more than 1/8 inch deviation over a 10 foot radius to prevent joint failure. If the subfloor is not perfectly flat, the narrow confines of a hallway will amplify every imperfection. I have seen guys try to use double layers of underlayment to cushion a dip. That is a rookie mistake. Too much cushion causes the locking mechanisms on LVP or laminate to snap under pressure. You need a rigid, flat surface.
“A floor is only as good as the subfloor beneath it; deflection is the enemy of every joint.” – Master Flooring Axiom
This axiom is the law of the land. In a narrow hallway, you have walls on both sides acting as fixed boundaries. There is nowhere for the energy of a footfall to go except into the floor itself. If there is a void under that plank, the tongue and groove will rub, creating that annoying squeak or click. I use a 10 foot straight edge on every hallway job. If I see light under that bar, out comes the grinder or the self-leveling compound. We are talking about high-performance cementitious materials that can withstand 4,000 PSI. This is the foundation of your home’s traffic flow.
Performance data for hallway materials
Choosing the right flooring material for a corridor depends on the Janka hardness rating and the moisture resistance of the core. In a hallway, the concentration of traffic means the wear layer will be tested every single day. A 20 mil wear layer on LVP is the minimum for a busy home. If you are going with hardwood, you need something that can take a beating. | Material | Janka Rating | Acclimation Time | Max Run Length | | :— | :— | :— | :— | | Red Oak | 1290 | 7 to 10 Days | 30 Feet | | LVP (20 mil) | N/A | 48 Hours | 50 Feet | | Engineered Oak | 1360 | 3 to 5 Days | 40 Feet | | Laminate | 1100-1500 | 48 Hours | 30 Feet | This table shows why acclimation is not optional. If you take wood from a dry warehouse and put it in a humid house in Houston, it will grow. If you don’t leave room for that growth, it will buckle. I have seen $20,000 floors ruined because the installer was in a hurry and didn’t wait the seven days for the oak to reach equilibrium with the home’s atmosphere.
The 1/8 inch that ruins everything
Expansion gaps in hallway flooring must be maintained at a minimum of 1/4 inch at all vertical obstructions to allow for seasonal movement. This includes door frames, baseboards, and transitions. Many installers try to cut the planks tight to the wall to avoid using baseboards or shoe molding. This is a recipe for disaster.
“Wood is a hygroscopic material that gains or loses moisture until it is in equilibrium with the atmosphere.” – NWFA Technical Guidelines
When the humidity rises, those planks are going to expand. If they hit the wall, they have nowhere to go but up. This causes crowning or peaking at the joints. In a narrow hallway, this pressure is intensified because the planks are hemmed in on both sides. You need to undercut your door jambs so the floor can slide underneath them. Never, ever nail your baseboard through the flooring. The floor must be able to move independently of the walls. It is a floating system for a reason. Even for glue-down applications, that perimeter gap is your insurance policy against the changing seasons.
The chemistry of the bond
Adhesive selection for hallway floors involves understanding the shear strength and moisture vapor emission rates of the concrete slab. If you are gluing down engineered hardwood, you aren’t just using glue. You are using a moisture barrier in a bucket. These high-tech polymers are designed to create a flexible but unbreakable bond. They allow the wood to move slightly without breaking the seal. When I work in a basement or on a slab-on-grade house, I always perform a calcium chloride test. If that slab is off-gassing more than three pounds of moisture per 1,000 square feet, you cannot use standard adhesive. You need a specialized urethane-based glue with an integrated vapor retarder. These chemicals are the unsung heroes of the flooring world. They prevent the wood from absorbing moisture from below, which would lead to cupping. Cupping is when the edges of the board are higher than the center. In a hallway, a cupped floor is a trip hazard and a sign of professional negligence.
Essential checklist for hallway installation
A perfect hallway floor installation requires meticulous attention to detail from the initial subfloor check to the final transition piece. Follow these steps to ensure the floor survives the next few decades of use.
- Check subfloor moisture levels with a pin-meter for wood or a relative humidity probe for concrete.
- Verify that the subfloor is flat within 1/8 inch over 10 feet.
- Undercut all door jambs and casings to allow the floor to pass underneath.
- Acclimate the flooring material in the hallway for at least 48 to 72 hours.
- Plan the layout so the final row of planks is at least two inches wide.
- Leave a 1/4 inch expansion gap at all walls and vertical surfaces.
- Use a tapping block and a pull bar to avoid damaging the tongue and groove joints.
Following this list separates the professionals from the hacks. I have spent too many years fixing the mistakes of people who thought they could eyeball a level surface. Precision is the only way to ensure a floor doesn’t fail. If you ignore the checklist, the house will eventually win, and the floor will lose.
Light angles and the visual grain
Lighting conditions in narrow corridors dictate how the grain of the wood and the seams of the planks appear to the naked eye. If you have a window at the end of the hallway, you should almost always run the planks toward that light source. If you run them perpendicular to the light, every minor variation in height between planks will cast a tiny shadow. This makes the floor look uneven even if it is technically within tolerance. By running the planks with the light, you highlight the natural beauty of the grain and hide the joints. This is especially vital with darker woods or high-gloss finishes. The way photons bounce off the surface of a floor determines the emotional feel of the space. A well-lit hallway with long, continuous lines feels airy and clean. A poorly planned hallway feels cramped and busy. This is the intersection of engineering and art. You have to think like an architect and work like a mechanic.