
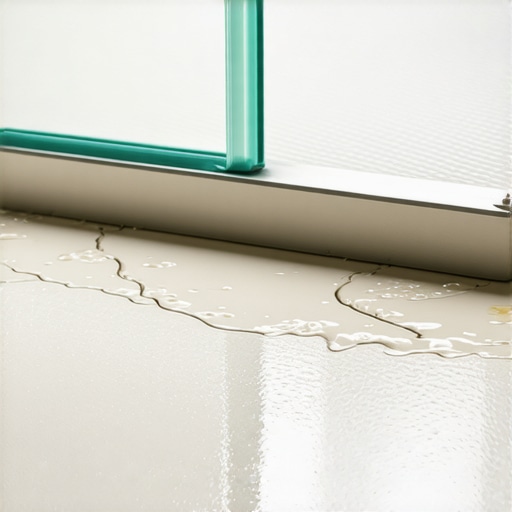
The subfloor secret that ruins luxury bathrooms
Most guys skip the leveling compound. They think the underlayment will hide the dip. It won’t. I spent three days grinding concrete on a job last month just so the floor wouldn’t click like a castanet. That same level of neglect is what leads to shower door leaks. When a shower door leaks at the bottom, it is not just a puddle on the tile. It is a slow-motion demolition of your home. Water finds the path of least resistance, traveling through grout lines and under the baseboards to reach the plywood or OSB subfloor. Once the moisture hits that wood, it begins to swell. I have seen fifteen thousand dollar wide-plank walnut floors cup like a potato chip because a three dollar plastic seal on a shower door was installed backwards. You have to treat the shower threshold as a structural barrier, not a suggestion. If the curb is not sloped correctly or the sweep is worn out, the capillary action of the water will pull moisture into the floor joists. This creates a breeding ground for mold and structural rot that costs more to fix than the entire bathroom remodel. [image_placeholder]
The ghost in the expansion gap
Stopping a shower leak requires understanding how water interacts with surface tension and gravity at the threshold. Most homeowners think a heavy door and a bit of glass are enough to keep the spray inside. They are wrong. The primary culprit is usually the polycarbonate sweep at the base of the door. Over time, these strips harden and crack. When they lose their flexibility, they no longer create a hydraulic seal against the curb. I always tell my clients that a floor is only as good as its driest day. If you have laminate or hardwood floors anywhere near that bathroom, a minor leak is a ticking time bomb. Laminate is basically pressed paper with a pretty picture on top. The moment water hits the tongue and groove, it expands and the edges peak. You cannot sand it down. You cannot fix it. You have to rip it out. Hardwood is even more sensitive to the vapor pressure changes caused by standing water. If your shower door is leaking, you are effectively humidifying the underside of your flooring from the ground up.
The 1/8 inch that ruins everything
The gap between the bottom of your glass and the top of the threshold must be precise to allow the sweep to function without binding. If the door is hung too low, the sweep drags and tears. If it is too high, the water bypasses the seal entirely. I look at this through the lens of structural engineering. We are managing fluid dynamics in a high-traffic zone. You must inspect the drip rail. This is the metal or plastic channel that sits on the inside of the door. Its job is to catch the water running down the glass and redirect it back into the pan. If that rail is clogged with soap scum or hard water deposits, the water overflows onto the floor. It is a simple mechanical failure that leads to catastrophic subfloor damage. Most people ignore the grout near the shower door too. They think grout is waterproof. It is not. Grout is porous. If you let water sit on the floor outside the shower, that water will soak through the grout, bypass the thin-set, and sit on the subfloor.
“A floor is only as good as the subfloor beneath it; deflection is the enemy of every joint.” – Master Flooring Axiom
The physics of the drip rail and seal mechanics
To fix the leak, you must first identify if the issue is the seal, the sweep, or the pitch of the curb. A shower curb should always have a slight inward slope. If the installer made the curb level or, heaven forbid, sloped it outward, no amount of silicone will save you. You are fighting gravity. In those cases, you need a high-profile dam strip. These are clear acrylic barriers that you adhere to the top of the curb to create a physical wall for the water. When I install these, I use 100% silicone, not the cheap siliconized acrylic stuff that turns yellow and peels in six months. You need a chemical bond that can handle constant immersion. The chemical makeup of the adhesive matters. True silicone remains flexible and resists the microbial growth that thrives in the damp environment of a leaky shower. If you use a cheap caulk, it will shrink as it cures, creating microscopic fissures that pull water in via capillary action. This is how you end up with rotted subfloors even when the seal looks fine to the naked eye.
Technical metrics for shower and floor protection
The following table breaks down the technical requirements for different flooring types near wet areas. Understanding these numbers is the difference between a floor that lasts thirty years and one that fails in three.| Material Type | Moisture Tolerance | Acclimation Time | Recommended Underlayment || :— | :— | :— | :— || Solid White Oak | Low | 7 to 14 days | 15lb Felt or Aquabar B || Engineered Wood | Medium | 3 to 5 days | High-density foam with vapor barrier || Waterproof LVP | High | 48 hours | Integrated IXPE pad || Porcelain Tile | Absolute | None | Uncoupling membrane (Schluter-Ditra) |
Why your subfloor is lying to you
Most installers will tell you that if the floor feels solid, it is fine. They are lying or they are lazy. You need to use a pin-less moisture meter to check the saturation levels around the shower. If the meter reads above 12% in a wood subfloor or 4% in a concrete slab, you have a problem that a new shower seal won’t fix. You have trapped moisture. I have seen guys install luxury vinyl plank over damp concrete thinking the “waterproof” label protects them. It doesn’t. The water gets trapped between the slab and the vinyl, turns into vapor, and creates enough pressure to pop the locking mechanisms. This is why I insist on a 6-mil poly film over concrete, regardless of what the box says. The chemistry of the bond between your floor and the subfloor is volatile. When you add a shower leak to the mix, you are creating a petri dish for structural failure.
“Moisture is the single greatest cause of flooring failure in residential construction; prevention is cheaper than remediation.” – TCNA Handbook Standards
The checklist for a dry bathroom floor
Follow these steps to ensure your shower door stops leaking and your flooring stays intact.
- Inspect the sweep for cracks or rigidity and replace it if it is more than three years old.
- Check the pitch of the shower curb using a small level to ensure it slopes toward the drain.
- Clean the glass and the threshold with denatured alcohol before applying any new seals or dam strips.
- Verify that the drip rail is angled at a 45-degree slope toward the interior of the shower pan.
- Re-grout any areas outside the shower door using a high-performance epoxy grout that is truly non-porous.
- Ensure the expansion gap at the edge of your bathroom floor is filled with a color-matched 100% silicone caulk to prevent water from reaching the subfloor.
The chemistry of the threshold and proper sealing
When you are applying silicone to the shower door frame or the curb, the environment must be bone dry. I tell people to stop using their shower for forty-eight hours before the repair. If there is even a hint of moisture in the track, the silicone will not bite. It will look sealed, but a thin film of water will eventually work its way behind the bead. This is a common point of failure. The water travels behind the metal track of the shower door and exits through the screw holes into the wall cavity. From there, it drops down to the bottom plate of the wall and onto the subfloor. You won’t see this leak for months, but you will smell it. It smells like old gym socks and wet dirt. That is the smell of your floor joists rotting. If you have a crawlspace, go down there with a flashlight. Look for dark spots under the bathroom. If you see them, your shower door leak has already become a structural issue. Don’t be the person who ignores the 1/8 inch gap that ruins everything. Be the person who understands the physics of the floor.