
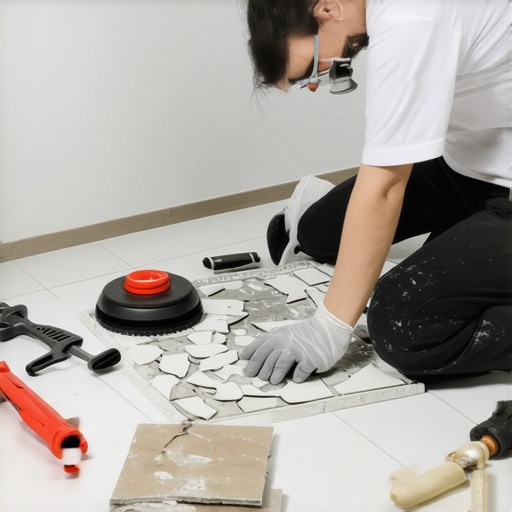
Most guys skip the leveling compound. They think the underlayment will hide the dip. It won’t. I spent three days grinding concrete on a job last month just so the floor wouldn’t click like a castanet. That is the reality of the trade. If the substrate is not dead flat, the finish material is doomed. When a single tile cracks, it is rarely the fault of the ceramic itself. It is usually a void in the thin-set or a high point in the slab that created a pressure vessel. Replacing that one unit without ruining the surrounding floor requires a surgical approach. Forget the hammer and the pry bar for the initial lift. You need to understand the physics of the bond. If the tile is loose but trapped by grout, the suction cup is your best friend. If it is shattered, you have a different fight on your hands. I have seen guys ruin entire bathrooms because they tried to manhandle a single piece of porcelain. You have to be smarter than the stone.
The physics of the vertical lift
A vacuum suction cup creates a pressure differential that allows for a perfectly vertical extraction of a debonded tile. This method prevents the lateral force that typically chips the edges of adjacent healthy tiles. When you use a pry bar, you create a fulcrum. That fulcrum puts hundreds of pounds of pressure on the edge of the next tile. That is how a one-tile repair turns into a ten-tile disaster. A double-cup suction lifter, rated for at least one hundred pounds, provides the grip needed to pull a tile straight up once the grout joints are cleared. This is only possible if the thin-set bond has failed, which is the case in eighty percent of single-tile cracks. If the bond is still intact, you must first break the tension of the adhesive. Ceramic is strong under compression but weak under tension. The suction cup exploits this. By pulling upward, you are fighting the weakest point of the failed adhesive bond rather than the strongest point of the ceramic structure itself.
“A floor is only as good as the subfloor beneath it; deflection is the enemy of every joint.” – Master Flooring Axiom
The grout joint extraction phase
Removing the surrounding grout is the first requirement before any suction lift is attempted. If you do not clear the grout, the suction cup will just pull against the entire floor grid. I use a multi-tool with a diamond grit blade. You have to run that blade at a medium speed. If you go too fast, you generate heat that can melt the spacers left behind by the last guy or even scorch the edge of the good tiles. You need to see the subfloor or the membrane in that gap. Only when the tile is an island can the suction cup do its job. Grout is essentially a bridge. It transfers movement and stress. In showers, this is even more dangerous. If you nick the waterproof membrane while cleaning the joint, you just bought yourself a leaked ceiling in the room below. You have to stay steady. Smelling that dry, dusty scent of ground cement is part of the process. If you see white dust, you are hitting the thin-set. If you see grey or red, you might be hitting the liner. Stop immediately if you hit the liner.
The mechanical advantage of triple-cup lifters
High-quality vacuum lifters use a hand-pump mechanism to evacuate air and create a secure mechanical bond with the tile surface. Do not use the cheap plastic ones from the bargain bin. Those lose suction the second you apply real force. You want a metal-bodied lifter with a rubber pad that is clean of any grit. Even a single grain of sand on the suction pad will break the vacuum and cause the tool to slip. If the tile is textured, you might struggle to get a seal. In those cases, a thin layer of petroleum jelly on the rim of the cup can help, but you must be careful not to stain the grout later. The goal is to pull until you hear that satisfying pop of the thin-set letting go. It sounds like a gunshot in a quiet room. That sound is the air finally reaching the void under the tile. Once that seal is broken, the tile will lift out like a tooth. You are left with a clean pocket. Well, a relatively clean pocket. You still have the old thin-set to deal with.
| Material Type | Janka Hardness or Density | Moisture Sensitivity | Repair Difficulty |
|---|---|---|---|
| Ceramic Tile | High Compression | Low | Moderate |
| Porcelain Tile | Very High | Near Zero | High |
| Solid White Oak | 1360 lbf | High | Moderate |
| Laminate Floor | Varies | Extreme | Very High |
The subfloor secret regarding thin-set removal
Old adhesive must be ground down to the original substrate to ensure the new tile sits flush with the existing floor. This is where most people fail. They try to butter the new tile and stick it on top of the old ridges. That makes the new tile sit high. A high tile is a trip hazard and a prime candidate for cracking. I use a small carbide scraper or a cold chisel. You have to be gentle. You are not trying to penetrate the concrete. You are just trying to shave it flat. If you are working over a wood subfloor with a cement board overlay, you have to be even more careful. Do not pull up the mesh tape. If you ruin the integrity of the cement board, the new tile will never stay. It will just bounce until the grout turns to powder. I have spent hours with a vacuum hose in one hand and a scraper in the other just to get a four-inch square perfectly flat. It is tedious. It is dusty. It is the only way to do it right.
The chemistry of the new bond
Modified thin-set with polymer additives provides the flexibility needed to prevent future cracks in the same location. When you replace a single tile, you are dealing with a localized stress point. Standard dry-set mortar might not be enough. A high-polymer modified mortar grabs the substrate and the tile with a chemical bond that is far superior to a simple mechanical grip. You also need to consider the back-buttering technique. For a repair, you do not just put mortar on the floor. You apply a thin layer to the back of the tile itself. This ensures one hundred percent coverage. Voids are where cracks start. If you drop a heavy pot on a tile with a void under it, the tile shatters. If that same tile is fully embedded in a solid bed of mortar, the energy transfers through the tile into the slab. The tile survives. The slab doesn’t care. That is the difference between a floor that lasts five years and one that lasts fifty.
- Inspect the substrate for any hairline cracks that caused the initial failure.
- Clean the edges of adjacent tiles with a nylon brush to remove all dust.
- Dry-fit the new tile to ensure it sits 1/16 inch below the surrounding floor.
- Apply modified thin-set using the correct notch trowel size.
- Set the tile and use a level to bridge across the surrounding units.
- Wait a full twenty-four hours before applying any grout.
The ghost in the expansion gap
Floors need room to breathe and move or they will eventually destroy themselves through internal pressure. This is true for hardwood floors and laminate, but it is also true for tile. Most people think grout is flexible. It is not. It is rigid. If a room is too large and has no expansion joints, the tile will tent. That means it lifts off the floor in a triangular shape. Using the suction cup trick won’t help you there because the whole floor is under tension. You have to look at the perimeter. Is there a gap under the baseboards? If the tile is jammed tight against the drywall or the studs, the floor has nowhere to go when the house settles or the temperature changes. I always leave a quarter-inch gap at the walls. You cover it with the baseboard or shoe molding anyway. It is an invisible insurance policy. Hardwood is even worse. Oak can expand enough to push a wall out of alignment if you don’t give it space. People want that tight look, but the physics of wood cell expansion don’t care about your aesthetics.
“Adhesion is a matter of surface area; if you have air pockets, you have a failed installation waiting to happen.” – TCNA Handbook Reference
The shower moisture hurdle
Replacing a tile in a shower requires an absolute commitment to maintaining the integrity of the water barrier. Showers are not waterproof because of the tile. They are waterproof because of what is under the tile. If you use the suction cup and pull up a piece of the Kerdi or RedGard membrane, you have a major problem. You cannot just slap a new tile over a hole in the liner. You have to patch the membrane using the manufacturer’s specific sealant. I have seen guys ignore this and three months later the homeowner has mold growing in the kitchen downstairs. Moisture is a patient enemy. It will find a pinhole and exploit it every single day. When you are cleaning out that old thin-set in a shower, you use a plastic scraper if possible. Avoid sharp metal near the floor pan. It is better to spend an hour longer on the prep than a week longer on a mold remediation job. Water belongs in the drain, not in the joists.
The hardwood and laminate comparison
Unlike tile, you cannot simply suction a single plank of laminate or hardwood out of the center of a room. These materials use a tongue and groove system. They are mechanically locked together. To replace a single plank of hardwood, you have to cut the center out with a circular saw set to the exact depth of the wood. Then you chisel out the remaining bits. For the new plank, you have to cut off the bottom of the groove so it can drop into place. Then you glue it. It is a different kind of surgery. Laminate is even harder because it is a floating system. If you have a bad plank in the middle, the official way is to take up the floor from the nearest wall until you reach the damage. It is a nightmare. This is why I tell people to buy an extra three boxes of tile or wood when they do a job. Batch colors change. You will never find a match five years later. That extra hundred dollars now saves you five thousand later. Trust me on that one.
The final grout match
Matching old grout is an art form that requires testing multiple samples against the dried original. Grout changes color as it ages. It gets hit by UV rays. It absorbs dirt. It reacts to cleaning chemicals. Even if you have the original bag, the new mix will look different. I usually mix a small amount and let it dry on a piece of cardboard first. Wet grout looks darker than dry grout. You have to wait. If the match is off, you can use a grout stain or