
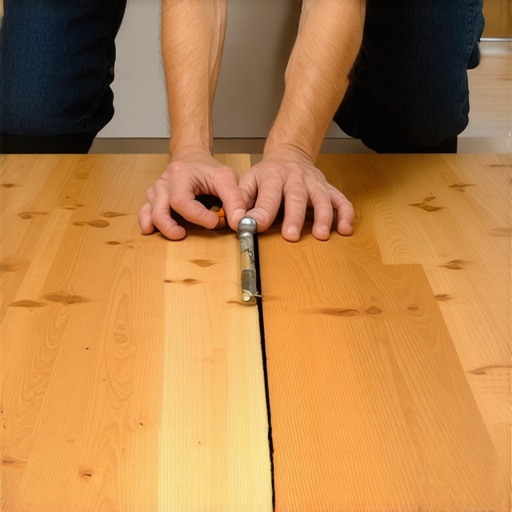
I once walked into a house where a $15,000 wide-plank walnut floor was cupping so bad it looked like a potato chip because the installer didn’t check the crawlspace humidity. The gaps in the center of the room were wide enough to drop a nickel through. This was not a minor aesthetic issue. It was a structural failure caused by a lack of respect for the hygroscopic nature of wood. When you see a large gap in the middle of your hardwood floors, you are looking at the physics of contraction in real time. It is a sign that the environment has won over the installation. Most homeowners want a quick fix involving a tube of caulk, but that is how you ruin a floor. You have to understand the cellular behavior of the oak or maple under your feet before you can fix it properly. I have spent twenty five years fixing these messes, and it always comes down to two things: moisture control and mechanical restoration. If you do not address the subfloor moisture or the ambient humidity, the gap will return every winter like a ghost. Wood is alive. It breathes. It moves. If you do not give it the room to move or the environment to stay stable, it will tear itself apart at the seams.
[image_placeholder_1]
The mechanics of seasonal wood movement
Hardwood floor gaps appear when the moisture content of the wood drops significantly below its installation level, causing the tracheids and vessels to shrink. This volumetric change is most pronounced across the grain rather than along the length of the board. When the relative humidity in a home falls below thirty percent, the wood releases bound water from its cell walls. This causes the individual planks to narrow. If the floor was not properly acclimated or if the fasteners are failing, these small individual movements accumulate into one massive gap in the center of the room. This is often referred to as a structural separation. It differs from the small, uniform gaps you see between every board during a dry winter. A large gap in one specific area suggests that the floor is anchored elsewhere, perhaps by heavy cabinetry or a lack of expansion space at the perimeter, forcing all the movement to manifest in a single weak joint. You cannot simply fill this with grout or putty because the next time the humidity rises, the wood will expand and crush the filler, or worse, cause the boards to buckle and peak.
Diagnosing the source of separation
Before attempting a repair, you must use a pin-type moisture meter to measure the moisture content of the planks and the subfloor beneath them. Professional standards from the National Wood Flooring Association require that the moisture difference between the hardwood and the subfloor be no more than four percent for strip flooring and two percent for wide-plank flooring. If you find that your floor is currently at six percent moisture content but the gap only appeared recently, the wood is likely over-dried. You should first attempt to stabilize the home environment using a whole-house humidifier. If the gap does not close after three weeks of consistent forty five percent humidity, the boards have likely taken a set or the fasteners have been pulled from the subfloor. In cases where the gap is localized, check the basement or crawlspace directly underneath. A localized heat source, like an uninsulated HVAC duct running close to the subfloor, can bake the moisture out of the wood in one specific spot, creating a cavernous opening in an otherwise perfect floor.
“A floor is only as good as the subfloor beneath it, deflection is the enemy of every joint.” – Master Flooring Axiom
The specialized tool kit for floor restoration
Repairing a wide gap requires mechanical force and specialized adhesives rather than cosmetic fillers that lack structural integrity. You will need a professional-grade floor jack or a set of heavy-duty ratchet straps designed for flooring installation. These tools allow you to apply hundreds of pounds of lateral pressure to the planks without damaging the finish. You will also need a high-quality PVA (polyvinyl acetate) wood glue that offers a long open time and a strong tensile bond. Unlike the thin liquids used in elementary schools, industrial wood glues are formulated to penetrate the wood fibers and create a bond that is stronger than the wood itself. If the gap is too large to be pulled closed, you will need to manufacture a sliver or a dutchman from the same species of wood, ensuring the grain pattern and the Janka hardness match the existing floor. Never use laminate repair kits or tile grout for these repairs as they lack the elasticity required for natural wood movement.
| Tool Name | Technical Function | Necessity Level |
|---|---|---|
| Moisture Meter | Measures MC percentage in wood cells | Mandatory |
| Floor Jack | Applies lateral PSI to close gaps | High |
| PVA Wood Glue | Creates chemical bond between boards | Mandatory |
| Rubber Mallet | Distributes force without marring finish | High |
| T-Square | Ensures board alignment during pull | Medium |
The ratchet strap method for mechanical closure
To close a gap mechanically, you must anchor one end of a floor strap to a stable point and use the ratcheting mechanism to pull the separated boards back together. This process requires patience and precision. You cannot simply crank the handle and hope for the best. You must slowly increase the tension, allowing the wood and the fasteners to adjust to the new position. If the floor is nailed down, this may require removing the baseboards at the perimeter to free the boards so they can slide. In many cases, I have to use a block of wood screwed into the subfloor as a temporary anchor point. Once the gap is closed, you apply glue into the tongue and groove joint and hold it under tension until the adhesive cures. This method is only successful if the underlying cause of the movement has been addressed, otherwise, the tension will eventually snap the glue bond or pull the nails out again.
- Assess the gap width and check for debris or old filler inside the joint.
- Vacuum the gap thoroughly to ensure no grit prevents a tight closure.
- Place the floor straps every three feet along the length of the gap.
- Apply a thin, consistent bead of PVA glue to the top of the tongue.
- Gradually tighten the straps until the gap is completely closed.
- Clean any glue squeeze-out immediately with a damp, lint-free cloth.
- Keep the floor under tension for at least twenty four hours.
The chemistry of custom wood slivers
If a gap is permanent and cannot be pulled closed, the only professional solution is to install a custom-tapered wood sliver into the void. This is where the artistry of the trade meets the chemistry of wood. You must take a donor board from the same batch of flooring or a matching species and rip it into thin strips. These strips should be slightly wider than the gap and tapered like a wedge. This allows the sliver to be tapped into the gap for a friction fit. The side of the sliver should be coated in wood glue. Once the glue has dried, you carefully plane or chisel the sliver flush with the floor surface. Because wood expands and contracts, the sliver will move with the rest of the floor. This is a far superior method to using wood putty, which is essentially just sawdust and resin. Putty has no structural strength and will crumble into dust within two seasons of heating and cooling. A wood sliver, when done correctly, is nearly invisible and maintains the integrity of the surface.
“Wood flooring is a hygroscopic material that gains or loses moisture to reach equilibrium with its environment.” – NWFA Technical Standards
Why grout and rigid fillers fail in wood
Using grout or epoxy in a hardwood floor gap is a catastrophic mistake because these materials are non-compressible and do not expand with the wood. Hardwood is a dynamic material. In the summer, when humidity is high, the wood cells swell. If the gap between the boards is filled with a rigid substance like grout, the expanding wood has nowhere to go. This creates immense internal pressure. This pressure will either cause the boards to pull away from the subfloor, leading to a squeaky floor, or it will cause the edges of the boards to crush, a condition known as compression set. Once the wood cells are crushed, they never regain their original shape. The next winter, when the wood shrinks again, the gap will be even wider than it was before. This is a common issue I see when homeowners try to treat their floors like the tile in their showers. The materials have completely different physical properties and must be handled with appropriate techniques.
The role of underlayment and subfloor prep
Many large gaps are actually caused by subfloor irregularities that prevent the tongue and groove from seating properly. If there is a dip in the subfloor, the planks will deflect when you walk on them. This vertical movement puts shear stress on the tongue, eventually breaking it or causing the boards to slide apart. While most people want the thickest underlayment, too much cushion actually causes the locking mechanisms on laminate or LVP to snap under pressure, and it can cause similar issues in floating hardwood systems. A flat subfloor, within one eighth of an inch over a ten foot radius, is the only way to ensure a floor stays together. If your subfloor is uneven, you must use a self-leveling compound or grind down high spots before the floor is installed. If the floor is already down and a gap has appeared due to a dip, the only real fix is to inject a low-expansion structural foam under the boards to provide support, though this is a surgical procedure that requires extreme care.
The importance of environmental stabilization
To prevent future gaps, you must maintain a consistent indoor environment with relative humidity between thirty five and fifty percent year-round. This is the golden rule of hardwood flooring. In regions with harsh winters, a furnace will drop the humidity inside a home to single digits, which is like putting your floor in an oven. Conversely, a humid summer can cause the boards to swell and rub together. Using a hygrometer to monitor your home environment is just as important as cleaning the floors. If you can keep the humidity stable, the wood will stay stable. This is especially true for modern engineered floors, which are more stable than solid wood but can still delaminate if exposed to extreme dry cycles. Professional installers should always leave a three quarter inch expansion gap around the entire perimeter of the room, hidden by baseboards, to allow the entire floor to move as a single unit without buckling or gapping in the center.