
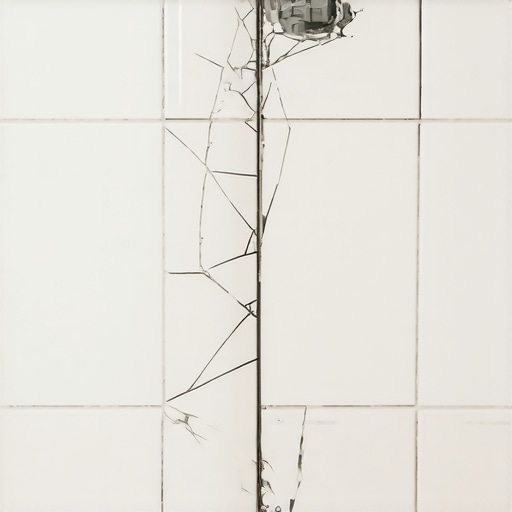
Most guys skip the leveling compound. They think the underlayment will hide the dip. It won’t. I spent three days grinding concrete on a job last month just so the floor wouldn’t click like a castanet. I have seen the same mistake repeated for twenty-five years. A homeowner sees a hairline fracture in their shower grout and buys a five-dollar tube of caulk or a small bag of patch material. Two months later, the crack is back. This is because grout is not a glue. It is a rigid, cementitious filler that exists in a state of compression. If the structure beneath it moves even a fraction of a millimeter, the grout must break. It has no choice. I have walked into multi-million dollar homes where the master shower looked like a spiderweb because the builder used 2×10 joists spaced too far apart. You cannot fix a structural failure with a cosmetic patch. You are fighting the laws of physics, and physics always wins in the end.
The structural lie beneath your feet
Your shower grout is cracking because the assembly is experiencing excessive deflection or moisture-related movement. Grout is a rigid material with zero tensile strength, meaning any flex in the subfloor or wall studs will cause it to fracture immediately. Patching only covers the symptom without addressing the underlying lack of structural rigidity. When you step into a shower, your body weight applies a concentrated load. If the subfloor is not stiff enough, it bows. This bowing pulls the tiles apart. Since the tiles are stronger than the grout, the grout is the first thing to yield. This is why the TCNA Handbook is so obsessed with deflection ratings. If you do not have a stiff enough subfloor, you do not have a shower. You have a ticking time bomb of water damage and mold.
Why your subfloor is lying to you
A subfloor might feel solid when you walk on it, but your feet are not a precision instrument. A subfloor needs to meet the L/360 standard for ceramic tile and L/720 for natural stone. This means the floor should not deflect more than the span of the joists divided by 360 or 720. If your joists are sixteen inches on center and you have a single layer of 5/8 inch plywood, you are already in trouble. The movement is microscopic, but for a cementitious bond, it is an earthquake. In the humid environment of a place like Savannah or Charleston, the wood fibers in your subfloor absorb ambient moisture from the crawlspace. This causes the wood to expand and contract. This cycle of swelling and shrinking is called hygroexpansion. As the wood moves, it stresses the bond between the thin-set and the tile. Eventually, the bond breaks or the grout cracks. This is the structural reality of flooring. You must control the moisture or the moisture will control your wallet.
“A floor is only as good as the subfloor beneath it; deflection is the enemy of every joint.” – Master Flooring Axiom
The molecular failure of the bond
The chemistry of your mortar is just as important as the stiffness of your wood. Many installers use cheap, unmodified thin-set in areas where they should be using high-polymer modified mortars. Polymer-modified mortars contain latex or acrylic additives that allow for a tiny amount of flexibility. Think of it like the difference between a glass rod and a plastic ruler. When the house settles, the glass rod snaps, but the plastic ruler bends. If your installer used a bargain-bin mortar, the bond between the tile and the substrate is brittle. Once that bond is compromised, the tile starts to ‘micro-move.’ You might not see the tile moving, but you will see the grout turning into powder. This is often exacerbated by improper mixing. If you add too much water to your grout during the mixing phase to make it easier to spread, you are effectively hollowing out the molecular structure of the cement. As the water evaporates, it leaves behind microscopic voids. This makes the grout soft and porous, leading to early failure and staining.
The ghost in the expansion gap
Every vertical and horizontal transition in a shower must be treated as a movement joint. If your installer put grout in the corners where two walls meet, or where the wall meets the floor, they failed. These are ‘change of plane’ joints. Every house breathes. The walls move independently of the floor. If you fill that gap with rigid grout, it will crack within months. This is non-negotiable. You must use a 100 percent silicone sealant in these areas. Silicone is an elastomer, meaning it can stretch and return to its original shape. Many people make the mistake of using ‘caulk’ that is water-based. This will shrink and pull away from the tile. You need a high-modulus silicone that meets ASTM C920 standards. This ensures that as the house shifts, the joint stays sealed. Without this expansion gap, the pressure from the moving walls is transferred directly into the field of tile, which causes cracks in the middle of the floor where you least expect them.
| Grout Type | Flexibility Rating | Moisture Resistance | Best Use Case |
|---|---|---|---|
| Sanded Grout | Very Low | Moderate | Large joints over 1/8 inch |
| Unsanded Grout | Very Low | Low | Narrow joints in walls |
| High-Performance Cement | Moderate | High | High-traffic residential |
| Epoxy Grout | High | Waterproof | Steam showers and commercial |
The 1/8 inch that ruins everything
Precision is not about aesthetics; it is about engineering. When I talk about a 1/8 inch dip in a subfloor, I am talking about a void that creates a trampoline effect. When a tile spans a void in the thin-set, it is unsupported. Every time you step on that tile, you are applying pressure to an arch. Eventually, the thin-set beneath the surrounding tiles will fatigue. I have seen guys try to ‘spot bond’ tile, which is the practice of putting a dollop of mortar in the center and four corners. This is a crime in the flooring world. You need 95 percent coverage in wet areas. Without that coverage, water gets trapped in the voids behind the tile. This leads to something called efflorescence, where minerals in the concrete are carried to the surface by moisture, leaving a white, crusty residue on your grout. This is a sign that your shower is holding water like a sponge. If your grout is cracking and you see white crystals, your problem is much deeper than a surface crack. Your entire waterproofing envelope may be compromised.
The difference between a patch and a fix
Patching a crack in grout is like putting a band-aid on a broken leg. If you do not address the movement, the crack will return. To truly fix the issue, you must first determine if the tile is loose. Tap on the tiles around the crack with a screwdriver handle. If you hear a hollow ‘thwack’ instead of a solid ‘click,’ the tile has debonded. At that point, the only solution is to remove the tile, clean out the old mortar, and reinstall it with a high-quality, polymer-modified thin-set. If the tile is solid, you should use a oscillating tool to remove the grout to at least half the depth of the tile. Do not just smear new grout over the old. The new grout needs a mechanical bond to the sides of the tile. If you are in a region with high seismic activity or extreme temperature swings like the Pacific Northwest, you should consider replacing cement grout with a pre-mixed urethane or epoxy grout. These materials are far more resilient to the structural gymnastics of a moving house.
“Deflection at the joist level is the silent killer of the ceramic installation; once the substrate bows, the finish material is destined to fail.” – TCNA Engineering Guide
Checklist for a structural shower restoration
- Verify subfloor thickness and joist spacing to ensure L/360 compliance.
- Perform a ‘hollow tap’ test on all tiles adjacent to the cracks.
- Remove all grout from change-of-plane joints (corners and floors).
- Check for moisture behind the tile using a non-invasive moisture meter.
- Clean grout joints thoroughly to remove soap scum and body oils before re-grouting.
- Apply a high-quality 100 percent silicone to all transition joints.
- Use a pH-neutral cleaner to maintain the integrity of the new cementitious bond.
Climate and the swelling of the envelope
In the swampy heat of Florida or the Gulf Coast, the humidity is a constant adversary. If your shower is built on an exterior wall, the temperature differential between the air-conditioned interior and the sweltering exterior creates a vapor drive. Moisture is literally pushed through the wall studs toward the cooler interior. If your installer did not use a proper vapor barrier or a topical waterproofing membrane like Kerdi or Wedi, the moisture will collect behind the tile. This saturates the thin-set and the backer board. Wood studs will swell, pushing against the tile assembly. This is why you see grout cracking more often in the summer months. In these climates, a traditional ‘mud bed’ or ‘cement board’ shower is often not enough. You need a sealed system that prevents moisture from ever reaching the structural members of the home. If the wood cannot stay dry, the grout cannot stay intact. This is the fundamental law of the built environment. You must protect the structure from the water, and the grout is merely the first line of defense, not the last. Stop looking at your grout as a decorative choice and start seeing it as a structural indicator. A crack is a signal that your house is moving in ways it should not. Listen to it. Fix the structure, and the grout will take care of itself. Final structural verification of any repair is mandatory to ensure the longevity of the installation. Invest in the substrate now or pay for a full tear-out later.