
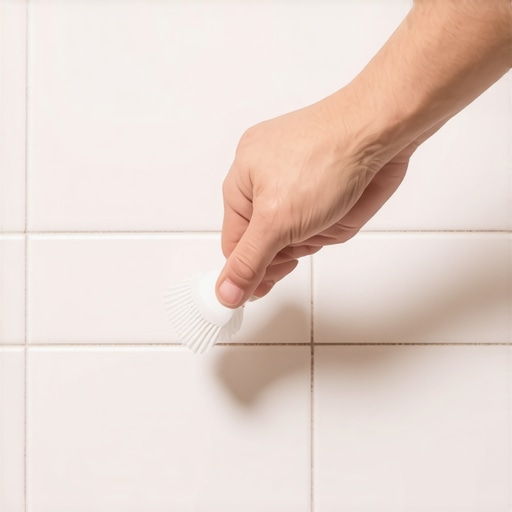
The Toothbrush Technique for Deep Cleaning Grime from Shower Corner Grout
I spent three days grinding concrete on a job last month just so the floor wouldn’t click like a castanet. Most guys skip the leveling compound because they think the underlayment will hide the dip. It won’t. I bring this up because people treat their shower grout with the same level of lazy optimism. I once walked into a luxury bathroom where the homeowners had spent twenty thousand dollars on marble, yet the corners were weeping a black, oily sludge. They thought they could just spray some ‘daily cleaner’ and call it a day. I had to pull three tiles to show them the rotting OSB behind the wall. That grime isn’t just a smudge. It is a biological colony that is actively eating your wall system. When you ignore the corners, you are inviting moisture to bypass your waterproofing and rot your floor joists from the top down. I have seen hardwood floors three rooms away buckle because a shower corner was neglected for five years.
The physics of corner grout failure
Shower corner grout fails because it is the primary point of structural convergence and thermal expansion in a bathroom. While the field tiles remain relatively static, the change in plane at the corner subjects the grout to constant shear stress. Cementitious grout is naturally porous and lacks the elasticity to handle this movement without micro-cracking. These cracks then act as capillary channels for soap scum and mineral deposits. Using a toothbrush allows for the focused application of mechanical friction to these specific failure points. You are not just cleaning a surface. You are purging a porous matrix. Most people do not realize that grout is essentially a hard sponge. If you do not clean it correctly, you are simply pushing the dirt deeper into the Portland cement structure.
“A floor is only as good as the subfloor beneath it; deflection is the enemy of every joint.” – Master Flooring Axiom
The chemical reality of shower grime is a mixture of fatty acids from soaps, human skin cells, and calcium carbonate from hard water. This creates a biofilm that is resistant to simple rinsing. You need to understand the pH scale before you grab a bottle. Acidic cleaners will dissolve the calcium in your grout and make it more porous, which is a disaster for long term durability. I always tell my clients to stick to alkaline or oxygenated cleaners. You want to lift the stain without eating the binder that holds your tiles on the wall. If you use a heavy brush, you will scratch the glaze on your ceramic or the polish on your stone. The soft nylon of a toothbrush is the perfect tool because it contours to the irregular valley of the grout line without causing abrasive damage to the tile edges.
The surgical application of mechanical friction
Applying mechanical friction with a toothbrush is the only way to reach the bottom of the grout valley. Unlike a flat sponge or a wide scrub brush, a toothbrush concentrates your hand pressure into a half inch area. This concentration of force is necessary to break the surface tension of the biofilm. You should use a circular motion rather than a back and forth sawing motion. Circular motions ensure that the bristles enter the pores of the grout from every possible angle. This is the same logic we use when we are buffing out a site finished white oak floor. You have to work the product into the grain, not just over the top of it. If you saw back and forth, you are just moving the grime from one side of the crack to the other.
| Cleaning Agent Type | PH Level | Grout Safety Rating | Biofilm Penetration |
|---|---|---|---|
| White Vinegar | 2.5 | Low (Corrosive) | Moderate |
| Baking Soda Paste | 8.0 | High (Safe) | High |
| Oxygen Bleach | 10.5 | High (Safe) | Excellent |
| Chlorine Bleach | 12.5 | Medium (Drying) | High |
The moisture content of the room must be managed. I see people trying to clean grout while the shower is still damp. That is a waste of time. You want the grout to be dry so that the cleaning solution can be absorbed into the pores by capillary action. If the pores are already full of water, your cleaner just sits on the surface. It is the same reason we check the moisture content of a subfloor before we lay down hardwood. If the wood is at 12 percent and the air is at 6 percent, that floor is going to move. If your grout is saturated with old shower water, your cleaning agent cannot do its job. Let the shower dry for at least twelve hours before you start the deep clean process. This allows the biofilm to become brittle, making it easier to fracture with the toothbrush bristles.
The zero threshold transition for moisture
The corner of a shower is a zero threshold transition where water gravity and surface tension work against you. Water does not just fall down a wall. It clings to the surface and pools in the corners due to the lack of perfect verticality in most builder grade framing. When you are scrubbing, you are essentially performing a structural audit. If the toothbrush bristles suddenly sink or feel soft, you have a void in your grout. This is a red flag. A void means the water is no longer just sitting on the surface. It is entering the wall cavity. I have seen laminate floors in adjacent hallways swell up because a corner void was feeding water into the subfloor for months. You must fill those voids with a color matched 100 percent silicone caulk after cleaning. Never put more grout into a cracked corner. It will just crack again because of the movement I mentioned earlier.
“Proper maintenance of grout joints is the first line of defense against sub-assembly moisture intrusion.” – TCNA Technical Bulletin
- Remove all shampoo bottles and accessories to expose the full corner.
- Apply a thick paste of baking soda and water or an oxygenated cleaner.
- Let the solution dwell for at least twenty minutes to break the chemical bonds.
- Use a soft-bristled toothbrush at a 45-degree angle to the wall.
- Scrub in small, concentric circles starting from the top and moving down.
- Rinse with lukewarm water to avoid thermal shock to the tile.
- Dry the area immediately with a microfiber cloth to prevent mineral spotting.
- Inspect the grout for any signs of crumbling or pinholes.
A contrarian data point that most people ignore is the thickness of the cleaning paste. People want a liquid because it is easier to spray. Liquid is the enemy of a deep clean. You want a heavy paste because it stays in place and provides a sustained chemical reaction. If the cleaner runs down the wall, it is not doing anything. It needs to sit on that corner and eat the grime. The toothbrush is the tool that massages that paste into the texture of the grout. If you are not sweating a little bit, you are not doing it right. It takes physical effort to reverse years of neglect. Do not trust ‘no-scrub’ labels. They are marketing lies designed for people who do not care if their house stays standing for fifty years. Real maintenance requires a brush and a pair of knees on the floor.
The ghost in the expansion gap
The expansion gap is the invisible space where your house breathes and where grout most frequently fails. Houses are living things that expand and contract with the seasons. If your shower was built by a hack, they grouted the corners solid instead of using a flexible sealant. This creates a rigid joint that is doomed to fail. When you clean these areas with a toothbrush, you are often removing the only thing holding the dirt in place. This is good. You want that dirt out so you can see the reality of your bathroom. If the grout comes out in chunks while you are scrubbing, do not panic. It was already failed. The toothbrush just revealed the truth. It is better to know your shower is leaking now than to find out when your kitchen ceiling collapses.
Why your subfloor is lying to you
Your subfloor is lying to you because it can hold a massive amount of water before showing visible signs of rot. People think that if the tile is tight, the floor is dry. That is a fantasy. Water is a molecular ninja. It will find a path through a grout line as thin as a human hair. By using the toothbrush technique, you are ensuring that the corners are sealed and clean, which prevents this slow-motion disaster. I have spent my career fixing the mistakes of people who thought maintenance was optional. A clean shower is a dry shower. A dry shower is a house that keeps its value. Do not let a five dollar toothbrush be the reason you need a thirty thousand dollar renovation. Take the time to scrub the corners. Your joists will thank you in twenty years.