
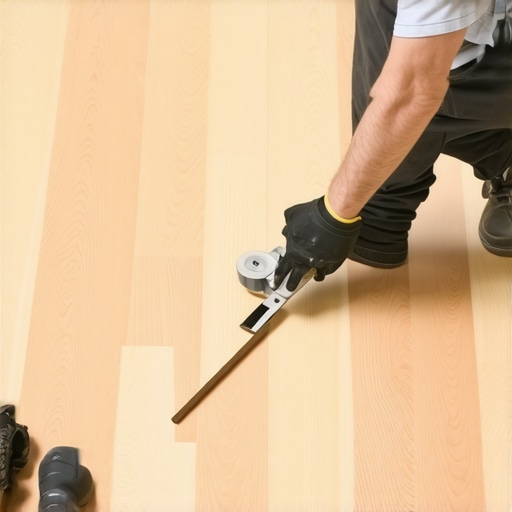
The painter’s tape technique prevents hardwood splintering by providing lateral surface tension to the wood fibers as the saw blade exits the cut. This method secures the grain and prevents the carbide teeth from lifting the veneer or solid oak edges during high-speed rotation. Most installers ignore the physics of the exit wound left by a miter saw. They just pull the trigger and hope for the best. I have spent twenty five years watching guys ruin expensive wide-plank flooring because they would not take thirty seconds to apply a strip of adhesive reinforcement. You can have the sharpest blade in the world but without surface stabilization, the upward or downward force of the tooth will eventually find a weak point in the lignin. This results in a jagged, white-edged scar that no wood filler can truly hide.
The walnut floor that looked like a potato chip
Experience is the only teacher that doesn’t let you skip the test. I once walked into a house where a $15,000 wide-plank walnut floor was cupping so bad it looked like a potato chip because the installer didn’t check the crawlspace humidity. The homeowner was in tears. The contractor was blaming the manufacturer. I pulled a single board from the transition and saw that the subfloor was sitting at twenty percent moisture while the walnut was at six percent. But the real crime was the cuts. Every single end-joint had visible tear-out. They had used a framing blade to cut select-grade hardwood. It looked like a beaver had chewed through the boards. That job was a total loss. I had to rip out every square foot because you cannot fix structural cupping combined with amateur hour finish work. Since that day, I never step onto a job site without a roll of high-quality blue tape and a moisture meter that costs more than my first truck. If you do not respect the wood, the wood will find a way to humiliate you in front of the client.
The physics of blade rotation and fiber tear
The saw blade physics involve centripetal force and shear strength where the tooth geometry meets the wood cell walls. When a blade spins at 4,000 RPM, it hits the wood with massive impact. A standard miter saw blade rotates downward and back toward the fence. This means the splintering occurs on the bottom of the board and the backside. On a table saw, the rotation is toward the operator, meaning the blowout happens on the top surface. This is where the painter’s tape becomes a structural sacrificial layer. By applying the tape to the face of the board where the blade exits, you are effectively increasing the tensile strength of the surface fibers. The adhesive holds the grain in place, refusing to let the wood fibers lift when the carbide tooth pushes through. It is a simple matter of resistance. If the adhesive bond of the tape is stronger than the inter-cellular bond of the wood fibers under stress, the cut stays clean.
“A floor is only as good as the subfloor beneath it; deflection is the enemy of every joint.” – Master Flooring Axiom
The density of the material also dictates the severity of the splintering. High Janka scale woods like Brazilian Cherry or Hickory are brittle. They do not bend. They snap. When the blade exits these species, the tear-out can travel an inch up the board. Softwoods like pine tend to crush rather than splinter, but the result is equally ugly. The tape move is non-negotiable for laminate as well. Laminate floors are essentially high-density fiberboard with a photographic layer and a melamine wear layer. That melamine is basically glass. If you do not tape it, the blade will chip the wear layer like a rock hitting a windshield. You end up with a series of tiny white chips along your joint that will eventually catch dirt and moisture, leading to premature floor failure.
The tape solution for high end finishes
The application process for protective tape requires firm pressure and precise alignment to ensure the adhesive bond is active across the entire cut line. I use a specific sequence. First, I mark my cut with a sharp mechanical pencil. I do not use a fat carpenter’s pencil because 1/16th of an inch is the difference between a tight fit and a gap. I then apply the tape directly over the mark. I use a plastic putty knife or my thumb to burnish the tape down. You have to remove the air pockets. If there is an air pocket over your cut line, the tape does nothing. It is just a blue decoration. Once the tape is set, I re-mark my line on top of the tape. Then I make the cut. [image_placeholder_1] The blade passes through the tape first, which keeps the fibers compressed. When I peel the tape back, I pull it at a 45-degree angle away from the cut to avoid lifting any finish. This is the professional standard for high-end walnut and oak installations.
The subfloor truth that installers ignore
A level subfloor requires a maximum variance of 1/8 inch over 10 feet to prevent deflection and joint separation in the finished hardwood floors. Most guys think they can fix a dip with more underlayment. They are wrong. Too much cushion under a floor is a death sentence. It creates a trampoline effect. Every time you walk on it, the locking mechanisms or the tongue-and-groove joints flex. This friction eventually breaks the wood fibers or the plastic click-locks. I spend more time with floor leveler and a grinder than I do with a hammer. If the subfloor is concrete, I am looking at the calcium chloride test results. I do not care if the slab looks dry. Concrete is a sponge. It holds moisture for decades. If you trap that moisture under a vapor-permeable floor without a 6-mil poly barrier, your hardwood will swell and your grout in the adjacent showers will crack from the pressure of the expanding wood.
| Material Type | Janka Hardness | Acclimation Time | Splinter Risk |
|---|---|---|---|
| White Oak | 1360 | 7-10 Days | Medium |
| Brazilian Walnut | 3680 | 14-21 Days | Extreme |
| Hickory | 1820 | 10-14 Days | High |
| Engineered Maple | 1450 | 3-5 Days | Low |
| Laminate High-End | N/A | 2 Days | High (Chipping) |
The technical gap between laminate and wood
The wear layer thickness of hardwood and laminate determines the long-term durability and the cutting strategy needed for a pristine installation. Laminate is a different beast entirely. While hardwood is a biological material that breathes, laminate is a synthetic composite. The cutting heat can actually melt the resin in a laminate board if your blade is dull. This is why I use a triple-chip grind (TCG) blade for laminate and a heavy-duty alternate top bevel (ATB) blade for solid hardwood. The TCG blade has a trapezoidal tooth that clears the path for the following flat tooth, which reduces the heat and the chipping. If you are working in a region with high humidity, like the Pacific Northwest, your hardwood floors will expand significantly. You need a minimum of a half-inch expansion gap at the perimeter. Do not trust the baseboard to hide a small gap. The wood will push against the drywall and eventually buckle in the center of the room. It is a slow-motion train wreck.
- Check subfloor moisture with a pin-less meter before starting.
- Use blue painter’s tape on all cross-cuts to eliminate tear-out.
- Verify that the miter saw is square to the fence using a machinist square.
- Set the blade depth to 1/4 inch below the board for table saw rips.
- Clean the blade with pitch remover every 500 feet of cutting.
- Always cut with the finished side up on a miter saw.
The wet room reality of showers and grout
In moisture-prone areas such as showers, the epoxy grout and waterproof membranes must be mechanically bonded to the substrate to prevent efflorescence. Many installers think they can run hardwood right up to a walk-in shower. That is a mistake. The transition between a wet zone and a wood zone is where most failures occur. You need a silicone-based sealant at that junction, not a hard grout. Hard grout will crack as the wood breathes. The moisture from the shower will then migrate under the wood, leading to mold and rot. I have seen grout lines in bathrooms shatter because the adjacent bedroom’s oak floor was nailed too tight to the wall, leaving no room for expansion. The force of expanding wood is enough to crack concrete. You have to respect the movement. Use a waterproof underlayment that extends at least three feet past the wet zone to act as a buffer.
“Tile and stone require a rigid substrate; wood requires a flexible environment. The transition is where the master is revealed.” – TCNA Installation Handbook
The final word on structural precision
Building a floor is an engineering task. The tape move is just one small part of a larger philosophy of precision. If you skip the tape, you probably skipped the moisture test. If you skipped the moisture test, you probably skipped the subfloor leveling. It is a chain of shortcuts that leads to a failed product. A professional floor should last eighty years. It should not click when you walk on it. It should not have gaps in the winter. It should not have splinters on the end-joints. Use the tape. Buy the expensive blades. Take the time to grind the concrete. Your knees and your reputation will thank you ten years down the line when that floor is still as flat as a frozen lake. Structural integrity starts with the smallest details of the cut. Keep your blades sharp and your tape tight.