
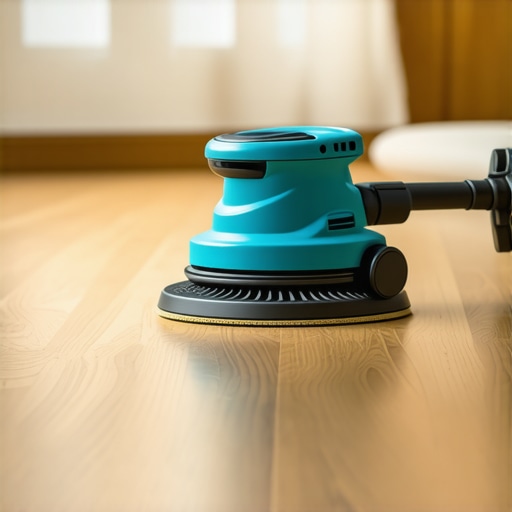
The hidden physics of a clean hardwood floor restoration
I once walked into a house where a $15,000 wide-plank walnut floor was cupping so bad it looked like a potato chip because the installer didn’t check the crawlspace humidity, but that was nothing compared to the homeowner who tried to sand his own red oak without a containment system. He had fine particulate matter inside his kitchen cabinets, behind his books, and deep inside his HVAC coils. It took a professional remediation team three weeks to clean the air. Sanding hardwood floors is not just about removing old polyurethane. It is a structural engineering task that involves managing millions of microscopic wood particles that want to float in your environment for years. If you think a cheap plastic bag on a rented drum sander will save your lungs, you are mistaken. Real dust containment requires a closed-loop vacuum system and high-efficiency particulate air filtration that creates a vacuum at the point of contact. This is the difference between a hack job and a master craftsman’s finish.
The lie of the dust bag
Most rental sanders rely on a simple fabric bag to catch wood dust which fails to capture the fine particles known as wood flour. These machines are essentially dust blowers that trap large chips while exhausting the most dangerous microscopic dust into the room. To achieve a dust-free environment, you must use a specialized vacuum with a minimum of 200 cubic feet per minute of airflow. This airflow must be maintained through a thick, reinforced hose that creates a negative pressure seal around the sanding head. This prevents the wood dust from ever escaping into the atmosphere of the home. The physics of dust collection is simple. If the velocity of the air moving into the vacuum is greater than the centrifugal force of the spinning sanding drum, the dust stays in the tube. If not, your house is coated in a layer of oak dust that smells like burnt sugar and old chemicals.
“A floor is only as good as the subfloor beneath it; deflection is the enemy of every joint.” – Master Flooring Axiom
The invisible lung killer in your living room
Wood dust is a known carcinogen that lingers in the air for days if not properly extracted at the source during the sanding process. When you sand hardwood floors, you are breaking down lignin and cellulose into particles smaller than 10 microns. These are invisible to the eye but heavy enough to sink into your upholstery. If you are working near showers or bathrooms, the high humidity in those areas will cause the dust to clump and stick to the grout lines in your tile, making it nearly impossible to clean. You need to ensure the house is at a stable humidity level before you begin. High moisture makes the wood fibers swell and makes the sanding less efficient. Low moisture makes the dust more static and prone to floating. I always keep my moisture meter in my pocket. If the floor is above twelve percent moisture, I do not start the machine. It is that simple.
Equipment performance comparison for dust management
| Machine Type | Dust Collection Rate | Ideal Use Case | Vibration Rating |
|---|---|---|---|
| Professional Belt Sander | 99.8 Percent | Lumber Leveling | Low |
| Rented Drum Sander | 60.0 Percent | Small Rooms Only | High |
| Random Orbital Buffer | 95.0 Percent | Fine Finishing | Minimal |
| Edge Sander | 85.0 Percent | Perimeter Work | Moderate |
The 1/8 inch margin of error
Precision sanding requires a perfectly flat surface where even a minor dip in the subfloor can cause the sander to skip and create a wave pattern. This is why the preparation of the subfloor is more important than the actual sanding. Most guys skip the leveling compound. They think the underlayment will hide the dip. It won’t. I spent three days grinding concrete on a job last month just so the floor wouldn’t click like a castanet. When you are sanding, you are looking for that 1/8 inch tolerance across ten feet. If your sander hits a high spot, it will gouge the wood. If it hits a low spot, it will leave old finish behind. This creates an uneven look once the stain is applied. You have to treat the floor like a precision machine part. Every pass with the sander should overlap the previous one by exactly three inches. This ensures a uniform removal of material without creating ruts.
The physics of a HEPA seal
A true HEPA filter captures 99.97 percent of particles that are 0.3 microns in size which is the gold standard for indoor air quality. Standard shop vacuums do not have the seals required to maintain this level of filtration. They leak air around the motor housing. A professional dust evacuation system is a sealed unit. It uses a long-life pleated filter that is cleaned by an automatic pulse system. This pulse keeps the filter from clogging with wood flour. If the filter clogs, the CFM drops. If the CFM drops, the dust escapes. It is a chain reaction that ends with a ruined house. I always tell my clients that they aren’t paying for the sanding. They are paying for the vacuum. Anyone can push a sander. Not everyone can keep the dust out of the silverware drawer.
Hardwood floors and the grit sequence
- Start with 36 grit for heavy finish removal and flattening the boards
- Move to 60 grit to remove the scratches left by the initial pass
- Use 80 grit for the first fine pass to prepare for buffing
- Finish with 100 grit on an orbital sander to close the grain
- Always vacuum the floor between every single grit change
Why plastic sheeting is a false security
Many homeowners think that taping up plastic over doorways will protect the rest of the house but air pressure always finds a way out. If you don’t have a vacuum pulling air out of the room, the act of sanding creates positive pressure. This pressure forces the finest dust through the smallest gaps around doors and through the electrical outlets. You need to create a negative pressure environment. This means venting the vacuum exhaust outside the house or using a certified air scrubber. In regions with high humidity like the Gulf Coast, this is even harder because the moisture makes the dust heavy. In dry climates like Arizona, the static electricity makes the dust jump onto the walls. You have to adapt your technique to the climate. If you don’t, the wood will behave in ways you didn’t expect. I have seen laminate floors in the same house get ruined because the dust got into the locking mechanisms during a nearby renovation. It acts like sandpaper in the joints and causes them to fail.
“Wood is a hygroscopic material; it never stops moving even after it is cut into planks.” – NWFA Technical Manual
The chemistry of the final bond
The final sanding pass determines how the wood will accept the stain and the protective topcoat. If you sand too fine, you burnish the wood and close the pores. This prevents the stain from penetrating, leading to a blotchy finish. If you leave it too coarse, the wood will absorb too much stain and look dark and muddy. This is especially true for species like maple or cherry. You have to understand the cellular structure of the wood you are working on. Oak has large open pores that catch dust. You have to brush the floor with a stiff bristle vacuum head to get the dust out of the grain before you ever think about opening a can of finish. If you leave dust in the grain, it will mix with the polyurethane and create a rough texture like sandpaper. You want the floor to feel like glass. That only happens if the environment is surgically clean. I spend more time with the vacuum than I do with the sander. That is the secret of the trade.