
I spent three days grinding concrete on a job last month just so the floor wouldn’t click like a castanet. Most guys skip the leveling compound. They think the underlayment will hide the dip. It won’t. I can still smell the metallic tang of the diamond cup wheel hitting that high spot and the fine white dust that coats every tool in my truck. My knees still ache from the vibration of the grinder. If you ignore the subfloor, you are building a house on sand. This same obsession with structural integrity must extend to your grout joints. Flooring is not a decoration. It is a performance surface that must withstand thousands of pounds of pressure and constant moisture cycles. When I see a shower floor with crumbling grout, I don’t see a cleaning issue. I see a failure of chemistry. Grout is a cementitious product that requires hydration to reach its full compressive strength. If the water leaves the mix too early, the chemical bond is broken. The result is a soft, powdery joint that will eventually let water penetrate the substrate and rot the floor joists below.
The chemistry of hydration in cementitious mixtures
Grout curing is a chemical reaction known as hydration where water molecules interlock with Portland cement particles to create a crystalline lattice. This process requires a specific window of time to ensure the grout reaches its rated PSI. If the environment is too hot or the tile is too porous, the water disappears before the crystals can fully form. This is why the plastic wrap trick is a game changer for professional installers. By covering the wet grout with a thin layer of polyethylene plastic, you trap the moisture against the joint. This creates a miniature greenhouse effect. The humidity remains near one hundred percent, allowing the hydration process to continue for days rather than hours. This results in a much harder, more color-consistent joint that resists staining and cracking. It is the difference between a floor that lasts five years and a floor that lasts fifty years. Most installers are in a rush to collect a check and move to the next job. They do not care about the microscopic reality of the cement matrix. I do.
“A floor is only as good as the subfloor beneath it; deflection is the enemy of every joint.” – Master Flooring Axiom
Why rapid evaporation is a structural failure
Rapid evaporation causes grout to shrink prematurely which leads to hairline fractures and bond failure between the tile edge and the cement. When the water leaves the mix too fast, the grout loses its volume before it has the structural strength to resist the tension. This creates a gap. Even a gap the width of a human hair is enough for capillary action to pull water behind the tile. In a shower, this is a death sentence. The moisture will migrate into the thin-set and eventually hit the waterproof membrane or, worse, the backer board. Over time, this constant dampness breeds mold and weakens the adhesive bond. You will notice the tiles start to sound hollow when you step on them. That is the sound of your floor failing. Using plastic wrap to slow this process down is a cheap and effective way to ensure the grout stays hydrated. It is especially vital in dry climates or during the summer months when the air conditioning is stripping moisture from the air. I have seen $20,000 marble showers ruined because the installer didn’t want to wait twenty-four hours for a proper cure.
The plastic wrap trick for perfect shower joints
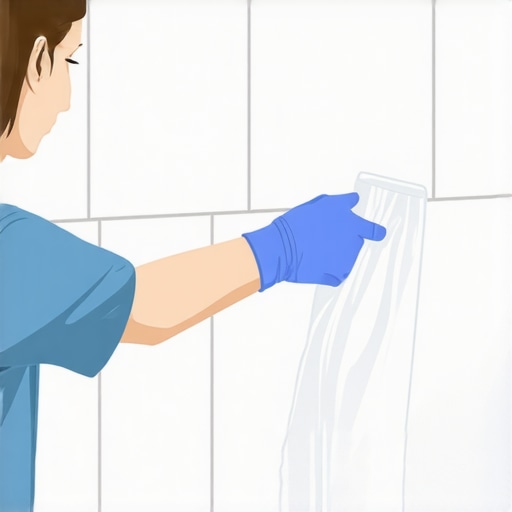
The plastic wrap technique involves misting the freshly grouted tile with clean water and then sealing the entire surface with clear plastic film to prevent air contact. You want to wait until the grout has reached its initial set, usually about two to four hours after installation. If you apply the plastic too early, you risk marring the surface of the joints. Once the grout is firm to the touch, lightly mist the walls or floor with a spray bottle. Do not soak it. You just want enough moisture to maintain the humidity. Lay the plastic wrap flat against the tile. The static cling of the plastic should hold it in place. Leave it there for at least three days. This is called wet curing. It is a standard practice in bridge construction and high-performance concrete slabs. Why wouldn’t you use it in your home? It ensures that the tricalcium silicate in the cement has every opportunity to build a bridge of crystals across the joint. When you pull the plastic off after seventy-two hours, the grout will be significantly darker and harder than air-cured grout. It will be a solid, monolithic structure.
Comparing grout types across different surfaces
| Grout Type | Minimum Joint Width | Compressive Strength | Recommended Use |
|---|---|---|---|
| Sanded Grout | 1/8 inch | 3000 PSI | Large format ceramic and stone floors |
| Unsanded Grout | 1/16 inch | 2500 PSI | Polished marble and glass wall tiles |
| Epoxy Grout | 1/16 inch | 8000 PSI | Commercial kitchens and heavy moisture zones |
| High Performance Cement | 1/16 inch | 5000 PSI | Modern residential showers and high traffic zones |
Hardwood floors and the danger of moisture migration
Hardwood floors and laminate are highly sensitive to the moisture vapor that can escape from a poorly cured or improperly sealed shower floor. If your grout is porous because it dried too fast, it acts like a sponge. In many modern homes, the transition between a tile bathroom and a hardwood hallway is a critical failure point. If moisture is allowed to sit in the grout joints, it can travel through the subfloor via capillary action. I have seen beautiful white oak planks, with a Janka hardness of 1360, start to cup and crown near a bathroom door because the shower was leaking through the grout. Solid wood will expand when it absorbs moisture. The bottom of the plank expands more than the top, causing the edges to rise. This is called cupping. If you had just taken the time to ensure the shower was a watertight vessel, those floors would be flat. Laminate is even worse. The fiberboard core in most laminate floors will swell like a sponge and never return to its original shape. It will buckle. The joints will peak. The floor is ruined. It all starts with the chemistry of the grout and the levelness of the slab.
The 1/8 inch that ruins everything
The 1/8 inch expansion gap around the perimeter of a room is the most ignored rule in flooring and the leading cause of floor buckling. People think they can jam the tile or the hardwood tight against the wall and cover it with baseboard. They are wrong. Every material on this planet expands and contracts with changes in temperature and humidity. If a floor has no place to go, it will move upward. In tile, this results in “tented” tiles that snap and pop off the floor. In hardwood, it results in massive humps in the middle of the room. You must maintain that 1/8 inch gap. I always use spacers against the drywall. I don’t care if the homeowner thinks it looks messy before the trim goes on. I am building for longevity, not for the photo op. This gap is also vital for the grout. If the tile field is under pressure from the walls, the grout will be crushed. It will flake out in chunks. You need that movement joint. The TCNA recommends a movement joint every twenty to twenty-five feet in each direction for interior tile. Ignore this, and the ghost in the expansion gap will come for your floor.
“Cementitious grout shall be water cured for at least 72 hours by covering with a non-staining moisture-resistant membrane.” – TCNA Handbook for Ceramic Tile Installation
A checklist for a bulletproof installation
- Verify subfloor deflection meets L/360 standards for ceramic or L/720 for natural stone.
- Grind all high spots and fill all low spots using a high-quality self-leveling underlayment.
- Check the moisture content of the wood subfloor using a pin-style meter to ensure it is within 2 percent of the hardwood flooring.
- Mix grout by hand or with a low-speed drill to avoid whipping air into the mixture.
- Wait for the initial set before misting and applying the plastic wrap membrane.
- Maintain a consistent ambient temperature between sixty and eighty degrees Fahrenheit during the cure.
- Never use acidic cleaners on fresh grout as it will eat the cement binder.
The ghost in the expansion gap
A movement joint is a flexible transition filled with 100 percent silicone sealant rather than hard grout to allow for structural shifting. You cannot put hard grout in the corners of a shower or where the floor meets the wall. It will crack. Physics dictates that different planes of a house move independently. The wall studs shrink while the floor joists twist. If you bridge that gap with rigid grout, the grout loses every time. I always use a color-matched silicone in these areas. It stays flexible. It handles the movement. It keeps the water out. Many DIY installers make the mistake of grouting the corners because it is easier. Three months later, they are calling me to fix the cracks. You have to understand the forces at play. A house is a living thing. It breathes. It moves. Your flooring system must be designed to accommodate that life. If you treat it like a static object, you are asking for a failure. The plastic wrap trick works for the field, but only the right sealant works for the corners.
Why your subfloor is lying to you
Subfloors often appear flat to the naked eye but harbor subtle dips and ridges that will cause LVP and laminate locking mechanisms to fail. I use a ten-foot straightedge on every single job. If I see a gap larger than 1/8 inch over that ten-foot span, I am not laying a single board. The modern click-lock systems are engineered to very tight tolerances. If the floor is allowed to bridge a dip, the tongue and groove will be under constant vertical tension. Every time you walk across that spot, the joint flexes. Eventually, the plastic or wood fiber will fatigue and snap. You will hear a clicking sound. That is the sound of a mechanical failure. People blame the product. They say the laminate was cheap. Usually, the laminate was fine, but the floor was a roller coaster. I spend more time on my knees with a level and a bag of patch than I do actually laying the floor. That is what a master does. You fix the foundation before you worry about the finish. If you want a floor that feels like a solid rock, you have to do the dirty work of grinding and filling. It is the only way. Grout hydration and subfloor prep are two sides of the same coin. They are about controlling the environment and the physics of the build. Don’t let a rush to finish ruin a lifetime of performance. Wrap your grout. Level your slab. Respect the trade.