
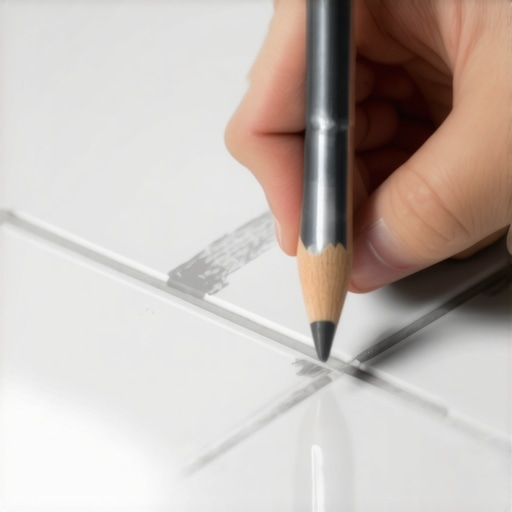
I spent three days grinding concrete on a job last month just so the floor wouldn’t click like a castanet. People think the surface is the only thing that matters. They buy expensive Italian porcelain and then drag a metal ladder across it. Now they have grey streaks that look like permanent marker. Most guys tell them the glaze is ruined. They are wrong. It is just metal transfer, and a twenty-cent eraser is the only tool that actually works without eating the finish. I have seen homeowners dump acid on their grout or scrub their laminate until the wear layer is gone just to fix a mark that requires zero chemicals. You have to understand the physics of the surface before you reach for the heavy cleaners. Flooring is a structural engineering challenge that starts at the subfloor and ends at the microscopic peaks of the glaze.
The microscopic reality of metal transfer on ceramic surfaces
Metal marks on tile occur when softer metals like aluminum, brass, or stainless steel rub against the harder surface of a ceramic or porcelain glaze. These marks are not scratches in the tile itself but rather microscopic deposits of metal shaved off by the abrasive nature of the glaze. Porcelain tiles and ceramic glazes act like a file against metal tools or furniture legs. Removing these requires mechanical friction rather than chemical dissolution.
When you look at a tile under a microscope, it is not a flat plane. It is a mountain range of silica and minerals. When a metal object like a pot, a chair leg, or a tool drags across these peaks, the metal is softer than the kiln-fired surface. This results in a physical transfer of material. The metal gets wedged into the valleys of the glaze. This is why a standard mop does nothing. You are essentially trying to wash off a piece of solid metal with water. It will not happen. You need something that can reach into those microscopic valleys and grab the metal particles. This is where the chemistry of a simple pencil eraser becomes your best friend on the job site.
“A floor is only as good as the subfloor beneath it; deflection is the enemy of every joint.” – Master Flooring Axiom
Why the pencil eraser hack works on glazed porcelain
The pencil eraser hack works because the rubber or vinyl polymer has a higher coefficient of friction than the metal deposit. As you rub the eraser over the mark, it generates localized heat that softens the elastomer. This allows the eraser to grip the metal particles trapped in the tile glaze and pull them free. It is a mechanical extraction process that preserves the integrity of the tile finish.
Not all erasers are equal. The cheap, hard pink ones on the back of a number two pencil can sometimes leave their own residue. I prefer a white vinyl eraser. These are softer and more pliable. They do not contain the pumice grit that the pink ones often have. On a job site, I always keep a few of these in my bag next to my moisture meter. You apply firm, downward pressure and move in small circles. The heat from the friction is the catalyst. You will see the eraser start to crumble. Those crumbs are actually wrapping around the metal dust and lifting it away from the surface. It is a simple matter of physics. The bond between the eraser and the metal is stronger than the bond between the metal and the tile.
The danger of using abrasive cleaners on showers and grout
Abrasive cleaners and acidic solutions can permanently damage the integrity of grout and tile glazes in showers. While they might eventually remove a metal mark, they also strip away the sealant and increase the porosity of the cementitious grout. This leads to long-term issues like mold growth and structural water damage. A pencil eraser provides a non-invasive alternative that keeps the waterproof barrier intact.
I have walked into bathrooms where the homeowner used a green scrub pad on their shower floor. They removed the metal mark, but they also sanded down the glaze. Now that spot is matte while the rest of the floor is glossy. Worse, they have opened up the pores of the tile. Now every bit of soap scum and skin cell will get trapped in those scratches. If you are dealing with marks near grout lines, you have to be even more careful. Grout is a thirsty material. If you use a liquid cleaner, it soaks in. If that cleaner is acidic, it eats the lime in the cement. Over time, your grout turns to sand. The eraser hack avoids all of this. It stays on the surface and does its job without introducing moisture or chemicals into the assembly.
Comparing material hardness and mark removal
| Surface Type | Mohs Hardness | Metal Mark Risk | Recommended Tool |
|---|---|---|---|
| Porcelain Tile | 7 to 9 | High | White Vinyl Eraser |
| Glazed Ceramic | 5 to 7 | Medium | Pencil Eraser |
| Hardwood Floors | 3 to 5 | Low (Scratches) | Soft Cloth and Oil |
| Laminate | 4 to 6 | Medium | Damp Microfiber |
The difference between metal marks and scratches on hardwood floors
Hardwood floors do not typically suffer from metal transfer in the same way as tile because the wood is softer than the metal. Instead of the tile filing the metal down, the metal object usually indents or scratches the polyurethane finish or the oak fibers. A pencil eraser will not fix a scratch in wood. It only works on hard, non-porous surfaces where the material is sitting on top of the glaze.
If you see a grey mark on your hardwood, it might be a scuff from a rubber sole or a metal glide. You can try the eraser, but do it gently. Wood finishes are sensitive. If you rub too hard, you will create a shiny spot in your satin finish. This is the nightmare of every site-finish expert. For hardwood, the NWFA guidelines are clear about maintaining the finish. You want to avoid anything that alters the sheen. If the metal has actually cut into the wood, you are looking at a screen and recoat job, or at least some touch-up pens. Unlike tile, wood is organic. It breathes. It moves. You have to treat it with a bit more respect than a slab of kiln-fired clay.
“Wood is hygroscopic; it constantly gains or loses moisture to reach equilibrium with its environment.” – NWFA Technical Standard
Why laminate flooring requires a different approach to maintenance
Laminate flooring consists of a photographic layer protected by a clear wear layer of aluminum oxide. This wear layer is incredibly hard, which is why laminate can sometimes show metal marks similar to tile. However, the core board is made of high-density fiberboard which is susceptible to moisture damage and swelling if liquid cleaners are used excessively.
The problem with laminate is the seams. If you use a wet cleaner to try and scrub out a mark, the water can seep into the joints. Once the fiberboard gets wet, it expands. It will never go back down. I call it the mushroom effect. The edges of the planks curl up, and the floor is ruined. The eraser hack is perfect for laminate because it is a dry process. You can lift the metal mark without ever introducing a drop of water to the floor. It protects the structural integrity of the click-lock system. I always tell people to stay away from the steam mops too. They are the fastest way to kill a laminate floor. Stick to the dry friction of an eraser for marks and a barely damp microfiber for the rest.
The structural importance of a level subfloor
A subfloor that is not level causes vertical movement in the flooring which can lead to increased metal-to-tile contact. When a floor deflects under weight, furniture glides and metal appliances shift, creating the very friction that causes metal marks. Proper floor preparation with self-leveling underlayment is the only way to prevent this micro-movement.
I have seen guys skip the floor prep because they think the underlayment or the thin-set will hide the dips. It will not. If there is a 1/8 inch dip in ten feet, that tile is going to flex. When it flexes, the grout cracks. When the grout cracks, moisture gets in. But even before that, you will notice that your chairs and tables wobble. Every time you sit down, that metal leg grinds a little bit more into the tile glaze. You are creating a factory for metal marks. A flat floor is a quiet floor and a clean floor. I spend more time with my straight edge and my grinder than I do with a notched trowel. If you do not get the bones right, the skin will always have problems.
Step by step metal mark removal checklist
- Identify the mark by rubbing it with a dry finger to see if it is surface debris.
- Clean the area with a dry cloth to remove any loose grit or dust.
- Select a white vinyl eraser for the best results on porcelain or ceramic.
- Apply firm pressure and rub the mark in a circular motion.
- Wipe away the eraser crumbs and inspect the sheen of the tile.
- If the mark persists, use a specialized stone poultice but avoid acidic cleaners.
- Seal the grout if you have been scrubbing near the joints to maintain water resistance.
The chemistry of adhesives and surface tension
Modern flooring installations rely on the chemical bond between the substrate and the finish material. Whether you are using modified thin-set for tile or pressure-sensitive adhesive for vinyl, the surface energy of the materials dictates how well things stay in place. Contaminants like metal dust or cleaner residue can interfere with these bonds if they are not addressed during the installation phase.
During a renovation, metal marks are common. Plumbers drag pipes, and electricians drop tools. If you leave those metal deposits on the floor, they can actually become permanent if they are covered by a sealer or a wax. I have seen guys try to seal over a dirty floor. The sealer won’t stick to the metal, and eventually, it peels. It looks like the floor is sunburnt. You have to be meticulous. Every mark must come off before the final finish goes on. The eraser is the best way to do this without leaving a chemical film that might react with the sealer. It is about maintaining the purity of the surface chemistry.
The impact of regional humidity on flooring stability
The swampy humidity of Houston means solid wood is a death wish; you need engineered cores. In those high-moisture environments, the subfloor is always under stress. This stress translates to the surface. If you are in a humid area, your tile and grout will be more prone to holding onto grime and metal marks because the surface often has a microscopic film of condensation. This moisture acts as a lubricant for the metal to slide but then traps the particles once it dries. In dry climates like Phoenix, the concern is different. The dry air makes everything brittle. The eraser hack is even more important there because the glazes are more prone to micro-cracking under the stress of harsh chemical cleaners. No matter where you live, the physics of friction remains the same. A dry, mechanical removal of surface metal is always the safest bet for the long-term health of your architectural surfaces. It is about understanding that the floor is a living system. From the plywood or concrete slab all the way up to the light reflecting off the glaze, every layer matters. Stop treating your floors like they are indestructible. Treat them like the precision-engineered surfaces they are. Get an eraser and save your grout.