
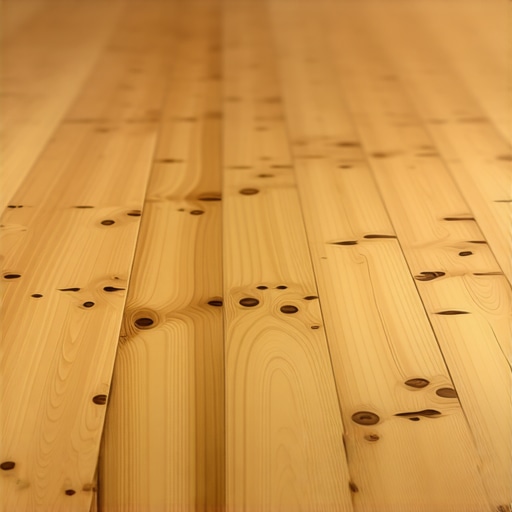
The hidden physics of the crowned hardwood plank
I once walked into a house where a $15,000 wide-plank walnut floor was cupping so bad it looked like a potato chip because the installer didn’t check the crawlspace humidity. But the worst part came six months later. The homeowner, desperate to fix the unsightly ridges, hired a cheap sand-and-finish crew. They ground those high edges down flat while the wood was still engorged with moisture. When the house finally dried out during the winter heating season, the edges shrank, and the centers stayed high. That is the birth of a crowned floor. It is a permanent structural scar caused by impatience and a lack of understanding of wood science. Hardwood floors are breathing, moving organisms that react to the atmospheric pressure and moisture content of your home. When you see the middle of a board humping up, you are looking at the aftermath of a moisture battle that the wood lost.
The mechanics of the center bulge
Hardwood floor crowning occurs when the center of the wood plank is higher than the edges, usually caused by moisture exposure from the top or sanding a cupped floor before it reached equilibrium. High humidity, liquid spills, or improper maintenance routines like wet mopping force wood fibers to expand. This physical transformation is rooted in the hygroscopic nature of timber. Wood cells act like microscopic straw bundles. When they absorb water, they swell. If the bottom of the board remains dry while the top absorbs moisture, the edges will eventually drop relative to the center. However, the most common culprit for crowning is the premature sanding of cupped boards. If an installer sands a floor flat while the bottom is still wet and expanded, the boards will inevitably crown once the moisture leaves the wood. This is why professional installers insist on using a pin-less moisture meter to track the drying process over weeks, not hours.
The ghost in the expansion gap
Expansion gaps are the silent protectors of your hardwood floors, providing the necessary room for natural wood movement during seasonal humidity shifts. Without a 1/2 inch gap at the perimeter, the planks have nowhere to go but up when they expand. This lack of space creates internal compression. Think of it like a tectonic plate shift in your living room. When the wood expands and hits the drywall or the baseboard, the pressure must be relieved. This pressure often forces the center of the plank to buckle or crown. I have seen floors where the installer tight-fit the wood against the door casings. Within a summer, the entire hallway looked like a rolling sea. Unlike laminate, which uses a high-density fiberboard core that is somewhat more stable, solid hardwood is relentless. It will push against a concrete wall until the wood fibers crush themselves or the floor lifts off the subfloor. Proper spacing is not a suggestion, it is a structural mandate from the NWFA.
“A floor is only as good as the subfloor beneath it; deflection is the enemy of every joint.” – Master Flooring Axiom
The chemistry of subfloor moisture barriers
Subfloor moisture barriers prevent water vapor from migrating from the crawlspace or concrete slab into the hardwood planks, preventing cupping and subsequent crowning. Using a 6-mil polyethylene plastic or a high-quality liquid moisture vapor retarder is essential for any ground-level installation. Concrete slabs are never truly dry. They are porous sponges that pull moisture from the earth via capillary action. If you glue hardwood floors directly to concrete without a moisture barrier, you are inviting disaster. Even if you use a high-end silane-modified polymer adhesive, the hydrostatic pressure can eventually break the bond. I prefer using a vapor-shield underlayment that has been tested for perm ratings. If the perm rating is too high, the vapor passes through like a sieve. If you are dealing with a crawlspace, you must cover 100 percent of the ground with a vapor barrier and ensure proper ventilation. This prevents the stack effect from pushing humid air up through your subfloor and into the bottom of your expensive oak or maple planks.
Species stability and the Janka scale
The Janka Hardness Scale measures the resistance of a wood species to denting and wear, but it does not account for dimensional stability. While a hard wood like Hickory is durable, it is notoriously unstable and prone to dramatic movement in humid environments. Choosing the right species for your climate is a decision that requires technical foresight. In a region with high humidity, like the coastal South, choosing a wide-plank solid Hickory is a recipe for heartbreak. You would be better off with an engineered core that uses cross-ply construction to limit movement. Engineered floors are not immune to crowning, but their structural design makes them more resilient to the stresses that cause solid wood to fail. When you compare this to materials like tile where the grout is the primary failure point, hardwood requires a much higher level of atmospheric control. You cannot treat a wood floor like a shower floor. It requires a stable relative humidity between 30 and 50 percent to remain flat and functional.
| Wood Species | Janka Hardness (lbf) | Dimensional Stability | Recommended RH % |
|---|---|---|---|
| White Oak | 1360 | Medium-High | 30-50% |
| Hickory | 1820 | Low | 35-45% |
| Brazilian Cherry | 2350 | Medium | 35-50% |
| Black Walnut | 1010 | High | 30-50% |
The 1/8 inch that ruins everything
Subfloor flatness is the most overlooked factor in hardwood installation, as dips and humps in the substrate create voids that allow the floor to flex and creak. A subfloor must be flat to within 1/8 inch over a 6-foot radius to ensure long-term stability. Most guys skip the leveling compound. They think the underlayment will hide the dip. It won’t. I spent three days grinding concrete on a job last month just so the floor wouldn’t click like a castanet. If the subfloor is not flat, the planks will bridge over the low spots. When you walk on them, the wood bends. This bending stresses the tongue and groove joints. Over time, the friction between the moving planks generates heat and noise. More importantly, it creates gaps where topical moisture from wet mopping can seep into the joint. Once that water gets into the side of the plank, the wood begins to swell from the middle out, leading to that dreaded crowning effect. You have to get the foundation right before the first nail is fired.
“Moisture is the primary cause of all wood flooring failures; control the water, and you control the floor.” – NWFA Technical Manual
The checklist for a flat floor future
- Verify the subfloor moisture content is within 2 to 4 percent of the hardwood planks.
- Acclimate the wood in the room where it will be installed for at least 7 to 10 days.
- Ensure the HVAC system is running at normal living conditions during the acclimation period.
- Check the crawlspace for standing water or inadequate vapor barriers before starting.
- Use a 15-pound felt paper or a dedicated vapor retarder underlayment for nail-down installs.
- Maintain a consistent indoor relative humidity between 30 and 50 percent year-round.
- Never sand a cupped floor until you have confirmed the wood has reached its EMC.
The problem with topical moisture
Topical moisture from steam mops and wet towels is a primary driver of hardwood crowning in modern homes. High heat and liquid water penetrate the wood finish and saturate the cell walls of the timber, causing rapid expansion of the top surface. Many homeowners are sold on the idea of steam cleaning as a sanitary solution. In reality, a steam mop is a hardwood floor’s worst enemy. The pressurized steam forces water deep into the cracks and under the finish. Once the water is in the wood, the top of the plank expands. Because the bottom of the plank is held in place by nails or glue and remains dry, the top has nowhere to go but up. This creates a crowned profile that cannot be easily fixed. If you see crowning in a kitchen or near a bathroom, the cause is almost always topical. Stop using steam. Use a microfiber mop and a dedicated wood cleaner that evaporates quickly. If you treat your wood like a laminate or a tile floor, you will destroy the cellular integrity of the planks within a few years.
Correcting the crown without replacement
Fixing a crowned hardwood floor requires a patient approach that prioritizes environmental stabilization over mechanical sanding. You must first eliminate the moisture source and allow the wood to dry back to its original equilibrium moisture content. This process can take months. Do not rush it. I tell my clients to buy a hygrometer and watch the numbers. Once the wood has stabilized and the crowning remains, only then can you consider a light buff and coat or a full sand and finish. If the crowning was caused by sanding the wood while it was cupped, you are in a difficult spot. You may have to sand the floor again, but you must be careful not to sand through the wear layer of the plank. If the wood is thin-cut engineered, you might not have enough material left to fix it. This is why site-finished solid oak is still the gold standard for many architects. It gives you the