
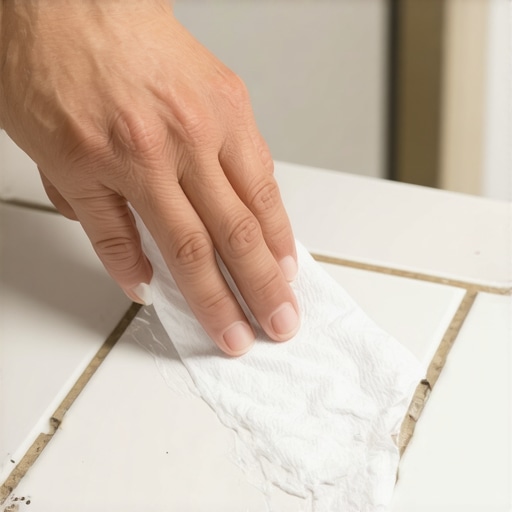
The Rubbing Alcohol Secret for Removing Construction Adhesive from Tile
I have spent twenty-five years with sawdust under my nails and the smell of WD-40 as my constant companion. Most guys skip the leveling compound because they think the underlayment will hide the dip. It won’t. I spent three days grinding concrete on a job last month just so the floor wouldn’t click like a castanet. That experience taught me one thing. Precision is not an option. It is the job. When you find construction adhesive on a high-end porcelain or a natural stone tile, your first instinct is to grab a chisel. That is how you ruin a floor. The real secret lies in the molecular breakdown of the bond. Most people think adhesive is permanent. It is just a chemical state that can be reversed with the right solvent and enough patience. We are not just cleaning a floor. We are performing a structural intervention. This process requires an understanding of surface tension and the specific gravity of the solvents we use. If you rush, you leave a ghost on the tile. If you wait too long, the solvent evaporates and the resin resets. This is about timing and chemistry.
The chemistry of the polymer bond
Construction adhesive creates a cross-linked polymer bond that grips the microscopic pits of a tile surface through mechanical and chemical adhesion. Removing it requires a solvent like isopropyl alcohol to penetrate these cross-links and soften the resin. High-strength adhesives like polyurethane are designed to be permanent and moisture-resistant. These products are engineered to withstand hundreds of pounds of shear force. When a blob of PL Premium or a similar heavy-duty glue lands on your tile, it begins to cure the moment it hits the air. The moisture in the atmosphere triggers a reaction. Within minutes, the outer shell hardens. If you try to wipe it while it is wet, you just smear the resins deeper into the pores of the tile. This is why we let it tack up slightly or address it with a targeted solvent approach. The bond is a physical interlocking of the glue into the surface profile of the material. On a polished tile, this is harder to maintain, but on a matte or textured surface, the glue finds purchase in every tiny valley. You cannot simply scrape that away without leaving a residue that will attract dirt for the next ten years.
“A floor is only as good as the subfloor beneath it; deflection is the enemy of every joint.” – Master Flooring Axiom
Why 70 percent isopropyl alcohol is the magic number
Isopropyl alcohol at a 70 percent concentration is the ideal solvent for removing construction adhesive because the water content slows down the evaporation rate. This allows the alcohol more time to sit on the adhesive and break down the chemical resins. Pure alcohol evaporates too quickly to be effective. Many installers think the 91 percent or 99 percent versions are better because they are stronger. That is a mistake. In the world of flooring chemistry, we need dwell time. The 30 percent water content in a standard bottle of rubbing alcohol acts as a carrier. It prevents the alcohol from flashing off the surface before it has a chance to penetrate the hardened skin of the adhesive. This is particularly important when dealing with hardwood floors or laminate transitions where you cannot use aggressive heat or scrapers. You need the liquid to do the work. The alcohol acts as a surfactant. It reduces the surface tension of the adhesive. This allows the liquid to seep under the edges of the drip. Once the edges are compromised, the mechanical bond begins to fail. You are essentially un-gluing the glue.
The physics of evaporation and contact time
To remove dried adhesive, you must maintain a constant state of saturation on the affected area for at least three to five minutes. This prevents the solvent from flashing off and ensures the chemical reaction reaches the base of the tile. Using a saturated cloth or a cotton ball is essential. If you just pour the alcohol on the floor, it will run into the grout joints. Grout is porous. If you get high-strength solvents in your grout, you risk discoloring the pigment or weakening the cementitious structure. You must be surgical. I use a technique where I soak a small piece of a clean white rag and weighted it down over the adhesive spot. This forces the alcohol to stay in contact with the resin. Do not use colored rags. The alcohol can bleed the dye from a red or blue shop towel directly into your tile or grout. That creates a permanent stain that no amount of scrubbing will fix. We are looking for the sweet spot where the glue turns from a hard rock into a gummy, pliable mass. This is the moment when the bond is weakest.
| Solvent Type | Evaporation Rate | Effectiveness on Polyurethane | Subfloor Risk |
|---|---|---|---|
| Isopropyl Alcohol 70% | Moderate | High (with dwell time) | Low |
| Mineral Spirits | Slow | Medium | High (residue) |
| Acetone | Very Fast | Very High | High (damage to finishes) |
| Citrus Based Cleaners | Very Slow | Low | Low |
The porous tile trap
Porous tiles such as travertine, slate, or unglazed ceramic require extreme caution because they can absorb the dissolved adhesive residue into their internal structure. This leads to permanent darkening or staining of the stone. Always test a small inconspicuous area first. When you apply rubbing alcohol to a porous stone, the stone acts like a sponge. It pulls the solvent and the now-liquified adhesive deep into the substrate. This is where the nightmare begins. Once that resin is inside the stone, it is there forever. To prevent this, you have to seal the stone before installation, but we all know builders who skip that step to save a buck. If you are working on unsealed stone, you should use a poultice method. Mix the alcohol with an absorbent powder like baking soda to create a paste. Apply the paste to the glue. The alcohol breaks down the glue while the powder pulls the residue up and out of the stone. This is the difference between a pro and a hack. A hack just wipes and prays. A pro understands the capillary action of natural materials.
Subfloor prep and the flat floor lie
The success of any tile or hardwood installation depends entirely on the flatness of the subfloor rather than the thickness of the adhesive. A subfloor must be within 1/8 inch of level over a ten foot radius to prevent structural failure. Adhesive cannot fix a bad floor. People always ask me why their laminate is clicking or why their grout is cracking. It is never the product. It is always the prep. I have seen guys try to use construction adhesive to fill a half-inch dip in a plywood subfloor. It does not work. As the adhesive cures, it shrinks. As it shrinks, it pulls. This creates tension in the tile above it. Eventually, that tension wins and the tile pops or the grout turns to powder. If you find yourself with adhesive on the face of your tile, it usually means you were trying to over-apply it to compensate for a subfloor that wasn’t ground down or leveled. You should have spent those three days with the concrete grinder. It is loud. It is dusty. It is the only way to ensure the floor lasts fifty years instead of five.
“Adhesion failure is rarely a product defect; it is almost always a failure of surface preparation and environmental control.” – TCNA Technical Bulletin
Regional humidity and adhesive behavior
High humidity environments like Houston or Miami significantly slow the curing time of solvent-based adhesives while accelerating the cure of moisture-triggered polyurethanes. This atmospheric variance dictates how long you have to clean up a spill. If you are working in the desert heat of Phoenix, that alcohol is going to evaporate before you can even get the cap back on the bottle. In those climates, you have to work in small sections. In a swampy climate, the moisture in the air can actually cause some adhesives to skin over faster, trapping the wet solvents underneath. This creates a bubble. If you see a bubble in your adhesive, you are in trouble. It means the bond is compromised. When removing adhesive in high humidity, you might need to use a slightly higher concentration of alcohol to overcome the moisture barrier on the surface. Always monitor the ambient temperature. Most adhesives and thin-sets are designed to work between 50 and 90 degrees Fahrenheit. Anything outside that range and the chemistry starts doing weird things that no amount of rubbing alcohol can fix.
- Inspect the tile for any pre-existing cracks or chips before applying solvent.
- Ensure the room is well-ventilated to prevent the buildup of isopropyl vapors.
- Use a plastic putty knife instead of metal to avoid scratching the tile glaze.
- Wipe in a single direction to prevent spreading the dissolved resin.
- Clean the area with distilled water after the adhesive is removed to neutralize the surface.
Tooling for the serious installer
A plastic scraper and a microfiber cloth are the only tools that should touch a tile surface during adhesive removal. Metal scrapers can leave gray marks known as metal tracking which are nearly impossible to remove from porcelain. I have seen guys ruin a whole bathroom with a five-in-one tool. They think they are being careful, but the metal is harder than the finish on some tiles. Once you scratch that glaze, the floor is done. You can’t buff out a scratch in ceramic. You also need a high-quality moisture meter. Before you even think about installing hardwood or tile, you need to know what the slab is doing. If your concrete is pushing 5 percent moisture, your adhesive is going to fail regardless of how clean the surface is. I keep my meter in my pocket like a cell phone. It is the most important tool I own. If the subfloor is wet, the adhesive will never cure properly. It will stay in a semi-liquid state, eventually off-gassing and causing the tiles to release. That is when you see the glue oozing up through the grout lines.
Preventing the residue ghost
The final step in removing construction adhesive is a secondary cleaning with a fresh solvent to ensure no microscopic resin film remains. This prevents a dull spot or a ghost from appearing when the light hits the floor. You might think the glue is gone because the lump is gone. But resins are stubborn. They leave behind a thin, oily film. If you don’t clean that off, it will act as a magnet for dust and mop water. Three months later, the homeowner calls you because there is a dark smudge on their beautiful new floor. That is the ghost. To kill the ghost, you use a two-cloth system. One cloth with alcohol to remove the bulk, and a second, bone-dry microfiber to buff the surface immediately after. You have to be fast. The goal is to lift the film before the alcohol dries. If you do this right, the tile will have its original luster. If you do it wrong, you will be back there on your hands and knees with a buffing compound. Do it right the first time. Your knees will thank you.