
The day fifteen thousand dollars turned into a potato chip
I once walked into a house where a fifteen thousand dollar wide plank walnut floor was cupping so bad it looked like a potato chip because the installer didn’t check the crawlspace humidity. The homeowner was devastated. The wood was screaming. This was not a failure of the wood itself but a failure of the physics governing the installation environment. When you spend twenty five years on your knees with a moisture meter, you stop seeing hardwood floors as decoration and start seeing them as a living, breathing structural challenge that responds to every microscopic change in the atmosphere. Hardwood is a hygroscopic material, meaning it absorbs and releases water to reach an equilibrium with its surroundings. If you miss a low spot in the subfloor or the finish, you are not just looking at a cosmetic blemish, you are looking at a point of future structural failure. This guide explains how to use the flashlight trick to identify those hidden dips before they ruin your investment.
The physics of glancing light and floor inspection
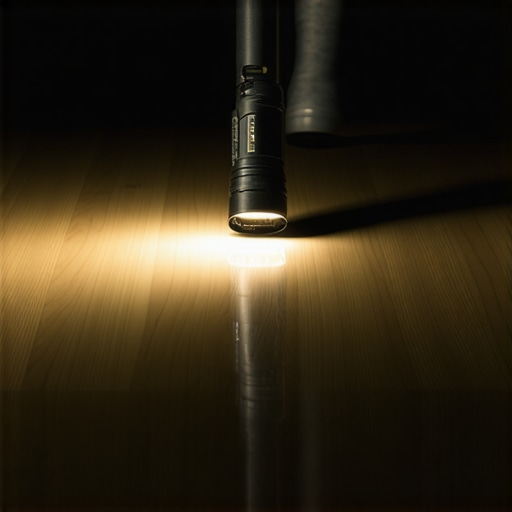
The flashlight trick works by using low angle glancing light to create exaggerated shadows across the surface of hardwood floors to reveal low spots. When a light source is held parallel to the floor, even a deviation of one thirty second of an inch becomes visible as a dark pocket or a shimmering distortion. This is the same principle used by drywall finishers and autobody technicians. By placing a high lumen LED flashlight directly on the floor and shining it across the room, you are forcing the light rays to hit the peaks and skip over the valleys. This is not just about vanity. These low spots in the finish often indicate a lack of film build or a dip in the subfloor that will eventually cause the finish to crack under the pressure of foot traffic.
“A floor is only as good as the subfloor beneath it; deflection is the enemy of every joint.” – Master Flooring Axiom
Why your subfloor is lying to you
Most guys skip the leveling compound. They think the underlayment will hide the dip. It won’t. I spent three days grinding concrete on a job last month just so the floor wouldn’t click like a castanet. The subfloor is the foundation of the entire system. Whether you are installing hardwood floors or laminate, the substrate must be flat to within three sixteenths of an inch over a ten foot radius. If the subfloor has a dip, the flooring material will bridge that gap. Over time, the air pocket beneath the floorboards acts as a bellows, pumping dust and moisture up through the joints. This constant movement fatigues the tongue and groove, eventually leading to the dreaded floor squeak. The flashlight trick reveals these bridges before you ever pull the trigger on a nail gun.
The hidden chemistry of finish failure
The molecular bond of your finish depends on a perfectly level application. When you apply a polyurethane finish, it seeks a self leveling state. However, gravity is a cruel mistress. If there is a low spot in the wood, the finish will pool there, creating a thicker layer that cures at a different rate than the surrounding area. This causes internal tension within the film. Conversely, a high spot will have a thinner wear layer, leading to premature wear through. In extreme cases, the finish might even peel. When you use the flashlight trick, you are looking for the way the light refracts off the surface. A consistent sheen indicates a consistent mil thickness. A blurry or dark area indicates a dip where the light is being trapped or scattered by uneven topography.
| Wood Species | Janka Hardness Rating | Average Acclimation Time | Expansion Coefficient |
|---|---|---|---|
| Brazilian Cherry | 2350 | 14 Days | High |
| White Oak | 1360 | 7 to 10 Days | Medium |
| Black Walnut | 1010 | 7 to 10 Days | Medium |
| American Cherry | 950 | 5 to 7 Days | Low |
The ghost in the expansion gap
Expansion gaps are the lungs of your floor. I have seen entire rooms of laminate buckle because the installer tight-fitted the boards against the baseboard. You need at least half an inch of clearance around the perimeter. Without it, the floor has nowhere to go when the humidity rises. In high moisture areas like kitchens or near showers, this becomes even more dangerous. Moisture from a bathroom can travel through the wall plate and reach the subfloor of an adjacent hallway. If that subfloor is uneven, the moisture will collect in the low spots, causing the wood to swell unevenly. This is why professional installers focus so much on the preparation stage. We aren’t just making it look pretty. We are engineering a surface that can survive a decade of seasonal changes.
How to execute the professional flashlight sweep
To perform the flashlight trick correctly, you must eliminate all overhead lighting. Ambient light is the enemy of a true inspection because it fills in the shadows that you are trying to find. Use a flashlight with at least five hundred lumens. Place the light on the floor at one end of the room and slowly rotate it in a fan pattern. You are looking for shadows that look like puddles. If you find a shadow, mark it with a piece of blue painter tape. Do not use masking tape, as the adhesive can react with the finish. Move the light every three feet and repeat the process. This methodical approach ensures that you catch every deviation in the plane of the floor.
- Ensure the room is completely dark for maximum contrast.
- Use a light with a focused beam rather than a wide flood.
- Mark low spots with non reactive tape only.
- Inspect the floor from at least four different directions.
- Check transitions and doorways where subfloor height changes are common.
The contrarian truth about underlayment and cushion
While most people want the thickest underlayment, too much cushion actually causes the locking mechanisms on LVP or laminate to snap under pressure. I have seen it a hundred times. A homeowner buys the most expensive, squishy foam thinking it will feel better on their feet. In reality, that extra compression allows the floor to flex too much. That flex puts a massive amount of torque on the thin plastic locking joints. Eventually, they shear off. A thinner, high density underlayment is almost always better because it provides support without allowing excessive vertical movement. This is especially true if you have any minor low spots that you were too lazy to fill with grout or leveling compound. A firm base protects the integrity of the floor joints.
“Consistency in subfloor elevation is the only insurance policy that actually pays out.” – Master Flooring Axiom
The humidity factor in regional installations
If you are installing floors in a swampy environment like Houston, you are fighting a constant battle against moisture. In those regions, solid hardwood is often a mistake. You need engineered cores that can handle the vapor pressure. Conversely, in the dry desert heat of Phoenix, wood will shrink until you can see the tongues in the joints. No matter where you live, the flashlight trick helps you see if the wood is starting to cup or crown before it becomes a disaster. Cupping is when the edges of the board are higher than the center, usually caused by moisture from below. Crowning is the opposite, often caused by a spill or high humidity from above. The low angle light will hit those raised edges and cast long, ugly shadows that tell you exactly what is happening to the wood fibers at a cellular level.
The long game of floor maintenance
Maintaining a floor is about more than just sweeping. It is about monitoring the structural health of the finish. The flashlight trick should be part of your annual home maintenance. It allows you to see where the finish is thinning before you reach the bare wood. Once you reach bare wood, you are looking at a full sand and finish, which is expensive and messy. If you catch it early, you can do a simple screen and coat. This involves lightly abrading the top layer of finish and applying a fresh wear layer. It is the difference between a five hundred dollar maintenance job and a five thousand dollar restoration. Keep your sawdust under your nails and your eyes on the floor level. It will save you a fortune in the long run.
{“@context”: “https://schema.org”, “@type”: “HowTo”, “name”: “The Flashlight Trick for Identifying Hardwood Low Spots”, “step”: [{“@type”: “HowToStep”, “text”: “Turn off all overhead and ambient lights in the room to create total darkness.”}, {“@type”: “HowToStep”, “text”: “Place a high-lumen LED flashlight directly on the floor surface.”}, {“@type”: “HowToStep”, “text”: “Shine the light parallel to the floorboards to create glancing light.”}, {“@type”: “HowToStep”, “text”: “Identify shadows or dark pockets that indicate a dip in the finish or subfloor.”}, {“@type”: “HowToStep”, “text”: “Mark these areas with blue painter tape for correction.”}]}