
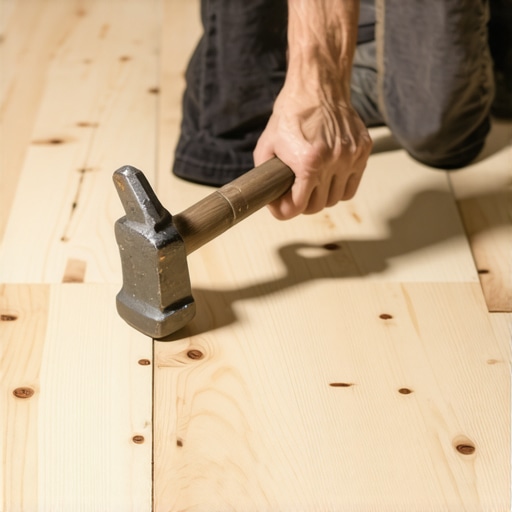
The physics of the strike and why your flooring warranty depends on it
The smell of WD-40 and fresh oak dust usually means the job is half done, but the quality of that second half depends entirely on the tools sitting in your bucket. Most guys skip the leveling compound. They think the underlayment will hide the dip. It won’t. I spent three days grinding concrete on a job last month just so the floor wouldn’t click like a castanet. That client had bought the most expensive laminate on the market, but the subfloor was a rolling hill of imperfections. If I had just started swinging a standard hammer, the tongues would have shattered within the first ten rows. You need to understand that the modern click-lock joint is a precision engineered marvel of geometry and friction. It is not a nail that you can just beat into submission. When you use a dead-blow mallet, you are managing kinetic energy in a way that protects the structural integrity of the plank. Using a standard rubber mallet is like bringing a sledgehammer to a surgery. The rebound alone can cause the tongue to vibrate and crack at a molecular level, leading to floor failure six months down the line when the seasonal humidity shifts.
The answer to why dead blow mallets are mandatory for professionals
Dead-blow mallets are the only acceptable tool for seating click-lock planks because they eliminate the rebound effect that causes micro-fractures in the HDF core. By using a canister filled with steel shot, these mallets deliver a sustained impact that pushes the tongue into the groove without the sharp, destructive vibration of a standard hammer. This ensures the locking mechanism remains intact and the expansion gap stays consistent across the entire subfloor surface.
The ghost in the expansion gap
Every floor breathes. Whether you are installing hardwood floors or laminate, the material reacts to the ambient moisture in the room. If you do not leave a 1/4 inch gap at the perimeter, the floor will eventually crown or buckle. But the mallet plays a role here too. When you use a standard hammer and a tapping block, the force is often too concentrated. You might think the joint is tight, but you have actually crushed the internal fibers of the locking profile. This creates a tiny space where moisture can settle. I have seen showers that leaked into hallways where the only planks that failed were the ones that had been over-driven with a hard mallet. The dead-blow mallet allows for a firm, dead-weight strike that seats the plank without compressing the core material beyond its elastic limit. It is about the duration of the force, not just the magnitude. A dead-blow strike lasts milliseconds longer than a rubber mallet strike, and that tiny window of time is what allows the friction of the locking mechanism to be overcome without shattering the wood fibers.
“A floor is only as good as the subfloor beneath it; deflection is the enemy of every joint.” – Master Flooring Axiom
The chemistry of the locking mechanism
Under a microscope, the tongue of a laminate plank is a series of ridges and valleys. When you slide that tongue into the groove, you are relying on the tensile strength of the High-Density Fiberboard or the stone-plastic composite core. If you hit that plank with a hammer that bounces, you create a shockwave. This wave travels through the material and can cause delamination of the wear layer. This is especially true in cheaper products where the binder resins are brittle. A dead-blow mallet stops that shockwave at the point of impact. The steel shot inside the head moves forward as you hit, canceling out the recoil. This physics principle is why your grout lines in tile jobs stay straight and your click-lock joints stay sealed. You are transferring 100 percent of your energy into the horizontal movement of the plank rather than wasting half of it on a vertical bounce that ruins the material.
| Tool Type | Energy Transfer Efficiency | Rebound Risk | Core Damage Potential |
|---|---|---|---|
| Standard Rubber Mallet | 65% | High | Moderate |
| Steel Hammer | 95% | Extreme | Critical |
| Dead-Blow Mallet | 98% | None | Low |
| Dead-Blow with Poly Face | 99% | None | Minimal |
The 1/8 inch that ruins everything
If your subfloor has a dip larger than 1/8 inch over a six-foot span, the mallet won’t save you, but it will tell you there is a problem. When you tap a plank over a hollow spot with a dead-blow, the sound is flat and heavy. It tells you the subfloor is lying to you. A standard mallet will bounce off that hollow spot and make you think the joint is seated when it is actually hovering in mid-air. I tell my apprentices to listen to the mallet. The mallet is a diagnostic tool. In regions with high humidity like the Gulf Coast, the wood is already under stress. Adding mechanical stress from a poor installation tool is a recipe for a callback. You want the floor to sit naturally. You want the click to be audible but effortless. If you are swinging like you are at a carnival strength test, you have already lost the battle against the physics of the room.
- Always check subfloor moisture with a pin-less meter before starting.
- Ensure the room has been acclimated for at least 48 hours.
- Vacuum every inch of the subfloor to prevent grit in the joints.
- Use a 16-ounce or 22-ounce dead-blow mallet specifically.
- Replace the tapping block if the edges become rounded or frayed.
Why your subfloor is lying to you
Concrete slabs are notorious for holding onto moisture long after they look dry. Even if you are installing a waterproof LVP, that moisture can build up hydrostatic pressure and force the planks to separate. If you haven’t used the right mallet to ensure a liquid-tight mechanical bond at the joint, that vapor will find its way up. I have seen hardwood floors in the Pacific Northwest that looked like a roller coaster because the installer didn’t use a moisture barrier and then beat the planks so hard with a rubber mallet that the tongues were cracked before the house was even occupied. The cracks allowed the humidity to penetrate the core faster, accelerating the swelling. A dead-blow mallet ensures that the joint is as tight as the manufacturing tolerances allow, which is your first line of defense against topical spills and atmospheric moisture. It is the difference between a floor that lasts thirty years and one that needs to be ripped out in three.
“Adherence to subfloor flatness standards is the single most important factor in the longevity of any floating floor system.” – NWFA Technical Guidelines
The myth of the thick underlayment
One contrarian point I always argue with homeowners about is underlayment thickness. They think a thicker, squishier pad makes the floor feel better. It actually destroys the floor. A thick pad allows the floor to deflect too much when you walk on it. That deflection puts immense vertical pressure on the click-lock joint. If you used a dead-blow mallet to install it, you at least gave the joint a fighting chance. But if you used a standard hammer and already weakened the joint, that extra padding will snap the tongues off in a matter of weeks. You want a high-density, thin underlayment. You want the floor to feel solid, like it is part of the house, not like a trampoline. The dead-blow mallet helps you achieve this by seating the planks firmly against each other so they act as a single monolithic slab rather than individual pieces that can shift and slide. This is how you build a floor that doesn’t creak when the temperature drops in the winter.