
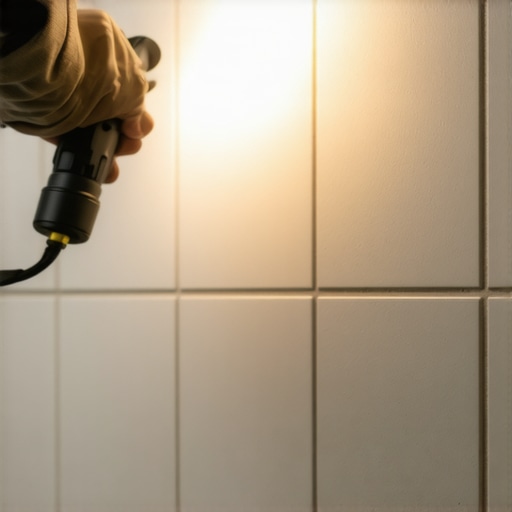
The tactical physics of side lighting
Side lighting, also known as the flashlight angle, involves placing a high-lumen light source parallel to the tile surface to reveal grout voids, pinholes, and shading issues. This technique highlights topographical irregularities that are invisible under standard overhead lighting, ensuring a waterproof and structurally sound shower installation. Most guys skip the leveling compound. They think the underlayment will hide the dip. It won’t. I spent three days grinding concrete on a job last month just so the floor wouldn’t click like a castanet. That same laziness leads to grout voids. If the tile isn’t fully supported, it moves. If it moves, the grout cracks. Use the light, and it’ll show you exactly where the failure started. I smell like WD-40 and oak dust most days because I care about the structural guts of a room, not just the shiny parts. A grout void is a direct path for moisture to reach your substrate, and in a high-moisture environment, that is a death sentence for your subfloor.
Why your subfloor is lying to you
Subfloor deflection is the leading cause of grout failure because it creates shear stress that the rigid cementitious matrix cannot absorb. Even if the grout looks perfect from a standing height, micro-cracks and internal voids can allow water to bypass the tile and rot the plywood or OSB beneath. If you are installing over laminate or hardwood floors in an adjacent room, a leak in the shower grout will eventually migrate, causing the wood to cup and the laminate to swell at the edges. I have seen guys try to grout over a bouncy floor, and it never works. The light reveals the truth of the installation. When you lay a flashlight flat against the tile, any dip in the grout line casts a long, sharp shadow. This is simple geometry. A hole that is only a millimeter deep will cast a shadow ten times its length when the light hits at a low angle. If you see those shadows, you have a void that needs to be filled before the sealer goes on.
“A floor is only as good as the subfloor beneath it; deflection is the enemy of every joint.” – Master Flooring Axiom
The chemistry of a failing grout joint
Grout hydration requires a specific water-to-powder ratio to ensure the Portland cement crystals grow into a dense, non-porous structure. When an installer adds too much water to make the grout easier to spread, they create capillary channels and pinholes as the excess water evaporates. These pinholes are the voids we are looking for with the flashlight angle. In dry climates like Phoenix, the grout can dry too fast, leading to a weak, chalky finish. In humid areas like New Orleans, the moisture stays in the joint too long, potentially affecting the color consistency. You have to understand the molecular reality of what is happening in that 1/8 inch gap. The polymer additives in modern grouts are designed to provide flexibility, but they cannot bridge a gap where there is no material. A void is a structural vacancy. It is a place where the mechanical bond between the tile edge and the grout is broken. If you do not catch these during the walkthrough, you are leaving the door open for mold growth and substrate failure.
Comparing grout performance characteristics
Grout selection should be based on the width of the joint and the moisture exposure of the specific installation area. Selecting the wrong material for showers or areas near hardwood floors can lead to cracking and water infiltration. Below is a breakdown of how different materials behave under the flashlight test.
| Grout Type | Porosity Level | Flexural Strength | Best Use Case |
|---|---|---|---|
| Unsanded Grout | High | Low | Wall tiles with joints under 1/8 inch |
| Sanded Grout | Medium | Medium | Floor tiles with joints over 1/8 inch |
| Epoxy Grout | Near Zero | High | Showers and high-traffic commercial zones |
| High-Performance Cement | Low | Medium-High | Residential floors and wet areas |
The precision checklist for a void free shower
Grout inspection must follow a systematic protocol to identify structural weaknesses before the waterproofing layer is compromised. Use this checklist during your final walkthrough to ensure the longevity of the installation.
- Place a 500-lumen flashlight directly against the tile surface at the base of the wall.
- Slowly sweep the beam across every horizontal and vertical grout line.
- Mark any shadow-casting holes with a piece of blue painter tape.
- Check the corners and change-of-plane joints for any signs of cracking or shrinkage.
- Verify that the grout is flush with the chamfered edge of the tile but not overflowing.
- Inspect the transition where the tile meets other materials like laminate or hardwood floors.
“Standard grout joint widths must account for the dimensional stability of the substrate to prevent compressive shear.” – Tile Council of North America Standard
Environmental factors and vapor drive
Hydrostatic pressure and vapor drive can force moisture through grout voids and into the subfloor assembly, leading to structural rot. This is especially dangerous when showers are built over crawlspaces with high humidity levels. The air wants to move from high pressure to low pressure, and it will take water vapor with it. If your grout is full of pinholes, your tile acts like a sieve. I have seen hardwood floors in bedrooms rot from the bottom up because the master shower had voids in the grout that let steam saturate the joists. It is not just about the water you see; it is about the vapor you do not see. Using the flashlight angle allows you to catch these microscopic entry points. You want a dense, packed joint. You want the grout to be an impenetrable barrier. While some people want the thickest underlayment, too much cushion actually causes the locking mechanisms on LVP to snap under pressure, and similarly, too much movement in a subfloor will snap the bonds of your grout. There is no shortcut for a flat, stable floor.
Final inspection notes
Grout maintenance begins with a thorough inspection and the application of a high-quality sealer to close any micro-pores remaining after the hydration process. Do not let a contractor tell you that pinholes are normal. They are signs of poor mixing or rushed application. If you find a void, scrape out the loose material and re-apply fresh grout. Do not just smear a little over the top. It will not bond correctly. You need to ensure the new grout integrates with the old at a molecular level. Once the repairs are made, run the light over it one last time. If the shadows are gone, the floor is solid. This is how you build a surface that lasts for thirty years instead of three. It is about the physics of the shadow and the chemistry of the cement. Take the time to get on your knees with a light. Your subfloor will thank you. “,”image”:{“imagePrompt”:”A close-up, low-angle shot of a hand holding a bright LED flashlight flat against a gray subway tile wall in a shower, with the light beam casting long shadows across the grout lines to reveal small holes and voids.”,”imageTitle”:”The Flashlight Angle for Grout Inspection”,”imageAlt”:”Flashlight held against tile to show grout voids through shadow casting”},”categoryId”:0,”postTime”:””}