
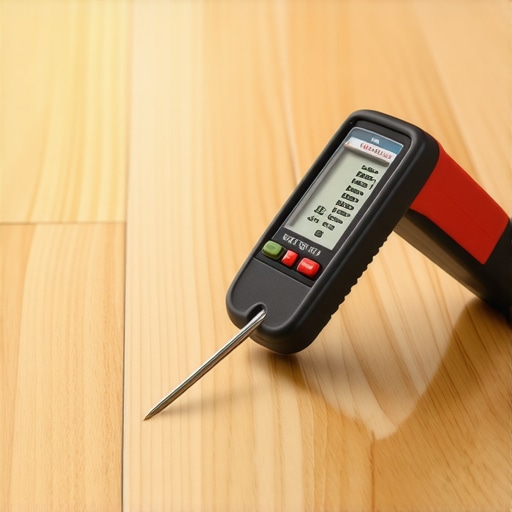
I once walked into a house where a $15,000 wide-plank walnut floor was cupping so bad it looked like a potato chip because the installer didn’t check the crawlspace humidity. The homeowner was standing in the kitchen crying while the contractor was ghosting her phone calls. The wood was literally screaming, making sharp popping sounds as the fasteners pulled out of the subfloor. Every single plank was ruined. All of that heartbreak and financial loss could have been avoided with a tool that costs less than a decent lunch at a diner. I have spent twenty five years with sawdust under my nails and a permanent knot in my back from laying thousands of square feet of oak, maple, and exotic hardwoods. I smell like floor wax and WD-40 most days, and if there is one thing I have learned, it is that moisture is a silent killer of craftsmanship. You can buy the most expensive grade of clear timber, but if you put it over a wet subfloor, you are just throwing money into a swamp. A floor is a performance surface that must interact with the physics of your home. It is not just a decoration that you slap down and forget about. If you do not respect the equilibrium moisture content, the wood will teach you a lesson you cannot afford.
The invisible water inside your oak
Hardwood floors are hygroscopic materials that naturally absorb and release moisture to stay in balance with their environment. This means your floor is a living, breathing entity that reacts to the relative humidity of the air and the moisture content of the subfloor. When a tree is first felled, it is saturated with water. The kiln drying process brings that moisture down to a stable level, usually between six and nine percent. However, the moment that wood enters your home, it begins to adjust to the local climate. If you live in a humid area, the wood cells will swell as they take on water. If the air is bone dry, the wood will contract. This movement is predictable, but only if you have the data to track it. A moisture meter allows you to see the invisible water levels inside the grain. Without it, you are just guessing. Most people think they can tell if wood is dry by looking at it, but that is a dangerous lie. You cannot see the water trapped in the heartwood until it is too late and the boards start to gap or buckle against the baseboards.
“A floor is only as good as the subfloor beneath it; deflection is the enemy of every joint.” – Master Flooring Axiom
Why concrete never truly dries
Concrete slabs act like massive sponges that hold onto water for months after they are poured. Even a slab that looks grey and dry on the surface can be harbor immense amounts of hydrostatic pressure deep within its core. Standard industry rules suggest that you need at least thirty days of drying time for every inch of concrete thickness, but that is a baseline, not a guarantee. If you install hardwood or laminate over a slab that is still off-gassing moisture, that vapor will rise and get trapped under your flooring. This leads to adhesive failure, mold growth, and the dreaded cupping where the edges of the planks rise higher than the center. I always use a pinless meter to scan the surface and then follow up with a pin-type meter if I suspect deep-seated dampness. You are looking for a moisture vapor emission rate that meets the manufacturer specifications. If the slab is too wet, you must apply a high quality moisture barrier or wait. There are no shortcuts here. I have seen guys try to use cheap plastic sheets to hide a wet slab, only to have the entire floor rot from the bottom up within two years. It is a mess that requires a total tear out and replacement.
The structural lie of waterproof flooring
Waterproof laminate and luxury vinyl plank are only waterproof from the top down, not the bottom up. This is the biggest scam in the flooring industry today. Manufacturers market these products as if you could submerge them in a pool. While the plastic or composite core might not rot, the moisture trapped underneath will still destroy your home. High moisture levels under a floating floor will lead to black mold colonies that thrive in the dark, damp space between the underlayment and the subfloor. Furthermore, if you lock a floating floor under a heavy kitchen island or bolt it down with transitions, you kill its ability to expand and contract. The floor needs to move as a single unit. When moisture causes the subfloor to shift, that pressure has to go somewhere. Usually, it results in the locking mechanisms snapping. Once those tiny plastic tongues break, the floor will start to click like a castanet every time you walk on it. No amount of tapping blocks or glue will fix a snapped joint. You have to be smarter than the marketing department and realize that water management starts at the subfloor level.
Navigating the Janka Hardness Scale
The Janka Hardness Scale measures the force required to embed a small steel ball into a piece of wood to determine its durability. This is a vital metric for anyone choosing between different species of hardwood floors. If you have large dogs or a busy household, choosing a soft wood like American Cherry is a mistake. You want something with a higher rating like White Oak or Hickory. However, hardness does not mean stability. In fact, some of the hardest woods are the most temperamental when it comes to moisture. Brazilian Cherry is incredibly hard, but it moves significantly with small changes in humidity. You have to balance the need for dent resistance with the reality of your local climate. In a dry region, a very stable wood like Engineered Oak is often a better choice than a rock hard exotic that will shrink and leave gaps big enough to lose a credit card in. [IMAGE_PLACEHOLDER] Use the following table to understand how different common species compare on the hardness scale and how they should be handled during installation.
| Wood Species | Janka Rating | Stability Rank | Recommended Use |
|---|---|---|---|
| Hickory | 1820 | Medium | High traffic kitchens |
| Hard Maple | 1450 | Low | Modern minimalist lofts |
| White Oak | 1360 | High | All purpose residential |
| Red Oak | 1290 | High | Standard family homes |
| Black Walnut | 1010 | Medium | Low traffic bedrooms |
| Douglas Fir | 660 | Low | Rustic decorative areas |
The subfloor leveling manifesto
A flat subfloor is the foundation of a quiet and long lasting installation. Most installers skip the leveling compound because it is messy and takes time to dry. They think the underlayment foam will hide the dips and humps in the plywood or concrete. It will not work. Any deviation greater than 3/16 of an inch over a ten foot radius will cause the flooring to flex. This vertical movement, known as deflection, puts immense stress on the tongues and grooves of your hardwood floors. Over time, this stress causes the wood to squeak and the finish to crack at the seams. I spent three days grinding concrete on a job last month just so the floor wouldn’t click. It was backbreaking work, but it was the only way to ensure the warranty remained valid. You have to check the floor with a long straightedge before you ever open a box of planks. If you find a low spot, fill it with a high compression strength floor leveler. If you find a high spot, sand it or grind it down. Your future self will thank you when you can walk across the room in the middle of the night without waking up the whole house.
The physics of the perimeter expansion gap
Every professional installation requires a dedicated expansion gap around the entire perimeter of the room to allow for natural movement. Wood expands outward when it gets warm or humid. If you push the planks tight against the drywall or the baseboards, the floor has nowhere to go. It will eventually hit the wall and then start to lift in the center of the room, creating a bubble. I have seen floors lift six inches off the subfloor because the installer didn’t leave a gap. You need at least a half inch of space, which is then covered by your baseboard or shoe molding. Do not ever put grout or caulk in this gap. It must remain empty. Also, avoid the temptation to pin the flooring down with heavy cabinetry. If you are installing a new kitchen, the cabinets should go in first, and the floor should be installed around them with the proper gaps. Locking a floor under thousands of pounds of granite and oak cabinets is a recipe for a buckled mess the first time the seasons change.
- Acclimate the wood in the room where it will be installed for at least seven days.
- Check the moisture content of at least twenty planks per thousand square feet.
- Ensure the subfloor moisture is within four percent of the flooring moisture.
- Run the HVAC system at normal living conditions during the entire process.
- Use a high quality vapor retarder between the subfloor and the wood.
- Document all moisture readings with photos for warranty protection.
The chemistry of failure in laminate and grout
Laminate flooring and tile grout fail most often due to improper mixing or moisture intrusion at the joints. In showers, the grout is not the primary waterproof layer; the membrane behind the tile is. However, if the grout is mixed with too much water, it becomes porous and brittle. This allows water to seep through and sit against the subfloor. For laminate, the edges are the most vulnerable point. Even if the surface is resin coated, the core is usually high density fiberboard which is basically compressed sawdust. If you use a soaking wet mop to clean your laminate, the water will find its way into the seams. Once the fiberboard gets wet, it swells and the edges of the planks will begin to peak. This damage is permanent. You cannot dry out a laminate floor once the core has blown. This is why I always tell people to use a damp, not wet, microfiber cloth and a dedicated pH neutral cleaner. Treating your floor like a sidewalk that needs a power wash is the fastest way to void your warranty and ruin your investment.
“Moisture is the single most common cause of flooring complaints and failures in North America.” – NWFA Technical Publication
The ten dollar moisture meter ritual
Owning a basic pin type moisture meter is the best insurance policy a homeowner can buy for their renovation. You do not need a three hundred dollar professional unit to get a baseline reading. A simple ten dollar tool from a hardware store will give you a close enough percentage to know if you are heading for a disaster. Before you start your project, stick the pins into the subfloor and the back of your new flooring planks. Write the numbers down. If the subfloor is at fifteen percent and the hardwood is at seven percent, do not install it. You need to wait until those numbers are within a few points of each other. This is called reaching equilibrium. It might take a week, or it might take a month depending on the weather. I know everyone is in a rush to see their new floor, but rushing this step is how you end up with a fifteen thousand dollar mistake. Be patient, trust the meter, and respect the science of the wood cell. A good floor should last a lifetime, but only if you give it the right start. Do not let a few days of impatience ruin a decade of beauty. Keep your tools sharp, your subfloor flat, and your moisture meter handy at all times.