
Most guys skip the leveling compound. They think the underlayment will hide the dip. It won’t. I spent three days grinding concrete on a job last month just so the floor wouldn’t click like a castanet. The homeowner thought I was crazy. They saw a flat slab. I saw a topographical map of a mountain range. Every high point was a pivot that would eventually snap the tongue and groove of the hardwood or crack the grout on the tile. If you don’t respect the subfloor, the subfloor will humiliate you. I have seen the way hardwood floors fail when the subfloor moisture is ignored. I have seen showers turn into moldy nightmares because the waterproofing was a suggestion rather than a rule. When we talk about tile, the suction cup test is the last line of defense before you commit to the grout.
The vacuum pull reveals the hidden truth
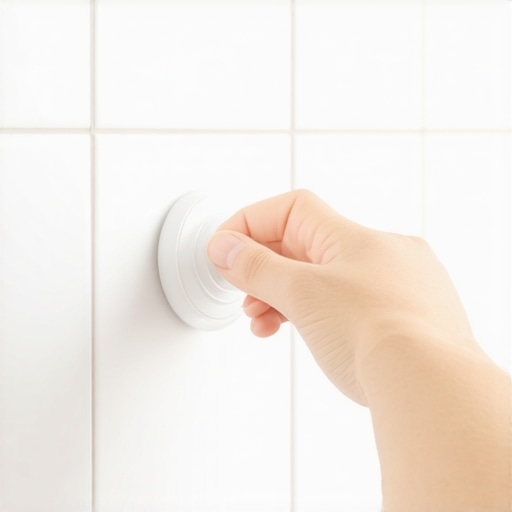
The suction cup test verifies the mechanical bond between the tile and the substrate by using vacuum pressure to detect voids or adhesion failure. This diagnostic procedure identifies tiles that have not properly wetted out the mortar bed, ensuring the installation meets TCNA standards before the grout is applied. Professional installers use this to confirm that the mortar has not skinned over during the installation process. If a tile lifts during this test, it indicates that the chemical bond has failed. This usually happens when the mortar has been spread over too large an area, allowing the surface to dry before the tile makes contact. You cannot fix a loose tile with grout. Grout is not glue. It is a filler designed to accommodate movement and keep debris out of the joints. If the tile moves, the grout will pulverize into a fine dust within weeks. I have seen it happen on countless ‘discount’ jobs where speed was prioritized over science.
“A floor is only as good as the subfloor beneath it; deflection is the enemy of every joint.” – Master Flooring Axiom
Why your mortar bed might be failing
Mortar bed failure occurs when the thinset loses its ability to transfer to the back of the tile, often due to improper trowel size or environmental factors. High heat or low humidity can cause the mortar to skin over, creating a non-adhesive barrier that prevents a secure bond. When you trowel out your mortar, you are creating ridges that are meant to collapse. This collapse is what ensures total coverage. If the ridges are too dry, they stay as ridges. They do not flatten out to wet the back of the tile. This is why the suction cup test is so effective. It mimics the stresses the floor will face from foot traffic and furniture loads. If the tile comes up, you will see exactly what happened. Often, you will see the trowel marks still perfectly formed on the substrate, with no mortar on the back of the tile. That is a failed bond. It is a sign that you need to slow down and check your environmental conditions. Maybe you need to dampen the substrate first. Maybe you need a different polymer modifier in your mix.
| Mortar Type | Open Time (Minutes) | Adhesion Strength (PSI) | Best Use Case |
|---|---|---|---|
| Unmodified Thinset | 10 to 15 | 150 to 200 | Concrete Substrates |
| Modified Thinset | 20 to 30 | 250 to 400 | Plywood or LVP Overlays |
| Rapid Set Mortar | 5 to 10 | 300+ | Quick Repairs |
| Epoxy Mortar | 45 to 60 | 700+ | Chemical Resistance |
The science of thinset hydration and suction
Thinset hydration involves a chemical reaction between Portland cement and water that forms interlocking crystals to create a permanent bond. Polymer additives like ethylene vinyl acetate improve this process by increasing flexibility and bond strength to non-porous surfaces such as porcelain or waterproof membranes. When we use a suction cup, we are testing the tensile strength of these developing crystals. The vacuum created by the cup applies a concentrated upward force. A properly set tile should feel like it is part of the house. It should not budge. If it pops, the crystallization was interrupted. This interruption often comes from dust. If you do not wipe the back of your tiles, you are bonding to a layer of dust instead of the ceramic itself. It is a rookie mistake that costs thousands in repairs. I always keep a damp sponge nearby. Every single tile gets wiped before it hits the mud. It is tedious. It is slow. It is also the only way to guarantee the floor lasts fifty years.
Using the suction cup as a diagnostic tool
To perform the suction cup test correctly, place the tool in the center of a newly set tile and pull vertically with moderate force. This should be done within the first hour of installation while the mortar is still in its plastic state to allow for immediate correction. Listen for a clicking sound or a hollow thud. These are the sounds of failure. If the tile moves, pull it up immediately. Scrape the old mortar off the floor and the tile. Apply fresh mud. This is much easier than trying to chip out a single tile once the grout has dried. I have seen guys try to inject epoxy under a loose tile later. It never works right. It is a band-aid on a broken leg. The suction cup doesn’t lie. It tells you the truth about your technique and your materials. It is the most honest tool in my bag.
- Ensure the tile surface is clean and dry before applying the suction cup.
- Pull from the corners of large format tiles to check for edge lift.
- Verify that the mortar has 95 percent coverage in wet areas like showers.
- Check the subfloor for deflection if multiple tiles fail in the same area.
- Monitor the ambient temperature to adjust your open time expectations.
The impact of air temperature on tile adhesion
Air temperature and substrate temperature directly influence the rate of evaporation and the chemical curing speed of flooring adhesives and mortars. Temperatures above 85 degrees Fahrenheit can cause flash drying, while temperatures below 50 degrees can stall the hydration process entirely. In the dry heat of Phoenix, you have to be careful. Your thinset will dry on the floor before you can even get the tile out of the box. In those conditions, I use a perimeter-based approach. I only spread enough mud for two or three tiles at a time. It feels like it takes forever, but I don’t have tiles popping off two weeks later. You have to respect the chemistry. You aren’t just laying down stones. You are managing a chemical reaction that requires a specific temperature range to succeed. If the house isn’t climate controlled yet, you are gambling with the owner’s money.
“The maximum allowable variation for tile substrate is 1/8 inch in 10 feet for large format units.” – TCNA Handbook Standards
Why grout cannot fix a loose tile
Grout is a cementitious or epoxy material designed to fill joints and provide lateral stability, but it lacks the structural integrity to hold a tile to the subfloor. A loose tile will continue to move under load, eventually cracking the grout and compromising the entire floor system. People see a crack in the grout and think they just need a little more grout. They are wrong. The crack is a symptom of movement. If the tile is moving, the bond is broken. The suction cup test prevents this entire scenario by catching the movement before the grout is even mixed. If you ignore a loose tile and grout over it, you are just hiding the problem for a few months. Eventually, the friction of the moving tile will turn the grout into a powder. Then the moisture gets in. Then the subfloor starts to rot. It is a chain reaction that starts with a single poorly bonded tile. I don’t take those chances. If it doesn’t pass the pull test, it comes up.
Managing the transition to hardwood floors
Transitioning from tile to hardwood floors requires careful planning of subfloor heights and expansion gaps to prevent buckling and lippage. Hardwood expands and contracts with humidity, while tile remains dimensionally stable, necessitating a flexible transition point that can handle independent movement. When I am running tile up against a white oak floor, I am looking at the heights. I often have to use a thinner underlayment for the tile to make it flush. But even then, I never butt them tight. You need that gap. You need to let the wood breathe. If the wood expands and hits the tile, it will either pop the tile loose or buckle the wood. I have seen $15,000 wide-plank walnut floors cupping because the installer didn’t leave room at the transition. It is all about the physics of the materials. Wood is alive. Tile is stone. They don’t speak the same language, so you have to act as the translator. That means respecting the expansion gap and using the right transition molding if a flush finish isn’t possible. The suction cup test helps here too by ensuring the edge tiles are locked down tight. If the edge tiles move, the transition will fail. It is a high-stress area that gets kicked every time someone walks by. It has to be perfect. No shortcuts. No excuses. Just solid engineering from the joists to the finish.