
I smell like WD-40 and oak dust because I spent the morning calibrating my miter saw for a set of zero-threshold transitions. My boots have seen more thin-set than your local hardware store clerk has seen customers, and my knees have the scars to prove it. Most guys skip the leveling compound. They think the underlayment will hide the dip. It won’t. I spent three days grinding concrete on a job last month just so the floor wouldn’t click like a castanet. The owner wanted to save five hundred bucks on self-leveler but ended up paying me triple that in labor to fix the humps I found with my ten foot straightedge. That is the reality of the flooring business. If you do not respect the physics of the substrate, the cosmetics of the surface will fail you every single time. One of the most overlooked aspects of a professional tile installation is the final cleanup phase, specifically what I call the sponge squeeze rule. It sounds simple, but it is the difference between a floor that lasts fifty years and one that looks like a hazy, crumbling mess within six months.
The science of the thirsty sponge
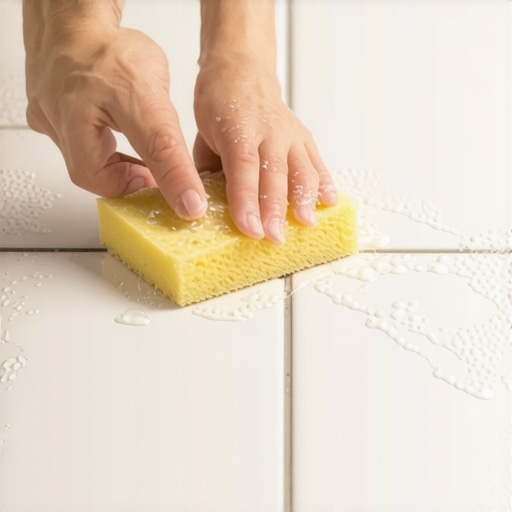
The sponge squeeze rule dictates that a grout sponge must be damp but never dripping to prevent washing out cementitious binders. Excess water dilutes the pigment and weakens the chemical bond of the grout, leading to pinholes and structural failure in the joints of showers and tiled floors. When you dip that yellow hydrophilated polyester sponge into the bucket, the temptation is to leave it heavy to save time. That is a rookie mistake that ruins the integrity of the installation. The sponge squeeze rule requires a two-handed compression that leaves the sponge feeling like a wrung-out chamois. If you see a single drop of water fall from the sponge when you move it toward the wall, you are carrying a weapon of mass destruction for your grout joints. Grout is not just a filler; it is a structural component of the tile assembly. When you introduce too much water during the cleanup phase, you are performing a process called washing the joint. This pulls the pigment from the top layer of the grout, leaving you with splotchy colors that the client will complain about once the floor dries. More importantly, it adds water to the chemical mix, which ruins the water-to-cement ratio. This leads to soft grout that will eventually crumble into dust when you run a vacuum over it. [IMAGE_PLACEHOLDER]
Why your subfloor is lying to you
Subfloors often appear flat to the naked eye but contain microscopic dips and peaks that compromise the locking mechanisms of laminate and hardwood floors. A floor is only as good as the surface it rests upon, and ignoring a 1/8 inch deviation over ten feet will result in vertical movement that eventually snaps the plastic tongues of modern click-lock systems. You have to understand that plywood and OSB react differently to humidity. Plywood tends to remain more stable, while OSB can swell at the edges when exposed to even a small amount of moisture during construction. If those edges are not sanded down before the underlayment goes down, you are building your floor on a series of miniature mountains. I always tell my apprentices that the level does not lie, but the builder often does. When they say a floor is ready for finish, I still pull out the ten foot straightedge and my moisture meter. If I am laying hardwood floors, I need to know the moisture content of the subfloor and the wood planks. If the difference is more than 4 percent for solid oak or 2 percent for wide-plank walnut, that floor is going to move. It will cup or it will gap, and no amount of finish will hide the structural failure. This is why acclimation is not a suggestion; it is a requirement. You cannot just bring wood from a climate-controlled warehouse into a humid house and expect it to behave. It needs time to reach equilibrium with the environment it will live in forever.
“A floor is only as good as the subfloor beneath it; deflection is the enemy of every joint.” – Master Flooring Axiom
The ghost in the expansion gap
Expansion gaps are the mandatory spaces left around the perimeter of hardwood floors and laminate installations to allow for seasonal movement. Without these gaps, usually 1/4 to 1/2 inch, the floor will buckle or cup as humidity increases, causing irreversible structural damage to the locking mechanisms and the wood fibers themselves. People hate the look of baseboards and shoe molding, but they are there for a reason. They hide the gap that allows your floor to breathe. In the swampy humidity of Houston, for example, solid wood is a death wish if you do not account for massive expansion. You need engineered cores in those environments because they are designed to be dimensionally stable. In the dry heat of Phoenix, the opposite happens. Your wood will shrink until your baseboards show a gap that you could fit a pencil into. You have to understand the geography of the jobsite. The climate dictates the chemistry of the installation. If you are installing laminate, you have to be even more careful. Laminate is essentially high-density fiberboard with a picture of wood on top. If that fiberboard gets wet, it expands like a sponge and never goes back to its original size. This is why the concept of waterproof laminate is mostly marketing. The surface may be waterproof, but the joints are the Achilles heel. If water sits in those joints for too long, the floor is toast.
Comparing grout types and performance
Selecting the right grout is just as important as the tile itself, especially when considering the traffic and moisture levels of the room. Different formulations have varying levels of resistance to stains and water penetration.
| Grout Type | Best Use Case | Cleanup Difficulty | Water Sensitivity ||
|—|—|—|—||
| Sanded Grout | Joints over 1/8 inch | Moderate | High ||
| Unsanded Grout | Joints under 1/8 inch | Easy | Medium ||
| Epoxy Grout | Commercial Kitchens | Very High | Low ||
| High-Performance Cement | Showers and Baths | Moderate | Medium |
As you can see, epoxy grout is the king of durability, but it is a nightmare to clean up if you do not know the sponge squeeze rule. It sets up fast and becomes like plastic. If you leave a haze of epoxy on a textured tile, you might as well replace the tile because you are never getting it off without a jackhammer. Cement-based grouts are more forgiving but require much more precision with water management. I have seen guys use a garden hose to clean up grout in a shower pan. That is a crime against the trade. You are literally washing away the structural integrity of the floor.
The checklist for a permanent bond
Before you ever open a bag of thin-set or a box of hardwood, you need to go through the professional sequence. Skipping a single step here is how you end up with a clicking floor or a cracked tile. Here is how I handle every jobsite.
- Verify subfloor levelness to within 1/8 inch over a 10-foot radius using a laser or straightedge.
- Check moisture levels in the subfloor and the finish material using a calibrated pin-less meter.
- Ensure the ambient temperature and humidity of the room have been stable for at least 72 hours.
- Vacuum the substrate until you could eat off it; dust is the ultimate bond-breaker for adhesives.
- Dry-lay the first three rows to establish a balanced layout and avoid tiny slivers at the walls.
- Mix all mortar and grout according to the manufacturer’s exact water-to-powder ratio using a digital scale.
The 1/8 inch that ruins everything
The industry standard for floor flatness is 1/8 inch deviation over 10 feet because larger gaps create voids under the planks that lead to structural failure. When you walk across a floor and hear a hollow thud or a clicking sound, you are hearing the sound of a poor installation. That noise is the flooring material slapping against the subfloor. Over time, this repeated stress will cause the joints to fail. In tiled areas, this lack of flatness leads to lippage, where one tile sits higher than the next. Lippage is not just an eyesore; it is a trip hazard and a point of failure for the grout joints. If the tile is not fully supported by thin-set, it will crack under the pressure of a heavy appliance or even just a heavy footfall. I have spent decades telling people that the pretty part of the floor is only 10 percent of the job. The other 90 percent is the prep work that nobody sees. That is why I despise builder-grade carpet. It is designed to hide the sins of the subfloor. When you pull up that carpet to install hardwood, you often find a disaster zone of uneven concrete and loose plywood. You have to fix those sins before you lay a single plank of oak. If you don’t, you are just building a house on sand.
“Proper hydration is the catalyst for structural integrity in cementitious bonds.” – TCNA Industry Standard
The chemistry of the bond
Grout is a mixture of Portland cement, graded aggregates, and chemical additives like polymers or pigments. When water is added, a chemical reaction called hydration begins. This isn’t just drying; it’s a molecular restructuring. The water reacts with the calcium silicates in the cement to form a calcium silicate hydrate (C-S-H) gel. This gel grows into microscopic crystals that interlock with the edges of your tile. If you add too much water during the cleanup phase, you disrupt this crystal growth. You are literally stopping the floor from becoming a solid mass. This is why the sponge squeeze rule is not just about aesthetics; it is about chemistry. If the crystals cannot form properly because they are drowning in excess water, the grout will be weak and porous. In a shower, this is a disaster. Porous grout will hold moisture through capillary action, leading to mold growth that no amount of bleach will fix. You want that grout to be as dense and hard as the tile itself. That only happens when you respect the water-to-cement ratio from the bucket to the final wipe. I have seen showers that had to be gutted after only two years because the installer was lazy with his sponge. The moisture got behind the tile, rotted the studs, and created a structural nightmare. All because he didn’t want to squeeze his sponge out twice. It is a shame, but it is a lesson every pro learns eventually. You either do it right the first time, or you do it for free the second time.