
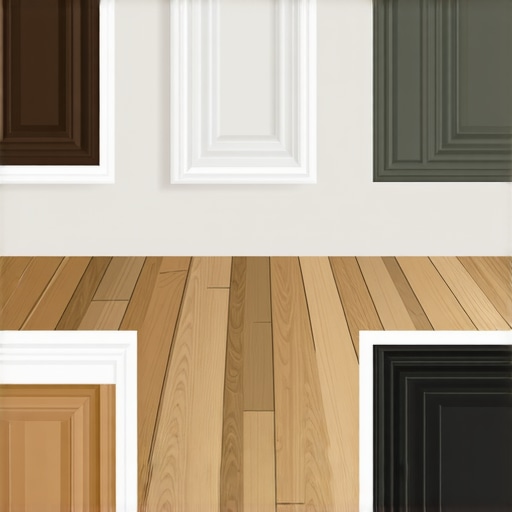
How to Match Your Baseboards to Wide Plank Hardwood
I once walked into a house where a $15,000 wide-plank walnut floor was cupping so bad it looked like a potato chip because the installer didn’t check the crawlspace humidity. The homeowner was focused on the paint color of the baseboards while the very foundation of their investment was literally pulling itself apart from the subfloor. This is the reality of high-end flooring. If you treat a wide plank installation like a simple decorative weekend project, you are going to lose your shirt. Wide planks are not just wood. They are dynamic, living structural elements that exert massive leverage against your walls as the seasons change. Matching your baseboards to these planks is a matter of engineering first and aesthetics second.
The movement physics of wide plank systems
Wide plank hardwood floors require larger expansion gaps than standard strips because the total movement is cumulative across the width of the board. A seven inch plank will expand significantly more than a three inch strip. Your baseboards must be thick enough to cover a minimum three quarter inch expansion gap at the perimeter. When you increase the surface area of the timber, you increase the number of hygroscopic cells that react to atmospheric moisture. Each cell acts like a tiny sponge. When the relative humidity in the room climbs above fifty percent, those cells swell. In a narrow board, that swelling is negligible. In an eight or ten inch wide plank, that swelling can move the entire field of the floor by a half inch or more. If your baseboard is too thin, or if you failed to leave a wide enough gap, the floor will hit the wall and begin to peak at the seams. This is why I always tell my clients that the baseboard is the safety valve of the entire room. It is the only thing standing between a flat floor and a structural failure.
The 1/8 inch that ruins everything
Precision in the subfloor levelness is the determining factor for how your baseboard will sit against a wide plank floor. If the subfloor has a deviation of more than one eighth of an inch over ten feet, the rigid wide planks will not follow the dip but will bridge over it. This creates a hollow space. When you go to install your baseboard, you will see a massive gap between the bottom of the wood and the top of the floor. You cannot just nail the baseboard down harder to close that gap. If you do, you are pinning the floor. A pinned floor cannot move. When the winter comes and the air dries out, the floor will try to shrink. Because you nailed the trim through the floor or too tight against it, the wood will split at its weakest point. This usually happens at the tongue and groove joint. I have spent three days grinding concrete on a job just so the floor would sit flat enough for the baseboards to look right. It is tedious work. It is dirty work. It is also the only way to ensure the floor doesn’t click like a castanet every time you walk across the room.
“A floor is only as good as the subfloor beneath it; deflection is the enemy of every joint.” – Master Flooring Axiom
Proportions and the visual weight of the perimeter
Matching baseboards to wide planks requires a shift in scale to maintain visual balance within the architectural space. Large planks dwarf small trim. A five inch wide plank demands a baseboard height of at least six inches to avoid looking unbalanced and cheap. We are talking about the golden ratio of flooring. If you have ten inch white oak planks and you try to put a standard three inch builder grade baseboard on top of it, the room will look squat. The floor will feel heavy and the walls will feel thin. I prefer a substantial baseboard with a simple profile. You do not want a complex, busy molding competing with the natural grain of a wide plank floor. Let the wood do the talking. The baseboard should act like a frame on a painting. It should define the boundaries without distracting from the masterpiece. This is especially true when transitioning from hardwood floors to wet areas like showers where grout lines and tile meet the wood. The transition must be handled with a heavy hand to ensure the moisture barrier remains intact.
| Plank Width | Recommended Baseboard Height | Minimum Expansion Gap | Recommended Material |
|---|---|---|---|
| 5 Inches | 5.25 Inches | 1/2 Inch | Solid Wood or MDF |
| 7 Inches | 6.00 Inches | 5/8 Inch | Solid Wood |
| 9+ Inches | 7.50+ Inches | 3/4 Inch | Solid Wood |
The ghost in the expansion gap
The expansion gap is a literal void left between the edge of the hardwood and the wall framing to allow for natural movement. Baseboards must be thick enough at the bottom to cover this void even when the floor is at its maximum state of contraction. During the dry winter months, your wide planks will reach their narrowest point. This is when the ghost appears. The ghost is that ugly line of subfloor or dark shadow that becomes visible because your baseboard was not thick enough to cover the gap when the wood shrunk. Many installers try to hide this with a shoe mold or a quarter round. I hate shoe mold. It looks like an afterthought. It looks like you made a mistake and had to cover it up. If you choose a baseboard with a one inch thickness at the base, you can leave a healthy three quarter inch gap and never see the edge of the floor. It requires better carpentry. It requires back cutting the trim at the corners. It is worth every extra hour of labor.
Materials that survive the friction
The chemical composition of your baseboard material must be compatible with the finish of your wide plank hardwood. While MDF is popular for its stability, solid wood baseboards offer better resistance to the physical impact of vacuum cleaners and foot traffic. If you are using a site finished wide plank oak, you should use oak baseboards. The way the light hits the grain will be consistent. If you use a prefinished floor with a high aluminum oxide content in the wear layer, your baseboard finish needs to be equally tough. I have seen guys use cheap latex paint on baseboards next to a high end floor. Within six months, the paint is chipping and the floor still looks new. It creates a massive disparity in quality. Use a high solids alkyd paint or a matching polyurethane stain. You want a surface that can handle the micro movements of the house without cracking the paint line at the top of the trim. This is where the chemistry of the bond matters most. The caulk you use between the baseboard and the wall should have at least 25 percent movement capability.
“Wood is a hygroscopic material; it will always seek an equilibrium with its environment through the gain or loss of moisture.” – National Wood Flooring Association
The regional climate expert perspective
In high humidity regions like Houston or Florida, the choice of wide plank material and baseboard matching is a matter of survival for the installation. Engineered wide planks are often necessary to combat the extreme moisture levels that would destroy solid timber. If you live in a swamp, your floors are going to move more than a floor in the high desert of Phoenix. In humid climates, you need to acclimate your wood for at least fourteen days. You need to verify the moisture content of the subfloor and the planks with a pin meter. The baseboards in these regions should be installed with a slight relief on the back side to allow air to circulate. If you trap moisture behind a baseboard in a humid climate, you are inviting mold and rot into your wall cavity. In arid climates, the opposite is true. The wood will shrink so much that the gaps will become massive. You might even need to humidify your home just to keep the floor from cracking.
Installation checklist for a perfect match
- Measure the moisture content of the subfloor and the wide planks to ensure they are within 2 percent of each other.
- Level the subfloor to within 1/8 inch over a 10 foot radius using a self leveling compound if necessary.
- Select a baseboard that is at least 1 inch thicker than the required expansion gap for your plank width.
- Back cut the baseboards at a 45 degree angle for all inside corners to allow for tight joints.
- Use a high quality construction adhesive in addition to finish nails to secure the baseboard to the wall studs only.
- Never nail the baseboard into the hardwood floor as this will cause the planks to buckle or split.
- Apply a flexible high movement caulk to the top of the baseboard to prevent cracking during seasonal shifts.
The final verification of the structural perimeter
Before you call the job done, you have to walk the perimeter. You are looking for any sign of a pinch point. A pinch point is where the wood is tight against a door frame, a radiator pipe, or a bottom plate. If the floor is tight anywhere, the whole system fails. The baseboard is your cloak. It hides the necessary structural gap that allows your wide plank hardwood to exist in a state of tension and release. This is not about being a perfectionist. It is about understanding the physics of the materials you are working with. When you match the scale, the thickness, and the material of your baseboards to your wide planks, you are not just finishing a room. You are protecting a legacy. You are ensuring that thirty years from now, that floor will still be flat, the joints will still be tight, and the baseboards will still be standing guard over the expansion gap that saved the wood from itself.