
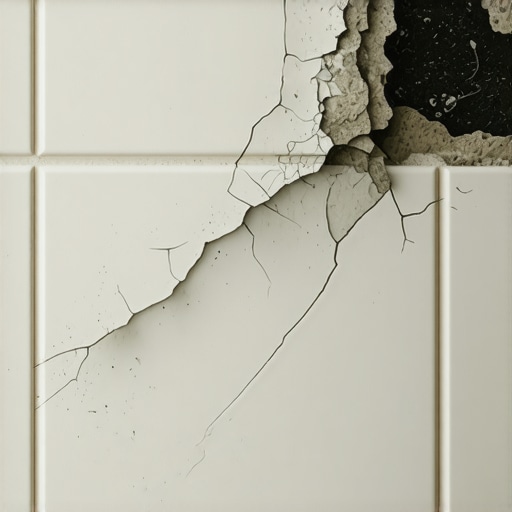
Most guys skip the leveling compound. They think the underlayment will hide the dip. It won’t. I spent three days grinding concrete on a job last month just so the floor wouldn’t click like a castanet. When it comes to showers, that same laziness leads to tiles popping off the wall like toast from a toaster. You see a tile on the floor and think it is just a bad batch of glue. It is never just the glue. It is the physics of the substrate. It is the moisture vapor transmission rate. It is the wrong thin-set for the job. A shower is a high-stress environment where water, heat, and structural movement collide. If your tiles are popping, you are looking at a fundamental failure of the bond coat or a structural deflection issue that should have been caught before the first spacer was set.
The physics of the hollow sound
Popping shower tiles usually occur due to poor thin-set coverage, improper substrate preparation, or excessive structural deflection that breaks the adhesive bond. When a tile detaches, it is often because the mortar did not achieve a ninety percent transfer to the back of the tile. This creates air pockets where moisture collects. Over time, the repeated heating and cooling of the shower causes these pockets to expand and contract. This mechanical stress eventually shears the bond. You can hear it when you tap the wall. That hollow thud is the sound of a failed installation. If you ignore it, the grout will eventually crack and water will begin to rot the framing behind the board.
The chemical failure of cheap thinset
The chemistry of the bond is everything in a wet environment. Standard unmodified thin-set relies on the formation of portland cement crystals that grow into the microscopic pores of the tile and the substrate. If you are using a dense, porcelain tile, those pores are almost non-existent. Without liquid latex polymers to create a bridge, the cement has nothing to grab onto. This is why ANSI A118.4 modified mortars are mandatory for most modern shower builds. The polymers act as a shock absorber. They allow the tile assembly to flex slightly without snapping the crystalline structures of the cement. If your installer used a bucket of pre-mixed mastic in a shower, you are already in trouble. Mastic is organic. It is essentially food for mold, and it re-emulsifies when it gets wet. It will never stay hard in a steam-heavy environment.
“A floor is only as good as the subfloor beneath it; deflection is the enemy of every joint.” – Master Flooring Axiom
The ghost in the expansion gap
Every building moves. Concrete shrinks and wood expands based on the humidity of the room. If a shower is tiled tight from wall to wall without a movement joint at the corners, the tiles will tent and pop as the walls squeeze them. This is the same principle that ruins hardwood floors when they are installed without a perimeter gap. In a shower, those corners must be filled with one hundred percent silicone sealant, not grout. Grout is rigid. It cannot compress. When the house settles, that rigid grout transfers the pressure directly to the tile edge. Something has to give. Usually, it is the bond between the tile and the wall. You see the grout line crack first, then the tile starts to wiggle. If you see vertical cracks in the corner grout, your shower is screaming for a movement joint.
The structural lie of the subfloor
Deflection is the silent killer of tile installations. For a standard ceramic tile, the floor must meet an L over 360 rating, meaning it cannot bend more than the span divided by three hundred and sixty. If you are using natural stone, that requirement doubles to L over 720. Most old houses have joists that are spaced too far apart or are too thin. If the subfloor bounces, the tile will pop. This is why we often glue and screw a second layer of exterior grade plywood or use a cement backer board. But remember, backer board is not structural. It does not stop the bounce. It only provides a better surface for the thin-set to bite. If the wood underneath is moving like a trampoline, your grout will turn to powder and your tiles will lift.
Comparing adhesive performance and requirements
To understand why your tiles are failing, you need to look at the technical specifications of the setting materials used. Not all mortars are created equal.
| Mortar Type | ANSI Standard | Best Use Case | Flexibility Rating |
|---|---|---|---|
| Unmodified Thin-set | A118.1 | Absorbent ceramic over concrete | Low |
| Polymer Modified | A118.4 | Porcelain tile in wet areas | High |
| Improved Modified | A118.15 | Large format tile and submerged areas | Very High |
| Epoxy Mortar | A118.3 | Chemical resistance and industrial use | Maximum |
The 1/8 inch that ruins everything
Precision in the notch size of your trowel determines the lifespan of your shower. Using a trowel that is too small results in thin spots that cannot support the weight of the tile or resist the pull of the drying mortar. I always use a half inch by half inch square notch trowel for large tiles. You have to collapse the ridges. You should pull the trowel in straight lines, then slide the tile into place to flatten the peaks. If you swirl the trowel, you trap air. Trapped air is the enemy. It creates a vacuum that pulls moisture in through the grout lines via capillary action. Once that water gets behind the tile, it begins to degrade the thin-set from the inside out. This is a common issue in showers where people try to save money by using less material.
The checklist for a permanent shower fix
- Strip the failed tiles and scrape the old mortar back to the substrate.
- Check the wall for flatness using a six foot straight edge.
- Apply a liquid waterproofing membrane like RedGard or Kerdi-Board.
- Select a high-quality ANSI A118.11 or A118.15 mortar.
- Back-butter every single tile to ensure one hundred percent coverage.
- Use silicone caulk in all change of plane transitions.
- Allow the mortar to cure for at least seventy two hours before grouting.
The hydrostatic pressure trap
In many basement showers, moisture is coming from behind the wall. Hydrostatic pressure pushes water vapor through the concrete foundation and into the tile assembly. If you do not have a proper vapor barrier, this moisture will blow the tiles right off the wall. This is a common failure point for those who think tile is waterproof. Tile is not waterproof. Grout is not waterproof. They are water resistant. The actual waterproofing is the layer hidden behind the tile. If that layer is missing or compromised, the thin-set is constantly saturated. No cement-based product can survive perpetual saturation without eventually softening or losing its grip. This is particularly true in regions with high water tables or heavy seasonal rains.
Why your subfloor is lying to you
Most installers assume a subfloor is flat because it looks flat. A dip of only one eighth of an inch over ten feet is enough to cause a large format tile to bridge and eventually crack. When I walk onto a job, I spend the first hour with a level and a grinder. If I find a low spot, I fill it with a high-compressive strength self-leveler. If I find a high spot, I grind it down. This is the difference between a floor that lasts fifty years and one that fails in five. When you are dealing with laminate or hardwood floors, you can sometimes get away with a little bit of play. With tile and grout, there is no forgiveness. It is a rigid system. Any movement in the substrate is expressed as a failure in the surface. Stop trusting your eyes and start trusting your tools.
“Deflection is not a suggestion; it is a law of physics that will break your tile every time.” – TCNA Installation Handbook
The curing time and the impatience tax
The biggest mistake homeowners make is using the shower too soon. Mortar needs time to hydrate and form the crystalline bonds that provide its strength. If you get the thin-set wet before it has fully cured, you interrupt the chemical reaction. This leads to a soft, chalky bond that will fail within months. Most manufacturers recommend waiting at least forty eight to seventy two hours before exposing the assembly to water. In high humidity environments, that time should be doubled. If you smell damp cement, it is not ready. Wait until the grout is hard and the sealant is dry to the touch. Cutting corners on the schedule is the fastest way to ensure you have to do the job twice.
Shower tile failure is almost always preventable. It requires a commitment to the chemistry of the thin-set and the structural integrity of the walls. If you use the right modified mortars, ensure full coverage, and respect the need for movement joints, your shower will stand the test of time. Skip the cheap materials and the rushed timelines. Your subfloor and your wallet will thank you in the long run.
{ “@context”: “https://schema.org”, “@type”: “HowTo”, “name”: “How to Fix Popping Shower Tiles”, “step”: [ { “@type”: “HowToStep”, “text”: “Remove the loose tiles and clear away all old thin-set from the substrate and the back of the tile.” }, { “@type”: “HowToStep”, “text”: “Inspect the substrate for moisture damage or structural deflection and reinforce if necessary.” }, { “@type”: “HowToStep”, “text”: “Apply a waterproofing membrane to protect the underlying structure from vapor transmission.” }, { “@type”: “HowToStep”, “text”: “Apply a polymer-modified thin-set using the proper notch size for the tile dimensions.” }, { “@type”: “HowToStep”, “text”: “Set the tile and allow it to cure for 72 hours before applying grout and silicone.” } ] }