
I once walked into a house where a $15,000 wide-plank walnut floor was cupping so bad it looked like a potato chip because the installer didn’t check the crawlspace humidity. The smell of damp oak and desperation was thick in the air. That job was a total loss, and it all started with a lack of respect for the subfloor and the physics of wood. When you have spent twenty five years with sawdust under your nails and the constant hum of a table saw in your ears, you realize that flooring is not a cosmetic upgrade. It is a structural engineering challenge that happens one plank at a time. The smell of WD-40 on my tools and the grit of oak dust on my skin are my daily reality. I do not care about the color of your curtains. I care about the moisture content of your slab and the precision of your scribe cuts. If you want a floor that does not click like a castanet or buckle in the summer heat, you have to treat the door jambs with the same reverence a surgeon treats a heart valve. Most guys try to eyeball these cuts or use a scrap piece of wood as a guide. Those guys are the ones I follow six months later to tear out their failures. Precision starts with the right tool, and for door frames, that tool is the contour gauge.
The mechanics of a professional contour gauge
A contour gauge is a specialized measuring tool consisting of a frame holding a series of independent pins that move when pressed against an object. These pins, which can be made of steel or high density plastic, displace to create a perfect negative image of the profile. This allows a floor installer to transfer the complex shape of a door casing directly onto a hardwood plank for a tight fit. The gauge works on the principle of mechanical displacement. When you push the pins against a fluted casing or a plinth block, the friction within the frame holds the pins in place once you pull the tool away. This gives you a physical template that is far more accurate than any paper trace or cardboard cutout. In the world of high end hardwood, a gap of even one sixteenth of an inch is a failure. You need the pins to be thin, ideally less than one millimeter in thickness, to capture the subtle curves of Victorian trim or modern architectural moldings. Cheap gauges from big box retailers often have thick, clunky pins that round off the sharp corners of the wood. You want a tool that can handle the microscopic reality of the surface you are working on. Hardwood is a living material. It is a bundle of cellulose fibers and lignin that reacts to every change in the environment. Your cut must respect that reality.
“A floor is only as good as the subfloor beneath it; deflection is the enemy of every joint.” – Master Flooring Axiom
The heartbreak of a failed walnut installation
Experience is a brutal teacher. I remember a job in the humid part of the country where the installer had cut the hardwood so tight to the door frames that there was zero room for expansion. When the humidity hit eighty percent in July, the floor had nowhere to go but up. It literally lifted the door casings off the wall. If they had used a contour gauge and respected the expansion gap rules, that walnut would still be beautiful today. Instead, it was a pile of expensive kindling. People think that waterproof laminate or luxury vinyl plank allows them to ignore these rules. They are wrong. Even if the material is stable, the house itself is not. Every structure breathes. Every floor moves. If you do not provide the proper relief at the perimeter, you are asking for a structural failure. Unlike the grout in showers which is rigid and prone to cracking if the substrate shifts, hardwood requires a balance of tightness and flexibility. You want the cut to look tight to the eye but provide the hidden space the wood needs to expand at the molecular level.
How to execute the perfect door jamb undercut
Undercutting a door jamb involves cutting the bottom of the casing so the hardwood plank can slide underneath it. This creates a professional look where the wood appears to grow out of the wall rather than being cut around it. This is a non negotiable step for any installer who values their reputation. You use a scrap piece of the actual flooring and a piece of underlayment as a height guide. Place the saw flat on the scrap and cut through the casing and the shim. This ensures the height is exactly correct. I prefer a Japanese pull saw for its thin kerf and control, though many guys use a power oscillating tool. The key is to keep the saw perfectly level. If you tilt it, you create a wedge shaped gap that will trap the flooring or look terrible from across the room. Once the cut is made, you must clear out the debris from behind the casing. This is where the contour gauge comes back into play. You are not just fitting the wood to the face of the trim; you are fitting it to the structural opening behind the trim. You need to know how far back the wood can slide before it hits a stud or the drywall. Precision here prevents the floor from binding later.
Measuring the door profile with surgical precision
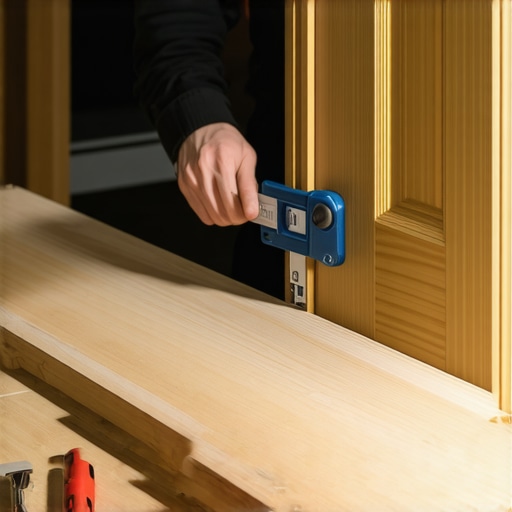
Measuring a door profile with a contour gauge requires you to press the tool firmly and evenly against the trim. You must ensure the gauge is perpendicular to the floor to get an accurate cross section of the casing. If the tool is tilted, the resulting shape will be elongated and the cut will not fit. I always tell my apprentices to treat the gauge like a delicate instrument. Clean the pins first. Any grit or old adhesive will prevent them from sliding smoothly. When you press it against the wood, you are recording a physical data point. If the door frame has a plinth block, you have to decide whether to cut under it or around it. My preference is always to undercut whenever possible. It hides the expansion gap and looks much cleaner than a caulk line. If you are dealing with a historic home where the trim cannot be cut, that is when the contour gauge becomes your only hope. You have to scribe the wood to match the curves perfectly while still maintaining a tiny gap for movement. It is a game of millimeters that separates the masters from the hackers.
| Gauge Material | Pin Thickness | Best Use Case | Durability Rating |
|---|---|---|---|
| Stainless Steel | 0.5mm to 0.8mm | High end hardwood and fine trim | Extremely High |
| High Density Plastic | 1.0mm to 1.5mm | Laminate and LVP installations | Moderate |
| Locking Aluminum | 0.7mm | Complex architectural curves | High |
Transferring the scribe to the hardwood plank
Transferring the profile from the gauge to the plank involves laying the tool flat on the wood and tracing the line with a sharp pencil. You must account for the thickness of the saw blade and the direction of the grain to ensure a clean finish. Do not use a fat carpenter pencil for this. You need a mechanical pencil or a sharp 2H lead to get a line that is thin and accurate. Once the line is traced, you have to decide which side of the line to cut. I always cut on the waste side of the line, leaving the lead mark visible. This gives me a tiny bit of extra material to sand down for a perfect fit. If you cut right on the line, the piece is often too small because you did not account for the kerf. This is the molecular zooming I talk about. If you ignore the width of your blade, you are failing the math of the installation. The physics of the cut matter just as much as the measurement. If you are cutting across the grain, the wood is more likely to splinter. You need a high TPI jigsaw blade, something with twenty or more teeth per inch, to keep the veneer from blowing out.
“Wood is a hygroscopic material; it never stops moving.” – Master Flooring Axiom
The physics of wood expansion and the hidden gap
The expansion gap is the intentional space left between the flooring and the vertical obstructions to allow for natural movement. For most hardwood species, this gap should be at least one quarter of an inch, though half an inch is safer for wider planks. Even when you use a contour gauge to get a tight fit around a door frame, the wood underneath that frame still needs room to breathe. This is the secret that most amateurs miss. They think a tight fit is a good fit. In reality, a tight fit is a ticking time bomb. When the wood absorbs moisture from the air, the cells expand. This expansion happens primarily across the width of the boards. If the board is locked against a door jamb, the pressure will build until the tongue and groove joints fail. I have seen entire floors lift three inches off the subfloor because of this. You use the contour gauge to get the shape of the visible part of the trim, but you must ensure the wood can slide underneath the undercut area without hitting the framing. It is a hidden clearance that saves the floor from destruction.
Essential checklist for door frame transitions
- Verify the moisture content of the subfloor and the hardwood before starting.
- Ensure the door jamb is undercut to the exact height of the flooring plus underlayment.
- Clean the contour gauge pins to ensure they move without resistance.
- Press the gauge perpendicular to the trim to avoid distorted profiles.
- Trace the contour onto the plank using a sharp, fine-point pencil.
- Use a high-TPI jigsaw blade to prevent splintering the wood surface.
- Leave at least a quarter inch of hidden expansion space behind the casing.
- Test fit the piece before applying any adhesive or fasteners.
The critical nature of the subfloor flatness
Subfloor flatness is the foundation of a successful flooring installation and must be checked before any cuts are made. If the subfloor has a dip near the door frame, the plank will flex when stepped on, causing the contour cut to rub against the trim. This friction will eventually lead to squeaks or the finish wearing off at the edges. I spend more time with a ten foot straight edge and a grinder than I do with a hammer. If the floor is not flat within three sixteenths of an inch over a ten foot radius, you are building on a shaky foundation. People want to skip the leveling compound because it is messy and takes time to dry. They think the underlayment will hide the dip. It won’t. I spent three days grinding concrete on a job last month just so the floor wouldn’t click like a castanet. That is the level of obsession required. When the floor is flat, your contour cuts stay exactly where you put them. There is no vertical movement to ruin the illusion of a perfect fit. Whether you are working with oak, maple, or exotic species like Cumaru, the subfloor is the boss. You ignore the boss at your own peril.
Advanced techniques for complex architectural trim
Dealing with complex architectural trim like fluted columns or wrap-around casings requires a multi-step contouring process. You may need to use multiple gauges or take measurements from several angles to capture the full three dimensional shape. In some cases, you have to scribe the piece, cut it, and then back-bevel the underside so it can slide into place at an angle. This is where the chemistry of adhesives comes into play. If you are doing a glue-down installation, you need a moisture-cured urethane adhesive that has a bit of give. Rigid adhesives like old-school water-based glues will crack when the house shifts. The adhesive acts as a shock absorber for your precision cuts. It holds the wood in place but allows for the microscopic expansion and contraction that happens every day. If you are working in a region with extreme weather, like the dry heat of Phoenix or the swampy humidity of Houston, these factors become even more important. The wood will shrink and grow more aggressively, making your contour cuts and expansion gaps the only thing standing between a beautiful floor and a total failure.
Final thoughts on the art of the scribe
Precision is not an accident. It is the result of a disciplined process and the right tools. The contour gauge is a simple device, but it represents a commitment to doing the job correctly. It is about respecting the material and the client. When you take the time to undercut the jambs and scribe the wood with surgical accuracy, you are creating a surface that will last for generations. It is the difference between a floor that looks like it was thrown in by a handyman and one that was crafted by a professional. I still have the first steel contour gauge I bought twenty years ago. It is scarred and the pins are a bit stiff, but it still gives me a perfect line every time. Flooring is a hard trade. It breaks your back and wears out your knees. But when you stand up at the end of a job and see those perfect transitions around the door frames, you know you have built something that stands the test of time. No gaps, no squeaks, just the solid feel of a well-laid floor. That is the only reward that matters in this business. Stick to the standards, watch your moisture, and never trust a subfloor you haven’t checked yourself. That is how you win in the flooring game.