
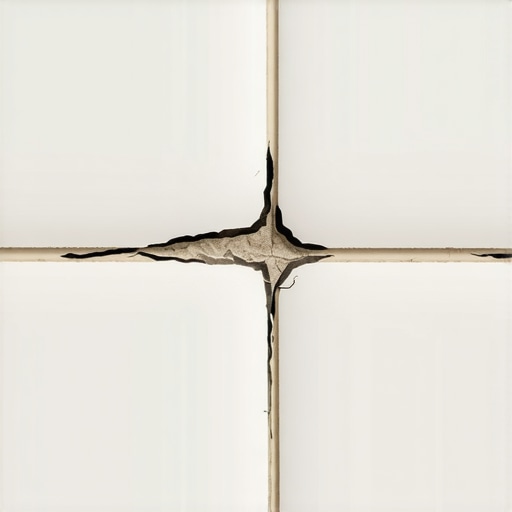
The physics of failing corners
I spent three days grinding concrete on a job last month just so the floor wouldn’t click like a castanet. Most guys skip the leveling compound because they think the underlayment will hide the dip. It won’t. This same shortcut mentality is why homeowners call me three months after a bathroom remodel complaining that their grout is falling out in chunks. Grout cracks in corners because of differential movement between adjacent surfaces. Rigid cementitious grout cannot absorb the kinetic energy of a house settling or expanding. You must use 100 percent silicone caulk at every change of plane to prevent failure. When you have two walls meeting at a 90 degree angle, or a wall meeting a floor, those surfaces move independently. One wall might be attached to a load-bearing stud while the other is fastened to a non-structural partition. As atmospheric pressure and humidity change, the wood framing behind the tile expands and contracts. Grout is essentially a brittle ceramic bridge. When the bridge is pulled in two different directions, it snaps. It is a simple matter of physics. If you see cracks, your installer treated a dynamic joint as a static one. It is a mistake born of laziness or a fundamental misunderstanding of the TCNA standards. I have seen fifteen thousand dollar showers ruined because the guy with the trowel didn’t want to spend ten dollars on a tube of high-grade silicone. This is not just an aesthetic issue. It is a structural warning sign. When grout cracks, water finds its way behind the tile. It saturates the thin-set, reaches the wallboard, and begins the slow process of rot. By the time you see the mold, the damage is already deep in the framing. This is why I am a stickler for the rules. I do not care how good the tile looks if the foundation is flawed.
Why your subfloor is lying to you
Subfloor deflection is the primary cause of grout failure on floor surfaces and lower wall corners. If your joists flex more than the L/360 standard, the tile will stay rigid while the floor bows. This creates a shear force that pulverizes grout into dust. I do not trust a subfloor just because it looks flat. I get down on my knees with a straightedge and a feeler gauge. If there is a dip of more than 1/8 inch over 10 feet, the floor is a failure waiting to happen. Most builders use 3/4 inch OSB and call it a day. That is barely the minimum. When you add the weight of a person and a full tub of water, that wood bends.
“A floor is only as good as the subfloor beneath it; deflection is the enemy of every joint.” – Master Flooring Axiom
The chemistry of the bond also matters. If you are installing over a slab, the moisture vapor transmission rate must be tested. I have walked onto jobs where the concrete was sweating under the laminate or tile, and the installer was just slapping down thin-set. That moisture will weaken the bond and cause the entire system to shift. You cannot hide structural movement with more grout. In fact, wider grout lines often crack faster because the higher volume of material undergoes more shrinkage during the curing process. The hydration of portland cement is a chemical reaction that requires a specific water ratio. If you add too much water to make the grout easier to spread, you are creating a porous, weak structure that will crumble under the slightest pressure.
The ghost in the expansion gap
Expansion gaps are the lungs of a flooring system and failing to provide them causes terminal stress. Every hard surface from laminate to porcelain tile needs a perimeter buffer of at least 1/4 inch to allow for thermal expansion. If you jam your tile tight against the wall and grout that gap, you are building a ticking time bomb. When the temperature rises, the floor expands. If it hits a solid wall, the energy has nowhere to go but up. This is how you get tented tiles and shattered grout lines in the corners. I see this constantly with laminate floors where the installer forgot to leave room under the baseboards. The floor locks up, the joints separate, and the homeowner thinks they bought a bad product. No, the product is fine. The installation is a disaster.
| Material Type | Expansion Rate | Recommended Joint |
|---|---|---|
| Ceramic Tile | Low | 1/8 inch |
| Laminate Flooring | High | 3/8 inch |
| Hardwood Floors | Extreme | 1/2 inch |
| Natural Stone | Medium | 1/16 inch |
This table shows the reality of movement. If you ignore these numbers, you are fighting nature. You will lose every time. I smell floor wax and sawdust every morning, and it reminds me that wood and stone are living materials in a sense. They react to the environment. A shower is a high-stress environment with rapid temperature swings from cold to 105 degrees in seconds. This thermal shock causes the tile to expand rapidly. If the corners are grouted, that pressure will pop the grout right out of the joint.
The chemistry of failure
Grout fails when the polymer chains are broken by excessive water or improper mixing speeds. Using a high-speed drill to mix grout introduces air bubbles that weaken the final cured density. You need to mix it low and slow. I see kids on jobsites whipping grout like they are making a cake. They are just introducing tiny voids. When that grout dries, it is like Swiss cheese. It looks solid on the surface, but it has no structural integrity. Then they wonder why it turns to powder when someone steps near it.
“Movement joints are not optional; they are a structural necessity in any ceramic or stone installation.” – TCNA Handbook for Ceramic, Glass, and Stone Tile Installation
You also have to consider the type of grout. Traditional sanded grout is great for wide joints on a stable floor, but it is too abrasive for some finishes and too brittle for corners. Epoxy grout is much stronger and stain-resistant, but it is a nightmare to work with and still cannot handle the movement of a corner joint as well as silicone. The contrarian truth is that the thickest, most expensive underlayment is often your enemy. Too much cushion under LVP or laminate causes the locking mechanisms to snap under foot traffic. You want a firm, flat base, not a trampoline.
The 1/8 inch that ruins everything
Precision in the layout of the movement joint determines the longevity of the entire installation. A joint that is too narrow will not hold enough sealant to remain elastic over time. If you only leave a hairline crack in the corner, the silicone cannot stretch. It will peel away from the tile face. You need a clean, deep channel of at least 1/8 inch. I spent years fixing showers where the guy just smeared a thin layer of caulk over the grout. That is a cosmetic band-aid, not a solution. You have to rake out the old grout, clean the joint with denatured alcohol, and then apply a deep bead of 100 percent silicone. This creates a flexible gasket that can compress and expand for years without failing. Below is your checklist for a permanent fix. [image placeholder]
- Remove all cracked grout from the corner using a carbide-tipped oscillating tool.
- Vacuum the joint to ensure no dust remains to interfere with the chemical bond.
- Wipe the tile edges with isopropyl alcohol to remove soap scum or oils.
- Install a foam backer rod if the gap is deeper than 1/2 inch to prevent three-sided adhesion.
- Apply a color-matched 100 percent silicone sealant.
- Tool the joint with a soapy finger or a profiling tool to ensure a concave finish.
It is a simple process, but it requires patience. Most people want a fast fix. They want to spray some bleach on the mold and move on. That is how you end up with a rotten subfloor. I have replaced entire bathrooms because a homeowner ignored a small crack in the corner for three years. The water traveled down the wall studs and ate the bottom plate of the house. It is a structural engineering challenge, not a weekend hobby. Stick to the standards. Respect the movement. Use the right chemistry. That is how you build a floor that lasts thirty years instead of three months.