
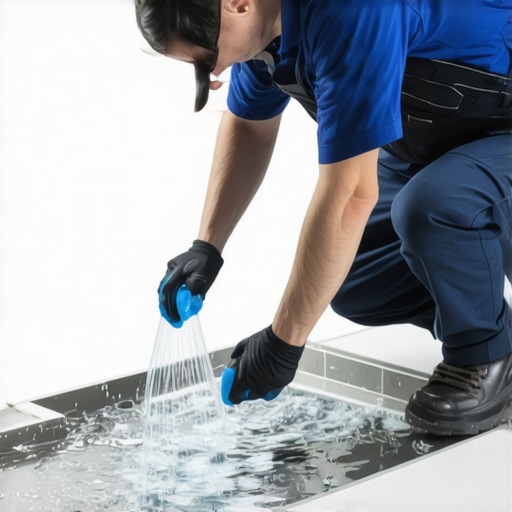
I spent twenty five years on my knees with a moisture meter and a level. I have seen the same mistake repeated a thousand times by guys who call themselves pros. Most guys skip the leveling compound. They think the underlayment will hide the dip. It won’t. I spent three days grinding concrete on a job last month just so the floor wouldn’t click like a castanet because the slab was a mess. If you think your subfloor is flat enough without checking, you are already building a failure. I smell like WD-40 and oak dust most days, and I have learned that gravity is the only inspector who never takes a bribe. When it comes to a shower, if that water does not move toward the drain with absolute intent, you have built a mold farm. Most people just dump a bucket of water and call it a day. That is the amateur way. You need the dish soap secret to see what is actually happening at a molecular level.
Gravity never lies about a shower floor
Shower pan slope must be exactly one quarter inch per foot toward the drain to ensure proper water evacuation. This pre-slope prevents standing water and mold growth in the mortar bed. Using liquid dish soap breaks the surface tension of the water, revealing dead spots instantly. When you perform a flood test, water molecules want to stick together. This is called cohesion. On a flat surface, water can actually bridge small dips because of surface tension, making a bad slope look functional. A single drop of dish detergent acts as a surfactant. It breaks those molecular bonds. If the water stays put after the soap is added, you have a birdbath. You cannot fix a birdbath with more grout. You fix it by rebuilding the slope from the substrate up.
The ghost in the expansion gap
Hardwood floors and laminate materials require a perimeter expansion gap of at least one half inch to accommodate seasonal humidity shifts. Failure to leave this space results in buckling, cupping, and joint failure. Many installers hide their mistakes with baseboards, but the pressure remains. In regions like Houston where the humidity is a constant weight, a solid oak floor will expand with enough force to crack a door frame if it hits a wall. This is not a suggestion. It is physics. The wood cells act like tiny straws, soaking up atmospheric moisture and swelling. If you lock the floor in place, it has nowhere to go but up. I have seen fifteen thousand dollar walnut floors turn into potato chips because a guy wanted a tight fit against the drywall. Use spacers. Trust the math.
“A floor is only as good as the subfloor beneath it; deflection is the enemy of every joint.” – Master Flooring Axiom
Why your subfloor is lying to you
Subfloor flatness is measured as one eighth inch over ten feet for large format tile or hardwood. A subfloor that looks level to the eye often contains heaves or valleys that cause laminate clicking or tile lippage. You need a ten foot straight edge, not a four foot level. I have seen slabs in Phoenix that looked like the surface of the moon after the concrete dried too fast in the desert heat. If you lay tile over a hump, the tile will teeter. When a person walks over it, the thin-set bond shears. This is how you get hollow sounding tiles and cracked grout lines. You must grind the high spots and fill the low spots with self-leveling underlayment. There are no shortcuts that don’t end in a callback.
[image placeholder]
The secret life of modified thinset
Modified thin-set mortar contains polymer additives that increase bond strength and provide flexibility for porcelain tile and natural stone. Standard unmodified mortar lacks the tensile strength to grip low absorption materials. When you mix thin-set, you are initiating a chemical reaction called hydration. The calcium silicate hydrate crystals grow and interlock with the microscopic pores of the tile and the substrate. If you add too much water, you weaken the crystalline structure. If you dont let the mortar slake for ten minutes, the chemicals dont fully activate. This is the difference between a floor that lasts fifty years and one that pops up in three. I prefer a high polymer content for anything near a shower. You want that extra grab when the floor is subjected to thermal expansion from hot water.
| Material Type | Janka Hardness | Acclimation Time | Max Humidity |
|---|---|---|---|
| Solid White Oak | 1360 | 7 to 14 Days | 45 Percent |
| Engineered Maple | 1450 | 3 to 5 Days | 55 Percent |
| Brazilian Cherry | 2350 | 10 to 21 Days | 40 Percent |
| Laminate Plank | N/A | 48 Hours | 60 Percent |
Hardwood floors and the vapor pressure problem
Moisture vapor transmission from a crawlspace or concrete slab can destroy hardwood floors from the bottom up. A vapor retarder with a perm rating of less than 1.0 is required to prevent cupping. You cannot just look at the top of the wood. You have to understand what is happening underneath. In a wet climate, the vapor pressure moves from the warm, damp ground into the dry, air conditioned house. The bottom of the floorboard swells while the top stays dry. This differential causes the edges to rise. It looks like a washboard. I always tell homeowners that if they haven’t addressed their crawlspace moisture, they shouldn’t buy hardwood. They should buy a dehumidifier first. Wood is a living material. It never stops moving.
The soap trick that saves your grout
Shower grout is a porous material that requires proper curing and sealing to remain water resistant. The dish soap test ensures that the pitch is steep enough to prevent grout saturation. If water sits on grout for too long, it will eventually find a way through. Modern epoxy grouts are better, but they are a nightmare to install if you aren’t fast. For standard cementitious grout, the mixing ratio is everything. If you use a sponge that is too wet during cleanup, you wash out the pigment and the binder. You end up with soft, sandy joints that crumble. I have seen guys ruin a beautiful marble shower because they were too lazy to change their wash water. It is basic chemistry. You cannot have a strong bond with diluted cement.
“The TCNA Handbook is the bible of the industry; ignore the standards and you ignore the safety of the structure.” – Master Flooring Axiom
Why big box laminate fails near moisture
Laminate flooring features a high density fiberboard core that is highly hydroscopic, meaning it absorbs water and swells at the joints. Even water resistant laminate is not waterproof and will delaminate if standing water is present for more than a few hours. The marketing on the box is a lie. They show a puppy spilling a bowl of water, but they don’t show the water seeping into the click-lock joint. Once that HDF core gets wet, it expands and never goes back down. You get peaked seams that look terrible and trip you up. If you want a floor for a bathroom, buy a porcelain tile or a high quality luxury vinyl plank with a stone polymer core. Avoid the cheap stuff at the big box retailers. It is just compressed sawdust and paper.
The structural reality of floor deflection
Floor deflection is the vertical movement of a subfloor under a load, measured as L/360 for ceramic tile and L/720 for natural stone. If your joists are too small or spaced too far apart, the floor will bounce. You can put the most expensive tile in the world down, but if the floor bends, the tile will crack. It is a mathematical certainty. I often have to sister joists or add a layer of exterior grade plywood to stiffen things up. Homeowners hate the extra cost, but they hate a cracked floor even more. You have to check the span tables. You have to look at the species of the wood in the joists. Douglas Fir has different structural properties than Southern Yellow Pine. This is the engineering side of flooring that most people ignore until it is too late.
Pre-Installation Checklist for Showers and Floors
- Verify subfloor flatness within 1/8 inch over a 10 foot radius.
- Check moisture content of wood subfloors to ensure it is within 2 percent of the hardwood flooring.
- Perform the dish soap flood test on shower pans to identify stagnant water zones.
- Ensure a minimum 24 hour acclimation period for all vinyl and 72 hours for laminate.
- Confirm the presence of a 6 mil polyethylene vapor barrier over concrete slabs.
- Inspect all tile crates for dye lot consistency before the first bag of thin-set is opened.