
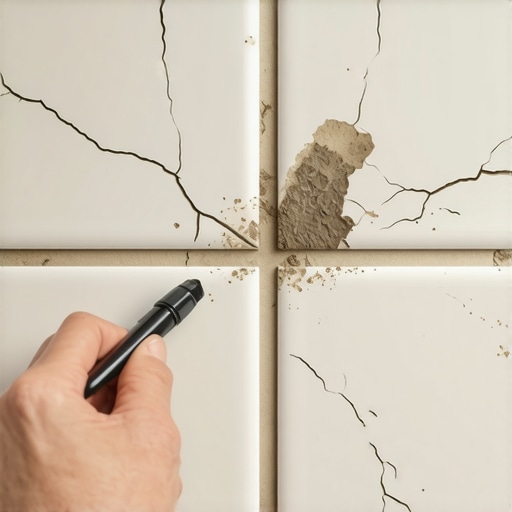
The chemical reality of old grout
Grout pens fail on old tile because the existing grout has reached a point of chemical saturation where oils, minerals, and old soap scum have permeated the porous cementitious matrix. These pens are essentially thin acrylic paints that require a pristine, open-pore surface to bond, but old grout remains hydrophobic and contaminated. To understand this, you have to look at the molecular structure of Portland cement. It is a crystalline lattice. Over five or ten years in a shower or a kitchen, that lattice fills with microscopic debris. When you run a felt-tip pen over that surface, the pigment just sits on top of a layer of grease. It will not soak in. It will not cure. Within three weeks, the steam from your shower or the friction of a mop will peel that layer right off. This is not a repair. It is a temporary disguise that usually makes the eventual real restoration much harder because now I have to scrape off your failed paint before I can even address the grout. It is a mess. It is frustrating. It is why professionals rarely touch these tools except for the most minor of aesthetic touch-ups on brand new installations.
The physics of the 1/8 inch dip that ruins everything
I once spent three days grinding concrete on a job last month just so the floor wouldn’t click like a castanet. Most guys skip the leveling compound. They think the underlayment will hide the dip. It won’t. This same structural obsession applies to your tile. If your grout is cracking or falling out, a pen won’t do a thing. Cracks in grout are almost always a sign of movement. Either your subfloor is flexing or the thin-set has lost its bond with the substrate. You can paint it white, you can paint it gray, but the movement will still be there. Every time you step on that tile, the microscopic vibration will shatter the thin film of acrylic from your pen. You are fighting the laws of physics with a marker. I have seen homeowners spend eighty dollars on pens trying to fix a shower floor when the real issue was a rotting subfloor in the crawlspace. They wanted a cosmetic fix for a structural engineering challenge. You have to respect the bond. If the grout is crumbling, the pen is a waste of time. You need to rake it out and start over with a high-performance epoxy or a modified cement grout that can actually handle the stress of the environment.
“A floor is only as good as the subfloor beneath it; deflection is the enemy of every joint.” – Master Flooring Axiom
The moisture dynamics in the shower environment
Showers are hostile environments for surface coatings. The constant cycle of wetting and drying causes materials to expand and contract. Most grout pens are not designed to handle the vapor pressure that builds up behind a tile. When water gets behind the grout, it wants to escape as it evaporates. A cheap acrylic coating from a pen creates a semi-impermeable barrier. The vapor pressure builds up behind that thin film and pushes it off. This is why you see the color flaking away in the corners first. It is the same reason why you do not use certain types of laminate in a bathroom. Laminate is basically a photograph glued to sawdust. If moisture gets into the core, it is game over. Your grout is the same. It is a breathing element of the assembly. If you seal it with a low-quality paint, you are trapping moisture in the wall. This can lead to mold growth behind the tile that you won’t see until the day the whole wall starts to feel soft. I have pulled down entire shower stalls where the tile was held on by nothing but hope and old adhesive because someone tried to mask the leaks with surface treatments instead of fixing the grout joints properly.
Comparison of grout restoration methods
| Method | Durability Rating | Chemical Bond Strength | Moisture Resistance |
|---|---|---|---|
| Grout Pen | Low | Surface Tension Only | Minimal |
| Epoxy Colorant | High | Covalent Cross-linking | Excellent |
| Regrouting | Maximum | Mechanical & Chemical | Superior |
| Steam Cleaning | Medium | N/A (Cleans Pore) | Moderate |
The transition from tile to hardwood and laminate
When I am finishing a job, the transition is where the professionals are separated from the amateurs. If you have old tile in a kitchen and you are running new hardwood floors in the dining room, you cannot just slap a T-molding down and call it a day. The height difference is usually the result of the subfloor prep. Hardwood floors require a level of flatness that tile can sometimes hide. If your tile grout is failing, it might be because the transition from the hardwood is putting stress on the edge of the tile field. I see it all the time. People install laminate right up against a tile edge without a proper expansion gap. The laminate expands in the humidity, hits the tile, and the grout is the first thing to crack. No pen will fix that. You need a proper transition strip that allows for the independent movement of both materials. Wood flooring is a hygroscopic material. It expands and contracts with the environment. If you lock it against a rigid tile floor, something has to give. Usually, it is the grout line at the threshold.
“Grout is not a structural component but its failure often signals a failure in the substrate or the bonding mortar.” – TCNA Technical Bulletin
A checklist for real grout restoration
- Test the porosity of the grout by dropping a few beads of water on it.
- If the water beads up, there is an old sealer or grease preventing any new product from bonding.
- If the water soaks in, the grout is open but likely needs a deep alkaline cleaning.
- Check for hollow sounds by tapping each tile with a plastic mallet.
- Rake out any loose or sandy grout to a depth of at least 1/8 inch before reapplying.
- Avoid using bleach before applying colorants as it can interfere with the chemical cure.
The chemical bond of modified thin-set and epoxy
To get a floor to last thirty years, you have to understand the chemistry of the bond. Modified thin-sets use polymers to create a bridge between the tile and the subfloor. Grout pens do not have this polymer load. They are just pigments in a carrier. If you really want to change the color of your grout, you need a professional grade epoxy grout colorant. These are different from pens. They are two-part systems or high-solids acrylics that chemically bite into the grout. But even then, you have to spend hours with a phosphoric acid solution or a heavy-duty degreaser to open up the pores of the cement. You have to scrub until your knuckles bleed. If you don’t do the prep, the product fails. There is no shortcut in flooring. Whether it is acclimating hardwood floors for two weeks in the house or grinding down a high spot in a concrete slab, the work is in the preparation. The final color is just the reward for doing the hard part right. If you think a five-dollar pen from a big-box retailer is going to save your old tile, you are in for a disappointment. It will look good for the five minutes it takes to take a photo for the internet, and then it will start to degrade. Do it right the first time. Clean the grout, repair the structural issues, and use a product that was designed for the physics of a wet environment.