
The $15,000 walnut floor that turned into a potato chip
I once walked into a house where a $15,000 wide-plank walnut floor was cupping so bad it looked like a potato chip because the installer did not check the crawlspace humidity before starting the finishing process. The homeowners were devastated. They thought the wood was defective. The truth was far more technical. The installer rushed the sanding between coats, trapped moisture under a premature layer of polyurethane, and ignored the subfloor physics. Experience teaches you that hardwood floors are not just planks of timber. They are dynamic, breathing organisms that respond to the molecular state of your home environment. If you do not respect the chemistry of the bond, the floor will fail. It is that simple. I have spent 25 years with a moisture meter in my pocket and sawdust under my nails. I have seen every shortcut imaginable. None of them work. This guide is about the reality of the mechanical tooth. It is about why your floor feels like sandpaper when it should feel like glass.
The mechanical tooth of a perfect finish
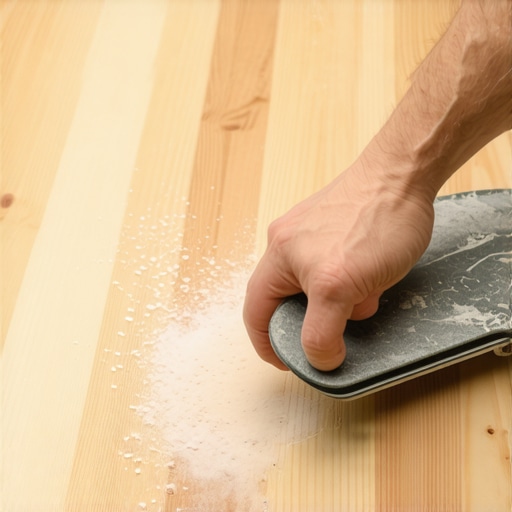
Sanding between coats of polyurethane creates a mechanical tooth that allows the next layer of finish to bond chemically and physically to the previous one. Without this abrasive scratch, the new coat of polyurethane will sit on top of the surface like a sheet of plastic on ice. This lead to peeling, flaking, and a finish that can be scratched off with a fingernail. You are not trying to remove the finish you just applied. You are trying to create microscopic valleys for the next coat to fill. This is the difference between a floor that lasts thirty years and one that fails in three. Most DIY enthusiasts believe the goal is to make the wood smooth. That is only half the truth. The goal is to make the wood receptive. When we talk about hardwood floors, we are talking about a performance surface. If you treat it like a craft project, you will get craft project results. If you treat it like a structural engineering challenge, you will get a masterwork.
The ghost in the expansion gap
Expansion gaps are the lungs of a hardwood floor and failing to protect them during the sanding process leads to structural buckling. When you sand between coats, fine particulates of dust settle into the 1/2 inch perimeter gaps required by NWFA standards. If you then apply polyurethane over that dust, you create a hardened bridge. This bridge prevents the floor from expanding during humid summers. The floor has nowhere to go but up. I have seen entire living rooms dome because an installer was too lazy to vacuum the expansion gaps. You must treat these gaps with the same reverence as the wood itself. Laminate installers often forget this, thinking the floating nature of their product is more forgiving. It is not. Whether it is solid oak or engineered planks, the physics of wood movement remain the same. The wood will move. Your job is to make sure it has the space to do so without snapping the bond of your finish.
“A floor is only as good as the subfloor beneath it; deflection is the enemy of every joint.” – Master Flooring Axiom
Why your subfloor is lying to you
A subfloor may look flat to the naked eye but microscopic dips and peaks will cause uneven wear in your polyurethane coats if not addressed with a floor buffer. If your subfloor has even a 1/8 inch deflection over ten feet, your sanding machine will skip. This creates thin spots in the finish. You might think you are applying a consistent three mils of polyurethane, but in reality, you are leaving the high spots exposed. This is why I spend days grinding concrete or replacing sheets of plywood before a single plank is laid. You cannot hide a bad subfloor with finish. It is like putting a silk dress on a skeleton. The bones will show through eventually. I have seen guys try to use thick underlayment to hide the dips. While most people want the thickest underlayment, too much cushion actually causes the locking mechanisms on floors to snap under pressure. This applies to hardwood and vinyl alike. Stability starts at the bottom.
The difference between grit and grace
Choosing the correct sandpaper grit for inter-coat abrasion requires a balance between creating a bond and avoiding deep scratches that show through the final sheen. I typically use a 220-grit screen or a maroon abrasive pad for this task. If you use a 120-grit between coats, the scratches will be visible under the light. If you use a 400-grit, you might not create enough tooth for the chemical bond. It is a game of microns. You also have to consider the species. A Janka hardness rating for Red Oak is different than for Brazilian Cherry. Harder woods require a more aggressive touch to open the grain. Softer woods like pine will gouge if you look at them wrong. You must feel the wood. You must smell the resin. If the wood smells like it is burning, your grit is too fine and you are glazing the surface. If the dust is coming off in thick curls, you are being too aggressive.
| Floor Type | Janka Hardness | Recommended Grit | Dry Time (Hours) |
|---|---|---|---|
| White Oak | 1360 | 220 Screen | 8 to 12 |
| Black Walnut | 1010 | 220 Pad | 12 to 24 |
| Hard Maple | 1450 | 180 Screen | 10 to 15 |
| Brazilian Cherry | 2350 | 150 Screen | 24+ |
The chemistry of a dry film
Polyurethane must reach a specific stage of off-gassing before it can be safely sanded without gumming up the abrasive or tearing the film. This is where most people fail. They touch the floor with their hand, think it feels dry, and start sanding. But the film is still soft. It is still curing. If you sand too early, you will create “corns” on your sandpaper. These are little balls of melted finish that will then scratch deep swirls into your floor. You need to wait until the finish is brittle enough to turn into a fine white powder when abraded. In the humid basements of the Midwest, this might take twice as long as the manufacturer suggests. In the dry heat of Phoenix, the finish might flash dry on the surface while remaining liquid underneath. You have to know your climate. You have to know your chemistry. This is not like painting a wall. This is a chemical reaction that you are interrupting for the sake of a better bond.
The 1/8 inch that ruins everything
Precision in flooring is measured in increments of 1/8 inch because anything larger creates a trip hazard or a structural failure point. This applies to the height of your transitions and the levelness of your sanding. If you are sanding between coats and you notice a dip, do not try to sand it out. You will only make the dip deeper. You have to fill it with finish or accept the character of the wood. Modern homeowners are obsessed with perfection. They want their floors to look like a digital render. But wood is imperfect. It has knots. It has grain. It has history. My job is to protect that history while making it functional. I see guys coming from the world of grout and showers trying to do hardwood. They think they can just wipe away mistakes like they are cleaning tile. You cannot. Once you sand through a coat of finish into the stain, you are looking at a full sand-and-finish job from scratch. There are no small mistakes in this business.
- Check the moisture content of the wood and the subfloor before every coat.
- Vacuum the entire floor three times with a HEPA filter vacuum.
- Use a microfiber tack cloth dampened with mineral spirits or water depending on the finish type.
- Inspect the floor with a high-intensity LED light held at a low angle to spot imperfections.
- Maintain a consistent temperature of 70 degrees Fahrenheit during the curing process.
- Turn off the HVAC system during the application to prevent dust from circulating.
Avoiding the grout haze of the flooring world
The most common mistake in hardwood finishing is failing to remove the white dust created by sanding between coats. This dust is the equivalent of grout haze on a tile job. If you leave even a tiny amount of it on the surface, the next coat of polyurethane will trap it. This creates a cloudy, milky appearance that ruins the clarity of the wood grain. You want the grain to pop. You want the depth of the oak or walnut to be visible. I have seen beautiful floors look like they were covered in a thin layer of fog because the installer used a dirty vacuum filter. You have to be surgical. You have to be obsessed. I wear clean socks on the floor. I do not allow pets or children within fifty feet of the job site. This is a controlled environment. If you treat it like a construction zone, it will look like one. If you treat it like an operating room, you will get a finish that shines.
“Consistency in the scratch pattern is the only way to ensure light refracts evenly across a large expanse of wood.” – NWFA Technical Manual
The molecular reality of adhesion
Adhesion fails when surface tension is not properly managed through the use of high-quality abrasives and clean application tools. It is not just about the sanding. It is about the chemistry of the polyurethane itself. Water-based finishes have a high surface tension. They want to bead up. Oil-based finishes are more forgiving but take forever to dry. When you sand between coats, you are breaking that surface tension. You are creating a landscape of microscopic peaks. When the next coat is applied, it flows into these peaks and locks in place. This is why I despise the cheap, big-box store finishes. They do not have the resin content to create a durable bond. They are mostly water or solvent. You want a finish with a high solids content. You want a finish that feels heavy in the can. This is what provides the wear layer. This is what protects the wood from the heels of shoes and the claws of dogs. It is a protective shell, and the sanding is what keeps that shell from cracking.