
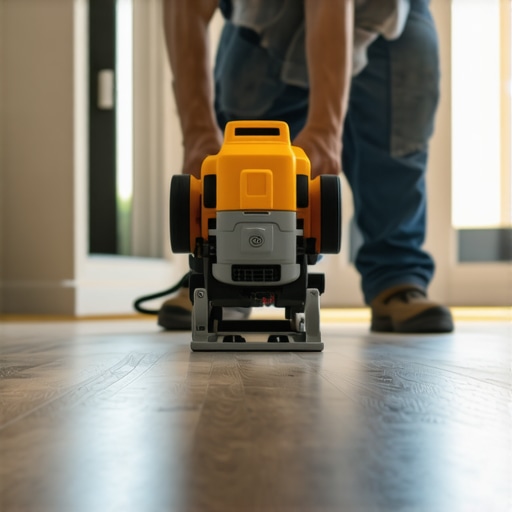
The steel savior of the final row
A standard steel pull bar is the $10 tool that makes hardwood installation twice as fast by allowing installers to tightly seat boards in restricted spaces where a tapping block cannot fit. This tool eliminates the need for pry bars that damage drywall and ensures a gap-free finish on the perimeter rows of any tongue and groove flooring system.
I once walked into a house where a $15,000 wide-plank walnut floor was cupping so bad it looked like a potato chip because the installer didn’t check the crawlspace humidity. The guy had spent three weeks hammering away, but he skipped the fundamentals. He didn’t have a moisture meter, and he certainly didn’t understand the physics of wood expansion. When you spend twenty-five years with sawdust under your nails and the smell of WD-40 on your shirt, you learn that flooring is not a craft of aesthetics. It is a craft of moisture management and mechanical tension. That $15,000 floor ended up in a dumpster because someone thought a hammer and a prayer were enough to fight against the laws of thermodynamics. Wood is a living, breathing material. It moves. It swells. It shrinks. If you do not respect the cellular structure of the oak or walnut you are laying down, the house will eventually reclaim it.
The physics of the steel pull bar
The pull bar functions as a mechanical lever that transfers force from a hammer strike to the edge of a floorboard without requiring a direct line of sight or open space. By hooking the weighted end over the tail of a board, the installer can close joints near walls where traditional tapping blocks are physically blocked by the vertical plane of the framing.
Most rookies try to use a screwdriver or a small pry bar to wedge the last row into place. This is a recipe for a disaster. You end up blowing out the drywall or, worse, crushing the delicate tongue of the wood. A professional-grade pull bar, usually forged from high-carbon steel, features a flat profile and a felt-lined underside. The felt is not just for show. It prevents the steel from micro-scratching the pre-finished wear layer. When you strike the anvil head of the pull bar, the force is distributed evenly across the groove. This ensures that the board seats perfectly into the previous row without damaging the locking mechanism. If you are working with engineered hardwood, this is even more vital. The thin veneers on engineered products are prone to delamination if they are subjected to uneven impact. A $10 investment prevents a $200 board from being ruined in a single second. The tool is simple, heavy, and indispensable. It allows for a rhythmic workflow that doubles your speed on the most difficult parts of the room. You stop struggling with the wall and start working with the material.
“A floor is only as good as the subfloor beneath it; deflection is the enemy of every joint.” – Master Flooring Axiom
The ghost in the expansion gap
An expansion gap is a mandatory 1/2 inch to 3/4 inch space left around the entire perimeter of a room to allow for the natural hygroscopic expansion of wood fibers. Failing to leave this gap results in buckling, as the floor has no room to grow when atmospheric humidity increases, leading to catastrophic structural failure of the locking joints.
People see that gap and think it looks unfinished. They want the wood to butt right up against the baseboard. That is how you kill a floor. Wood cells are like tiny straws. When the humidity in the room rises, those straws soak up water molecules. The wood expands across the grain. If that floor hits a wall and has nowhere to go, it will go up. I have seen floors pop off the subfloor with such force that they rip the nails right out of the plywood. You need to understand the Janka Hardness Scale and how it relates to stability. A hard wood like Brazilian Cherry moves differently than a softer species like White Pine. You must calculate the potential movement based on the species and the regional climate. In a humid environment, that expansion gap is your only insurance policy. You hide it with baseboards and shoe molding, but the gap must exist. It is the lungs of the floor. Without it, the system suffocates and dies. I have spent days grinding down the edges of floors that were installed too tight just to give them room to breathe again. It is a tedious, dusty job that could have been avoided with a simple spacer.
Why your subfloor is lying to you
Subfloor levelness is measured by a 3/16 inch deviation over a 10 foot radius, and anything beyond this threshold will cause vertical movement known as deflection. This movement stresses the tongue and groove joints, eventually causing audible clicking sounds and physical breakage of the wood fibers or the adhesive bond.
I spent three days grinding concrete on a job last month just so the floor wouldn’t click like a castanet. The homeowner thought the slab was flat because it looked flat. Concrete is never flat. It is a series of waves and valleys. If you lay hardwood or even a high-end laminate over a dip, you are creating a bridge. Every time someone walks over that bridge, the floor flexes. Over time, that flex fatigues the wood. If you are using a click-lock system, the plastic or wood tabs will eventually snap. Then you have a floating floor that actually floats. I use a 10-foot straight edge on every single job. If I see light under that bar, I am reaching for the self-leveling compound or the grinder. You cannot hide a bad subfloor with a thick underlayment. While most people want the thickest underlayment, too much cushion actually causes the locking mechanisms on LVP or laminate to snap under pressure. You want a high-density, low-compression underlayment that provides support, not a mattress. The subfloor is the foundation of your reputation. If it is wrong, nothing else matters.
The chemistry of the modified silane bond
Modified silane adhesives are moisture-curing polymers that provide a high-strength bond while remaining flexible enough to allow for the natural movement of wood planks. Unlike old-school solvent-based glues, these adhesives also act as a vapor retarder, preventing moisture from the concrete slab from reaching the wood.
When we talk about glue-down installations, we are talking about chemical engineering. You aren’t just sticking wood to a floor. You are creating a moisture barrier. A high-quality silane-modified polymer adhesive is the gold standard. It has a high green grab, meaning it holds the board in place immediately, but it stays elastic after it cures. This elasticity is vital. As the wood expands and contracts with the seasons, the glue moves with it. If you use a rigid, brittle glue, the bond will shear off the moment the wood tries to move. I also look at the mil-thickness of the adhesive layer. You need a specific notched trowel to ensure you are getting the right coverage. Too little glue and the floor will hollow out. Too much glue and it will ooze up through the joints, ruining the finish. This is where the chemistry of the slab comes into play. You have to test the pH of the concrete. If the alkalinity is too high, it will eat the adhesive from the inside out. It is a hidden war happening beneath your feet, and the only way to win is through precise measurement and high-quality chemicals.
Comparing material performance and durability
| Material Type | Janka Hardness | Acclimation Time | Moisture Resistance |
|---|---|---|---|
| Solid White Oak | 1360 | 7 to 14 Days | Low |
| Engineered Maple | 1450 | 3 to 5 Days | Medium |
| Laminate (High End) | N/A | 48 Hours | High |
| Luxury Vinyl Plank | N/A | 24 Hours | Waterproof |
Hardwood floors are the king of longevity, but they are not universal. You cannot put solid oak in a basement or a bathroom where showers are constantly running. The humidity will destroy it. For those areas, you look at tile and grout or high-end waterproof laminate. Grout is another beast entirely. It requires a stable subfloor just like wood, but it has zero tolerance for flex. If your subfloor deflects even a fraction of an inch, the grout will crack and crumble. This is why we use cement backer boards or uncoupling membranes like Ditra. When transitioning from a hardwood hallway to a tiled bathroom, the transition strip is not just for looks. It handles the different expansion rates of the two materials. Wood moves a lot; tile moves very little. If you join them tightly without an expansion joint, the wood will literally push the tile off the floor.
“Waterproof flooring is a marketing term; the subfloor is never waterproof.” – TCNA Installation Guide
The precision installation checklist
- Test subfloor moisture using an ASTM F2170 compliant RH probe.
- Acclimate the hardwood to the room’s service temperature for at least 7 days.
- Verify subfloor flatness within 3/16 inch over 10 feet.
- Undercut all door jambs to allow the floor to slide underneath.
- Maintain a consistent expansion gap of 1/2 inch at all vertical obstructions.
- Use a pull bar for the starting and finishing rows to ensure tight joints.
- Vacuum every row before installation to prevent debris from clicking.
The regional climate mandate
If you are installing floors in a place like Phoenix, the dry heat is your enemy. The wood will shrink until your baseboards show a gap you could park a truck in. You have to install the wood at a slightly higher moisture content or use a humidifier to keep the house stable. On the flip side, the swampy humidity of Houston means solid wood is a death wish. In those coastal regions, engineered cores are the only way to go. The cross-layered plywood core of an engineered plank counteracts the natural movement of the wood. It is basic physics. One layer pulls left, the other pulls right, and the board stays flat. I have seen guys try to fight the local climate and lose every time. You cannot change the air. You can only change the material to suit the air. This is the difference between a floor that lasts five years and a floor that lasts a century. You have to be a meteorologist as much as a carpenter. You have to know how the dew point affects the slab and how the seasonal change will impact the gaps in your boards. It is a constant game of inches and percentages. If you get it right, the floor is a masterpiece. If you get it wrong, it is just a very expensive pile of firewood.