
I once walked into a house where a $15,000 wide-plank walnut floor was cupping so bad it looked like a potato chip because the installer didn’t check the crawlspace humidity. While the moisture killed the structure, it was the dust management that ruined the finish bond. The homeowner had tried to clean the dust themselves with a damp mop and a household vacuum. They ended up driving micro-particulates deep into the grain of that expensive walnut. When the polyurethane hit the surface, it grabbed the dust instead of the wood fibers. The result was a finish that peeled off in sheets like a bad sunburn. I have spent twenty five years learning that a floor is only as good as the cleanliness of the wood cells before the first drop of sealer hits the deck.
The microscopic reality of hardwood particulates
Cleaning dust after sanding hardwood floors requires a deep understanding of micron-sized wood particles and HEPA filtration systems. Standard shop vacuums often lack the filtration efficiency to capture particles smaller than 10 microns. These microscopic remnants settle into the open wood grain and prevent finish adhesion. You must use a multi-stage extraction process to ensure the subfloor and surface are pristine. Wood dust is not just a nuisance. It is a contaminant that acts as a bond-breaker. When you sand a floor, you are essentially performing surgery on the cellular structure of the timber. The friction of the drum sander or the orbital buffer creates a static charge. This charge makes the dust cling to the walls, the windowsills, and the very floor you are trying to coat. If you do not neutralize this static and remove every speck, your finish will feel like sandpaper. Unlike laminate which comes pre-finished, site-finished hardwood floors are vulnerable to every airborne element in the room. Even nearby projects like tiled showers or fresh grout can introduce mineral dust that wreaks havoc on your wood finish. You need a clean room environment.
“A floor is only as good as the subfloor beneath it; deflection is the enemy of every joint.” – Master Flooring Axiom
The three stage vacuum protocol for professional results
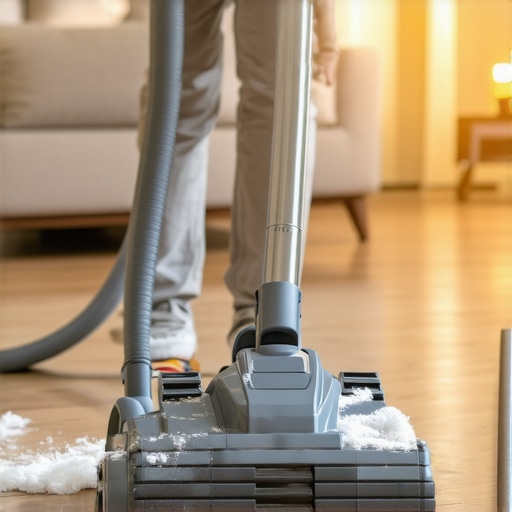
High-efficiency vacuuming is the primary defense against airborne wood dust and grain contamination. You must use a vacuum with a HEPA filter and a brush attachment designed for hard surfaces to pull dust from the beveled edges. This process must be repeated three times in different directions to ensure the wood cells are empty. Don’t use a beater bar. It will scratch the raw wood you just spent hours smoothing. I use a dedicated extraction unit that pulls 130 cubic feet of air per minute. Start at the farthest corner from the exit. Move slowly. If you move the vacuum head too fast, the air turbulence will just blow the dust into the air. You want the vacuum to drink the dust. Look at the light reflecting off the floor. If you see a dull haze, you aren’t done. Wood species like Brazilian Cherry have a high oil content which makes the dust heavy and sticky. Conversely, White Oak dust is fine and floats for hours. You have to adapt your speed to the density of the wood. The Janka Hardness Scale tells us how dense the wood is, but it also tells us how fine the dust will be.
| Wood Species | Janka Rating | Dust Particle Density | Acclimation Time |
|---|---|---|---|
| Red Oak | 1290 | Medium | 10-14 Days |
| Brazilian Cherry | 2350 | High (Oily) | 21 Days |
| Walnut | 1010 | Low (Fine) | 7-10 Days |
| Maple | 1450 | Medium/Fine | 14 Days |
Why your subfloor is lying to you
Subfloor cleanliness is often ignored because it is hidden under the hardwood planks, yet it dictates the longevity of the installation. Dust that migrates from the expansion gaps or the tongue and groove joints can migrate into the wet finish through capillary action. You must vacuum the perimeter gaps where the wood meets the wall. This is the graveyard for dust. Many installers think they can just blow it out with compressed air. That is a mistake. All you are doing is putting that dust back into the air so it can land on your wet finish three hours later. You have to suck it out. I have seen guys lose an entire day of work because they didn’t clean the tops of the baseboards or the window casings. The moment you start rolling that finish, the air movement pulls the dust off the ledges and drops it right into the middle of the room. It looks like little pepper flakes in your clear coat. It is embarrassing and it is avoidable.
The 1/8 inch that ruins everything
Precision depth cleaning involves removing dust from the grooves and cracks that are 1/8 inch or smaller. These tiny reservoirs of wood flour and sanding grit will react with water-based finishes and swell, creating a bumpy texture known as grain raise. You must use a crevice tool for these areas. Water-based finish is the industry standard now, but it is less forgiving than the old oil-based stuff. Water-based finish is mostly water. When that water hits a pocket of dust in a crack, it turns that dust into mud. Then the mud dries and leaves a permanent hump in your floor. If you are working in a bathroom near showers, ensure the grout is fully cured and sealed, as the moisture from the shower can migrate through the wall and cause the dust in the floor cracks to clump. I always use a moisture meter one last time after cleaning. If you used a damp tack cloth and the wood absorbed that moisture, you need to wait for it to dry back down to the target percentage before you coat.
- Vacuum the entire floor with a HEPA-rated shop vac using a wide floor brush.
- Clean all vertical surfaces including baseboards, windowsills, and door frames.
- Use a microfiber tack mop dampened very slightly with denatured alcohol or water.
- Wipe down all light fixtures and ceiling fan blades in the room.
- Run an air scrubber for at least four hours to catch floating particulates.
- Perform a white-glove test in the corners and along the perimeter.
Tack cloths and the chemistry of residue removal
Tack cloths should be used with denatured alcohol or a manufacturer-approved cleaner to lift the final layer of micro-dust without leaving a residue. Avoid tack rags with wax as they can cause fish-eyes in the polyurethane finish. You want a microfiber head that is barely damp. If you can see streaks of liquid on the wood, it is too wet. The goal is to use the surface tension of the liquid to grab the dust that the vacuum missed. Denatured alcohol is great because it flashes off quickly and won’t raise the grain like water does. However, you have to be careful with certain exotic woods. Some will bleed their natural tannins if you hit them with a harsh solvent. This is where the chemistry comes in. You are trying to achieve a pristine surface for a chemical bond. Any foreign substance, whether it is dust or wax from a cheap tack cloth, is an intruder.
“Surface preparation is the single most important factor in the success or failure of a wood floor finish.” – Master Flooring Axiom
The ghost in the expansion gap
Expansion gaps are essential for the natural movement of wood, but they act as a dust trap that can ruin a site-finished floor. These gaps must be completely clear of sanding debris to allow for seasonal expansion and contraction. If the gap is filled with packed dust, the wood has nowhere to go when the humidity rises. This leads to buckling or crowning. I have seen floors where the dust was so packed in the perimeter that the floor actually pushed the baseboards off the wall. You also need to check the transitions to other rooms. If you have a transition to a tiled area, make sure the grout isn’t crumbling. Old grout dust is incredibly abrasive. If it gets under your hardwood planks, it will act like sandpaper every time someone walks on the floor, eventually wearing down the tongue and groove joint until the floor starts to squeak.
Final inspection before the first coat of finish
Final visual inspection requires a high-intensity work light held at a low angle to reveal shadows from remaining dust or sanding swirls. This process ensures the surface integrity meets NWFA standards for a professional finish. Turn off the overhead lights. Get down on your knees. Run that light across the floor. This is where you see the truth. You might see a footprint of dust you missed or a swirl mark from a piece of grit that got stuck under your sandpaper. This is your last chance to fix it. Once the finish is down, it is locked in stone. If you see dust, vacuum it again. There is no such thing as a floor that is too clean. People ask me why I spend four hours cleaning a 200 square foot room. I tell them it is because I don’t want to spend four days sanding the floor again because the finish failed. It will buckle if you don’t respect the process. It will peel if you skip the details. Flooring is a structural engineering challenge that happens to look like a cosmetic choice. Treat it with the respect the wood deserves.