
Most guys skip the leveling compound. They think the underlayment will hide the dip. It won’t. I spent three days grinding concrete on a job last month just so the floor wouldn’t click like a castanet. That job taught me that if you don’t respect the slab, the slab will humiliate you. My hands still smell like oak dust and WD-40, and my knees are a testament to three decades of refusing to accept a subfloor that is anything less than perfectly flat. Flooring is a structural engineering challenge, not a decor choice. If you treat it like wallpaper, it will fail you every single time. I have seen thousand-dollar tile jobs turn into expensive rubble because the installer didn’t understand the chemistry of the bond or the physics of deflection.
The shadow of a structural failure
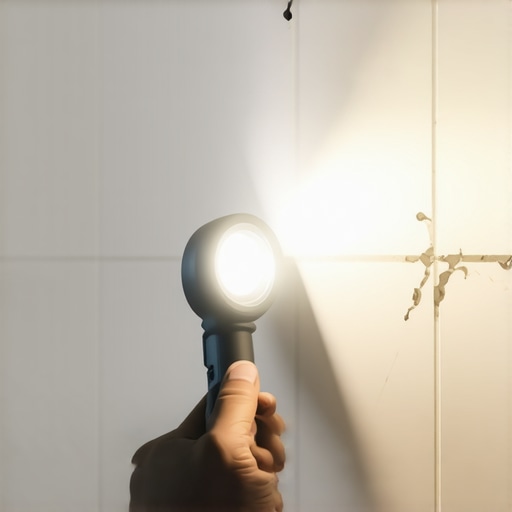
The flashlight method for detecting grout cracks relies on high-contrast lighting to reveal hairline fractures and vertical displacement that are invisible under standard overhead lights. By placing a high-lumen light source flat on the floor, you create long shadows that highlight the separation between tile and grout or the crushing of cementitious bonds. This technique is the most reliable way to catch structural movement before water infiltration destroys the subfloor integrity.
When you lay a professional-grade flashlight on its side, you are engaging in a rudimentary form of shadow analysis. Grout is a rigid material. It has very little tensile strength. When the subfloor moves, the grout cannot stretch. It snaps. These snaps are often microscopic at first, less than a hundred microns wide. In a shower, these tiny fissures act as straws. Capillary action pulls water deep into the setting bed. Once the water hits the thin-set, it starts to re-emulsify the bond if the wrong materials were used. By using a flashlight, you see the ridge of the crack casting a shadow. If you see a shadow, the bond is gone. There is no such thing as a cosmetic crack in a wet area. Every crack is a leak waiting to happen.
The microscopic physics of cementitious grout
Cementitious grout strength is determined by the hydration process and the water-to-powder ratio during the initial mixing phase. When grout fails, it is often due to excessive moisture during the wipe-down process, which pulls the cement fines to the surface and leaves a porous and brittle structure. High-performance grouts use polymer additives to increase the shear strength and decrease the absorption rate of the finished joint.
You have to understand the chemistry of Portland cement. It is a crystalline structure. As it cures, it forms needles of calcium silicate hydrate. These needles interlock with the edges of the tile. If you used too much water to mix the grout because you wanted it to flow easier, you created voids as that water evaporated. Those voids are weaknesses. When a 200-pound person walks across a tile floor with a subfloor that deflects even 1/16 of an inch, those voids collapse. The flashlight method shows the result of this internal collapse. You are looking for the “ghost in the expansion gap,” where the tile has moved but the grout has stayed put, leaving a jagged edge that catches the light.
“A floor is only as good as the subfloor beneath it; deflection is the enemy of every joint.” – Master Flooring Axiom
The 1/8 inch rule for structural integrity
Subfloor deflection limits are measured by the L/360 standard for ceramic tile and the L/720 standard for natural stone to prevent grout failure and tile cracking. A floor must not move more than 1/8 of an inch over a ten-foot span to be considered structurally sound for a rigid installation. The flashlight method reveals these dynamic loads by showing where the grout has been pulverized into dust by the constant friction of moving tiles.
If you are working in a place like the Gulf Coast where the humidity is constantly swinging, your subfloor is breathing. Plywood expands and contracts at a different rate than the tile above it. If you didn’t use an uncoupling membrane, the tile is locked to the wood. When the wood moves, the tile must follow. But the tile can’t. The result is shear stress. I have seen beautiful white oak floors in Houston cup like potato chips because the installer didn’t leave enough of an expansion gap at the perimeter. The same happens with tile. If there is no movement joint, the grout is the first thing to give. It turns into a fine powder. Use your light. If you see powder in the shadows, your floor is grinding itself to death.
Comparison of flooring material expansion and tolerances
| Material Type | Expansion Coefficient | Moisture Tolerance | Acclimation Time |
|---|---|---|---|
| Solid White Oak | High | Low | 10-14 Days |
| Engineered Hardwood | Medium | Moderate | 3-5 Days |
| LVP (Stone Core) | Very Low | High | 48 Hours |
| Ceramic Tile | Negligible | High | None |
Why your laminate transition is a ticking clock
Laminate flooring transitions fail when the expansion gaps are too small or the T-molding is pinned to the floor, preventing the floating floor system from moving freely. Most locking mechanism failures are caused by vertical deflection in the subfloor, which snaps the thin plastic or HDF tongues under the pressure of foot traffic. Detecting these failures early requires checking for separation at the joints using a low-angle light source.
People love to buy the thickest underlayment they can find. They think it makes the floor feel soft. It is a lie. That cushion is the enemy of your floor. When you step on a plank with a thick pad, the plank sinks. The plank next to it stays up. The locking tongue is now under a massive amount of leverage. Eventually, it snaps. I have seen whole floors of waterproof LVP buckle because the homeowner put a heavy kitchen island on top of it. They locked the floor in place. It couldn’t breathe. When the summer humidity hit, the floor tried to grow and had nowhere to go but up. Use your flashlight along the long seams. If you see shadows at the edges, your locking joints are already failing.
The moisture barrier lie that ruins hardwood
Hardwood floor moisture barriers must have a perm rating that allows for the slow transmission of vapor to prevent hydrostatic pressure from building up under the planks. Using a total vapor block on a concrete slab can trap moisture, leading to mold growth and adhesive failure in glue-down installations. Professional installers use a calcium chloride test or a pinless moisture meter to verify the slab is ready for a finish surface.
If you are in a dry climate like Phoenix, your baseboards will shrink until they show a gap. In a humid climate, your wood will grow until it hits the wall. I always tell people to throw away the “all-in-one” underlayments. You need a dedicated moisture barrier that is taped at every seam. I spent a week last year tearing up a laminate floor that smelled like a swamp because the guy before me didn’t overlap his plastic. One tiny gap in the barrier is enough to ruin a thousand square feet. The flashlight method works here too. Look at the edges of the planks. If the edges are higher than the center (cupping), you have a moisture problem coming from below.
Pre-installation structural checklist
- Verify subfloor flatness within 1/8 inch over 10 feet.
- Check moisture content of wood subfloor with a pin meter.
- Perform a mat test or calcium chloride test on concrete slabs.
- Confirm joist spacing and subfloor thickness meet L/360 requirements.
- Inspect all transition areas for proper expansion gap clearance.
- Ensure HVAC has been running for 7 days at occupancy levels.
Adhesive chemistry is the last line of defense. Modern modified thin-sets are engineering marvels. They use long-chain polymers to create a flexible bond. But if you don’t back-butter your large format tiles, you aren’t getting the coverage you need. You’ll have air pockets. Those air pockets are where the grout will crack first. I have spent my life chasing the perfect bond. It starts with the flashlight. It starts with seeing the shadows before the floor falls apart. If you ignore the signs, you are just building a very expensive puzzle that won’t stay together. Respect the physics. Respect the chemistry. Above all, respect the subfloor.