
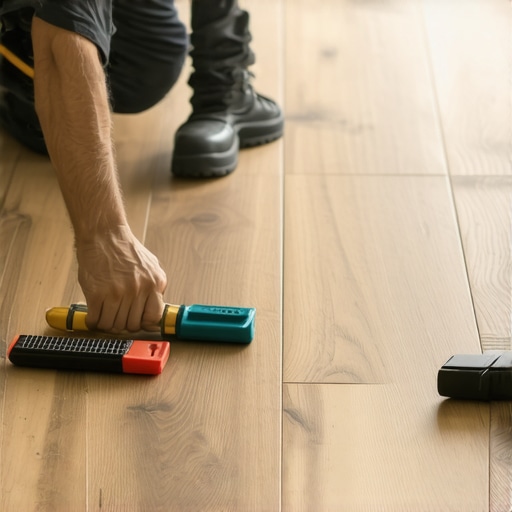
The physics of the floating floor surgical extraction
I spent three days grinding concrete on a job last month just so the floor would not click like a castanet. The homeowner thought they could save money by skipping the leveling compound. They were wrong. Now, they have a single plank right in the middle of the kitchen that has a chip the size of a nickel because they dropped a cast iron skillet. Most installers would tell you to rip the whole floor up from the wall to that point. That is the lazy way. If you understand the structural engineering of a click-lock system, you can perform a surgical extraction. You have to be precise. You have to be patient. If you rush this, you will ruin the integrity of the surrounding boards and end up with a floor that drifts. I have seen it happen a hundred times. A floor is a performance surface. It reacts to your weight, the temperature, and the moisture in the air. When you cut into it, you are changing the tension of the entire system.
The structural anatomy of laminate layers
Laminate flooring consists of four distinct layers including the wear layer, the decorative image, the high-density fiberboard core, and the balancing backing. These components are fused under high pressure to create a rigid board that mimics hardwood floors while offering superior resistance to scratches and impact damage during daily use. Understanding the HDF core is vital. This core is made of wood fibers compressed with urea-formaldehyde resins. At a molecular level, these fibers are hungry for water. This is why you cannot use grout or wet-mop these surfaces. If the core gets wet, it swells and the locking mechanism fails. The wear layer is usually made of aluminum oxide. It is incredibly hard, sitting high on the Mohs scale, which makes it difficult to cut without the right blade. When you are replacing a plank, you are fighting against these layers. You need a blade with at least 60 teeth to ensure you do not chip the surrounding decorative surface. It is a game of millimeters.
The ghost in the expansion gap
An expansion gap is a mandatory space left around the perimeter of a room to allow the floor to expand and contract with humidity changes. Without this gap, a floating floor will buckle or peak because the boards have no room to move when the wood fibers swell. I have been in Florida homes where the humidity is so high the floor looks like a roller coaster because the installer did not leave a gap. In dry climates like Arizona, the floor might shrink so much the gaps open up. When you replace a single plank, you must respect this movement. You are gluing the new plank to the subfloor or the surrounding tongues, which creates a static point in a dynamic system. This is a technical challenge. You have to ensure that your adhesive has enough flex to handle the micro-movements of the house. If you use a rigid glue, the joint will snap within six months. This is why I always check the moisture content of the subfloor before I even open my toolbox. If the concrete is putting out more than three pounds of vapor, you are wasting your time.
“A floor is only as good as the subfloor beneath it; deflection is the enemy of every joint.” – Master Flooring Axiom
The surgical reality of plank replacement
Replacing a single laminate plank requires cutting out the center of the damaged board and removing the remaining tongue and groove sections with a sharp chisel. This surgical approach preserves the surrounding floor integrity without requiring a full room teardown, ensuring the locking mechanisms stay intact. You start by marking your cut lines. I use a circular saw set to the exact depth of the laminate, which is usually about 8 millimeters or 12 millimeters. If you go too deep, you cut into the subfloor or the underlayment. If you go too shallow, you do not break the core. I make two parallel cuts down the length of the plank, about an inch from each edge. Then, I make relief cuts at a 45-degree angle toward the corners. This allows me to lift out the center piece like a puzzle. Once the center is gone, the edges are vulnerable. You use a chisel to gently tap the remaining pieces out of the grooves of the healthy boards. You have to be careful not to damage the tongue of the board that is staying. If you snap that tongue, you are in a world of hurt. You will be pulling up the whole floor anyway.
| Material Type | Janka Hardness | Repair Difficulty | Adhesive Requirement |
|---|---|---|---|
| Laminate HDF | N/A (Cores vary) | High | PVA or CA Glue |
| Engineered Oak | 1360 | Medium | Urethane |
| Solid Walnut | 1010 | Low | Wood Glue |
| LVP (Vinyl) | N/A | Medium | Contact Cement |
Why the click system fails under pressure
The click-lock mechanism fails when the subfloor is uneven or when the floor is pinned down by heavy cabinetry, preventing natural movement. This stress causes the thin tongues of the HDF core to shear off, leading to gaps that allow moisture to enter the core and cause swelling. Most homeowners think their waterproof LVP or laminate is indestructible. It is not. The surface might be waterproof, but the joints are the Achilles heel. When I see a floor that is clicking or popping, I know there is a dip in the subfloor. A 1/8 inch dip over 10 feet is all it takes to ruin the floor. When you put a new plank in, you are trying to bridge that gap. You need to make sure the subfloor under that specific plank is perfectly flat. If it is not, I will use a bit of self-leveling patch right in that spot before I drop the new board in. It is a small detail, but it is the difference between a repair that lasts and a repair that fails when the weather changes. Hardwood floors are more forgiving because they are nailed down, but floating floors are at the mercy of physics.
- Set the saw blade depth to exactly the thickness of the plank.
- Vacuum all debris from the grooves before installing the new board.
- Remove the bottom lip of the groove on the new plank for a drop-in fit.
- Apply a thin bead of wood glue to the remaining tongues.
- Weight the plank down for at least four hours while the adhesive cures.
The chemistry of the adhesive bond
The adhesive used in laminate repair must provide a high-strength bond while remaining flexible enough to withstand the expansion and contraction of the HDF core. Polyvinyl acetate glues are common, but specialized flooring adhesives offer better resistance to moisture and temperature fluctuations found in kitchens and bathrooms. When you prepare the replacement plank, you have to modify it. You cannot just click it in because the other boards are already locked. You have to shave off the bottom lip of the groove on the new board and the tongue on the end. This allows the board to drop straight down. This is where the glue comes in. You are no longer relying on a mechanical lock; you are relying on a chemical bond. I prefer a high-quality wood glue that dries clear and stays slightly elastic. You apply it to the top of the tongue of the existing boards and the modified groove of the new board. You have to be careful with the amount. Too much glue will squeeze out and ruin the finish. Too little, and the board will eventually pop out when someone walks on it with heavy boots. You have to find that perfect balance. It is like being a chemist and a carpenter at the same time.
“Laminate flooring must maintain a consistent expansion gap around all vertical obstructions to prevent buckling.” – NWFA Technical Manual
Why your subfloor is lying to you
A subfloor might look flat to the naked eye but contain subtle undulations that cause floating floors to bounce or the locking joints to snap over time. Professionals use a straightedge to identify dips greater than 3/16 of an inch, ensuring the surface is ready for a stable installation. I have seen guys try to hide subfloor issues with thick underlayment. They think more cushion is better. It is a lie. Too much cushion actually causes the locking mechanisms on LVP or laminate to snap under pressure because the floor deflects too much. You want a high-density underlayment that is thin, maybe 2 or 3 millimeters. This provides support for the joints. When you are doing a single plank repair, the underlayment is often damaged by the saw. You have to tape it back together or replace that small section. If the underlayment is bunched up, the new plank will never sit flush. It will be a high spot that gets worn down by foot traffic in a matter of weeks. You have to be meticulous. Every layer matters. From the concrete slab to the aluminum oxide coating, every piece of the puzzle has to be perfect.
Executing the final seat and weight
The final step of a plank replacement involves weighting the new board down with heavy objects to ensure the adhesive creates a flush, level surface with the surrounding floor. This pressure must be maintained for several hours to prevent the board from shifting as the glue sets and the moisture evaporates. Once the board is in, I use a tapping block to make sure the joints are tight. You cannot hit the laminate directly with a hammer or you will mushroom the edge. Use a scrap piece of flooring as a block. Once it is tight, wipe away any excess glue with a damp (not soaking) rag. Then, I pile on the weight. I usually use five-gallon buckets of paint or boxes of tile. You want about 40 to 50 pounds of pressure. This forces the glue into the fibers of the HDF core and ensures the board stays flat. I tell the homeowners to stay off that spot for 24 hours. No dogs, no kids, no vacuuming. If that glue bond is disturbed before it is fully cured, the repair is compromised. It is a slow process, but it is the only way to do it right. Anything else is just a temporary fix that will fail the next time the furnace kicks on and the air gets dry. Flooring is about long-term performance, not just looking good for the first day.