
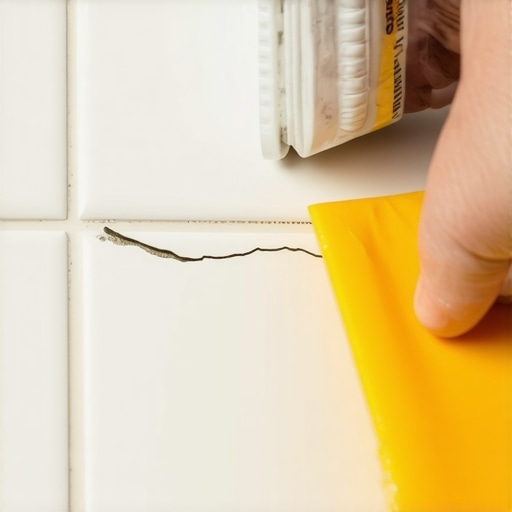
Most guys skip the leveling compound. They think the underlayment will hide the dip. It won’t. I spent three days grinding concrete on a job last month just so the floor wouldn’t click like a castanet. That same lack of preparation is exactly why your tile is chipping now. When a subfloor has a void, the tile acts like a bridge. One dropped heavy pot or a hammer and that bridge collapses into a crater. You are left with a jagged hole in your expensive floor. Replacing the whole piece is a nightmare. You risk nicking the waterproof membrane in showers or cracking the adjacent hardwood floors transition. If you have laminate nearby, you have to worry about the height difference. I have spent twenty five years fixing these craters without ripping out the substrate. It requires a mastery of epoxy chemistry and a steady hand. You do not need a sledgehammer. You need a surgical approach to the ceramic body.
The physics of the ceramic crater
Tile chips represent a mechanical failure of the vitreous glaze or the dense porcelain body due to concentrated point-load impact. Successful repairs depend on the density of the tile and the surface tension of the repair resin to create a permanent bond that resists moisture and abrasion. Most homeowners assume the damage is just cosmetic, but a deep chip exposes the porous clay or mineral core of the tile to stains and water infiltration. This is particularly dangerous in showers where grout lines are already under pressure. The repair material must mimic the hardness of the original fired earth. If you use a material that is too soft, it will compress. If it is too brittle, it will crack again when the floor experiences natural deflection from seasonal shifts in humidity. We are looking at the molecular level to ensure the new resin interlocks with the jagged edges of the fracture.
“A floor is only as good as the subfloor beneath it; deflection is the enemy of every joint.” – Master Flooring Axiom
Why your subfloor is lying to you
Subfloor deflection and uneven joist spacing often cause the structural stress that makes tiles susceptible to surface chipping and cracking. If your hardwood floors are creaking in the hallway, your tile subfloor is likely moving too. This movement puts the grout under tension. When the tile cannot move, it chips. You can fix the chip, but if the subfloor is bouncing, the patch will eventually pop out. I always tell my clients that a floor is a living system. The concrete slab or plywood deck is the skeleton. The tile is the skin. If the skeleton is weak, the skin fails. Before you reach for the epoxy, check for movement. If you can feel the floor vibrate when you walk, you have a deflection problem that no amount of resin will permanently solve. You might need to stiffen the joists from below before finishing the surface repair.
The chemistry of the repair resin
High grade polyester resins and UV cured acrylics offer the best adhesion and color matching properties for porcelain and ceramic tile repairs. These materials are engineered to bond with vitrified surfaces which are notoriously difficult to stick to due to their low porosity. Many people try to use standard wood filler or cheap caulk. That is a mistake. Those materials shrink as they dry. You need a two part epoxy or a light activated resin that maintains its volume. The chemical bond occurs when the resin flows into the microscopic pits of the broken tile body. This creates a mechanical lock. When I mix a batch of resin, I am looking for the exact viscosity of thick honey. If it is too thin, it runs out of the hole. If it is too thick, you get air bubbles. Air bubbles are the enemy of a clear finish because they catch the light and reveal the patch.
A comparison of repair material durability
| Material Type | Hardness Rating | Cure Time | Best Application |
|---|---|---|---|
| UV Acrylic Resin | High | 2 Minutes | Small Glaze Chips |
| Two Part Epoxy | Very High | 24 Hours | Deep Structural Crates |
| Polyester Stone Filler | Medium | 30 Minutes | Natural Stone or Marble |
| Acrylic Caulk | Low | 4 Hours | Temporary Fix Only |
The 1/8 inch that ruins everything
Precision in depth and perimeter cleaning is the only way to ensure a tile repair lasts more than a few weeks under foot traffic. If you leave even a tiny bit of grout dust or loose ceramic shards in the hole, the resin will fail. I use a dental pick to scrape the edges. I want to see clean, raw material. If the chip is shallower than one eighth of an inch, the resin does not have enough mass to stay put. Sometimes I have to actually make the hole slightly deeper or wider to give the patch a better grip. This feels counterintuitive to most people. They do not want to make the damage worse. But a shallow patch is a temporary patch. You want the resin to have a thick enough cross section to withstand the pressure of a kitchen chair leg or a heavy boot.
The checklist for a permanent surface fix
- Vacuum the chip to remove all pulverized ceramic and dust.
- Clean the area with 90 percent isopropyl alcohol to remove skin oils and floor wax.
- Mix the pigment slowly to avoid air entrapment in the resin.
- Overfill the chip slightly to account for the minor settling of the liquid.
- Level the patch with a single edge razor blade held at a 45 degree angle.
- Buff the surface with high grit sandpaper starting at 800 and moving to 2000.
Grout integration and the color match myth
Matching the color of a glazed tile is nearly impossible with a single pigment because of the way light refracts through the factory finish. You have to use a base color and then add translucent layers to create depth. Tiles are not one flat color. They have mottling and variations. If you just slap a solid white paste into a white tile, it will look like a white dot from across the room. I use a tiny brush to dapple different shades of pigment into the wet resin. This mimics the natural stone look or the variegated glaze of the ceramic. You also have to be careful with the grout lines. If the chip touches the grout, do not fill that part with resin. Use actual grout. Mixing the two materials looks amateur and the grout will not stick to the resin properly over time.
“Tile installations in wet areas must maintain a continuous waterproof membrane; any mechanical repair must not compromise the integrity of the shower pan.” – TCNA Technical Bulletin
Preventing the next impact fracture
Maintaining a consistent indoor climate and using area rugs in high traffic zones protects tile from the stresses that lead to chipping. Extreme temperature swings cause the subfloor to expand and contract. This is why you see more chips in the winter when the air is dry. The subfloor shrinks and pulls at the tile. If you have hardwood floors or laminate adjoining your tile, the transition strips can also put pressure on the edges. Make sure your T moldings have enough space to move. I also recommend checking your showers for loose tiles regularly. If a tile sounds hollow when you tap it with your knuckle, it is a candidate for a chip. That hollow sound means there is no thin-set behind it. It is an air pocket waiting to collapse. Fix the hollow spot by injecting a low viscosity adhesive through the grout line before it breaks.
When the damage is structural
Cosmetic repairs are useless if the tile has a full thickness crack that indicates a failure of the isolation membrane or the slab itself. A chip is a surface wound. A crack that runs from one side of the tile to the other is a broken bone. You cannot patch a structural crack. If you see a line running through several tiles and the grout, you have a foundation issue or a cured concrete crack that is telegraphing through the floor. In those cases, you have to rip it out. But for a simple dropped jar of pickles, the resin method is king. It saves you the cost of a plumber if the tile is in a wet zone and it keeps the aesthetics of your floor intact without the dust and mess of a full replacement. Take your time. Treat it like a piece of art. The floor will thank you for the precision.