
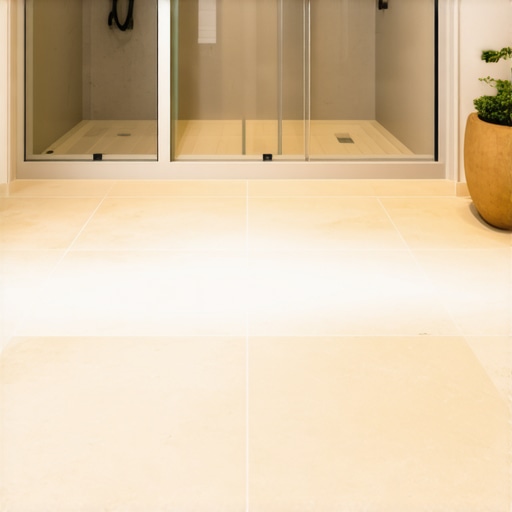
Most guys skip the leveling compound. They think the underlayment will hide the dip. It won’t. I spent three days grinding concrete on a job last month just so the floor wouldn’t click like a castanet. When you are dealing with tiles that measure 12 by 24 inches or even 24 by 48 inches in a tiny space, your margin for error is non-existent. A single high spot in the center of the room turns the tile into a seesaw. If you apply pressure to one end, the other end lifts. This creates lippage, those sharp edges that stub your toes and collect dirt. I have walked onto too many jobs where a homeowner tried to save money by ignoring the subfloor. They end up with a floor that feels like a series of speed bumps. Flooring is not about the color of the ceramic. It is about the structural integrity of the assembly beneath your feet. If your subfloor is not flat to within one-eighth of an inch over ten feet, you are building on a foundation of sand. I smell like cured thin-set and sweat most days because I refuse to compromise on the grind. The chemistry of the bond and the physics of the load distribution are the only things that matter when the client starts walking on that surface.
The subfloor secret that ruins everything
Subfloor preparation for large format tile requires achieving a flatness tolerance of 1/8 inch in 10 feet to prevent lippage and bond failure. Unlike smaller tiles that can follow the contours of a slightly wavy floor, large format pieces are rigid and unforgiving. You must use self-leveling underlayment or manual grinding to reach these industry standards. I remember a master bathroom in a high-rise where the concrete slab had a two-inch drop from the shower to the door. The installer tried to build it up with mortar. Within six months, every single grout line had cracked because the mortar bed was too thick and shrunk during the curing process. You cannot fix a bad floor with more glue. You fix it with mechanical intervention. You need to check the deflection of the joists if you are working on a wood subfloor. Large format tile has a zero-tolerance policy for bounce. If your floor flexes more than L/360, your grout will turn to powder and your tiles will pop. This is why I often suggest reinforcing the subfloor with an extra layer of 3/8 inch plywood or a high-quality uncoupling membrane. These membranes act as a shear-stress layer, allowing the subfloor and the tile to move independently. Without this, the expansion and contraction of your house will tear your tile apart.
| Tile Size | Maximum Allowable Variation | Minimum Grout Joint |
|---|---|---|
| 12×12 Ceramic | 1/4 inch in 10 feet | 1/16 inch |
| 12×24 Porcelain | 1/8 inch in 10 feet | 1/8 inch |
| 24×48 Large Format | 1/8 inch in 10 feet | 3/16 inch |
| Plank Tiles | 1/8 inch in 10 feet | 1/8 inch |
The physics of bond strength and mortar selection
Mortar for large format tile must be a medium-bed, polymer-modified thin-set specifically designed to support the weight of heavy tiles without slumping. Standard thin-set is too thin and will allow the tile to sink into the ridges, creating an uneven surface and air pockets. When you press a 24-inch tile into a bed of mortar, you need that mortar to hold its shape while providing 95 percent coverage. I always use a 1/2 inch by 1/2 inch square-notch trowel for these jobs. You have to back-butter the tile. This is not optional. You take the flat side of the trowel and skin a thin layer of mortar onto the back of the tile before setting it into the combed ridges on the floor. This ensures a molecular bond between the tile and the substrate. If you skip back-buttering, you are essentially just resting the tile on top of the mortar rather than integrating it. I have seen hardwood floors installers transition into tile and fail because they do not understand the suction required for a permanent bond. Air is the enemy. Every air pocket is a potential crack waiting to happen when a heavy vanity is dragged across the floor.
“A floor is only as good as the subfloor beneath it; deflection is the enemy of every joint.” – Master Flooring Axiom
The geometry of visual expansion in cramped quarters
Bathroom tile layout strategies for small spaces involve centering the main pattern on the most visible walkway to create an illusion of greater square footage. By using larger tiles, you reduce the number of grout lines, which minimizes visual clutter and makes the room feel expansive. However, the math gets complicated. You cannot just start at one wall and hope for the best. You must find the center point of the room and dry-lay your tiles. If your layout leaves you with a tiny two-inch sliver of tile at the wall, it looks amateur. You need to shift the entire grid so that the cuts on both sides are equal and substantial. In a small bathroom, the eye is drawn to the corners. If the corners are symmetrical, the room feels balanced. I spend more time with a chalk line and a laser level than I do actually setting tile. The layout is the blueprint for the entire project. If you mess up the math in the first hour, you will be staring at a crooked floor for the next twenty years. Many people think laminate is easier because it clicks together, but with tile, you are creating a monolithic structure that must be calculated to the millimeter.
Why your layout fails at the drain
Large format tile in showers requires a specific drainage strategy, often involving a linear drain, because these tiles cannot be sloped toward a traditional center drain without complex cuts. When you try to force a large, flat plane into a bowl-shaped slope, you get lippage that can cut a person’s foot. This is where the envelope cut comes in. You have to cut the tile diagonally from the corners of the drain to the corners of the shower area to create the necessary pitch. It looks like an envelope. If you do not want those extra lines, you must go with a linear drain at one end of the shower. This allows the entire floor to pitch in a single direction. I always tell clients that if they want the big tiles, they have to pay for the expensive drain. There is no middle ground. Waterproofing is the other factor. Underneath those beautiful tiles, you need a high-performance bonded waterproof membrane. I do not trust old-school mud beds alone. I want a topical barrier that keeps water from ever reaching the mortar bed. This prevents the damp, musty smell that plagues many older bathrooms.
“Total coverage of the tile back is mandatory in wet areas to prevent water migration and mold growth.” – TCNA Handbook Standards
The grout joint deception
Grout joints for large format tile should never be less than 1/8 inch, despite what the minimalist photos on social media might suggest, to allow for structural movement. If you butt tiles together with no gap, the slightest shift in the house will cause the edges to chip. This is called tenting. I use high-performance, rapid-setting grouts that are resistant to stains and mold. In a small bathroom, the grout is the most vulnerable part of the floor. It is where the moisture sits. It is where the bacteria grows. Using a power-grout or an epoxy grout is worth the extra cost because it does not require sealing and remains color-consistent. I have seen homeowners try to use laminate in bathrooms because they want the wood look without the grout. It always ends in disaster when the core swells. Tile is the only choice for a wet environment, but you have to respect the chemistry of the grout. Do not use too much water when cleaning it off. If you wash out the pigments and the binders, your grout will be soft and splotchy. I use a damp sponge, not a dripping one. It is a slow, methodical process that requires patience.
The 1/8 inch margin of error
Mechanical tile leveling systems are essential for large format installations to ensure all edges are perfectly flush and to counteract the natural bowing found in large porcelain planks. Even the best tiles from Italy have a slight crown in the middle. If you do not use clips and wedges, you will have lippage. These systems mechanically pull the tiles into alignment while the thin-set cures. I do not care how good you think your hands are. You cannot feel 1/32 of an inch with your fingers consistently across an entire floor. The clips also act as spacers, ensuring your lines stay perfectly straight. It is a system that removes the human element from the leveling process. I have a checklist I follow for every single LFT job:
- Verify subfloor flatness using a 10-foot straightedge.
- Check moisture vapor transmission rates in concrete slabs.
- Calculate the 33 percent offset for plank tiles to avoid lippage at the crown.
- Mix mortar with a low-speed drill to avoid entraining air.
- Apply a waterproof uncoupling membrane for crack isolation.
- Use a laser level to establish the primary grid lines.
- Employ a mechanical leveling system for every tile joint.
The physics of lippage and mechanical leveling
Lippage in large format tile is often caused by the inherent warpage of the tile itself, which is a byproduct of the firing process in the kiln. When a tile is three feet long, that slight curve becomes a major obstacle. If you offset the tiles by 50 percent, the highest point of one tile sits next to the lowest point of the next. This creates a cliff. Industry standards recommend a maximum offset of 33 percent to minimize this effect. I have had designers fight me on this because they want the brick pattern. I tell them they can have the brick pattern if they want to pay for me to hand-pick every tile for flatness, but it is still a risk. The mechanical clips help, but they cannot fix a severely warped tile. This is why I only work with rectified tiles for large format jobs. Rectified tiles are cut after firing to ensure they are exactly the same size. Non-rectified tiles vary just enough to throw your entire grid out of alignment by the time you reach the far wall. It is the difference between a floor that looks like a masterpiece and one that looks like a DIY project gone wrong.
The complexity of these installations is why you see so many failures in the field. People see a large tile and think it will be faster to install because there are fewer pieces. The opposite is true. It takes three times as long to prep the floor and set the tile because every mistake is magnified. You have to be an architect and a chemist at the same time. You are managing the moisture levels in the room, the open time of the adhesive, and the geometric constraints of the walls. It is a high-stakes game. If you crack a 48-inch porcelain tile while making a toilet cut, you just threw fifty dollars in the trash. You need specialized diamond blades and a steady hand. No one tells you about the dust. When you are grinding concrete to get that 1/8 inch flatness, the dust goes everywhere unless you have a high-quality HEPA vacuum attached to your shroud. I take pride in the prep work because I know that is what makes the floor last for fifty years. The tile is just the skin. The subfloor is the skeleton. If the skeleton is crooked, the skin will eventually tear. That is the reality of the trade. Success is found in the details that no one ever sees once the baseboards are installed.