
The ghost in the expansion gap
Most guys skip the leveling compound. They think the underlayment will hide the dip. It won’t. I spent three days grinding concrete on a job last month just so the floor wouldn’t click like a castanet, but even then, the client was staring at the grout. Grout is the most misunderstood component of a flooring system. It is not just a gap filler. It is a cementitious or epoxy based structural bond that reacts to every variable in the room. I once walked into a project where a high-end shower looked like a salt mine because the installer used tap water from a well with high mineral content. The homeowner was furious, claiming the product was defective. It was not the product. It was the chemistry of the water and the speed of the evaporation. When you see blotchy grout, you are looking at a failure of physics, not a failure of style. Whether you are dealing with showers, hardwood floors, or laminate transitions, the integrity of the surface depends on moisture management. Blotchy grout is the canary in the coal mine for a failed installation process. It tells me the installer got lazy with the sponge or the mixing drill.
The hidden reasons grout colors shift
Blotchy grout occurs when the pigment in the cementitious mixture is distributed unevenly during the hydration and drying phases. This usually stems from using too much water during the mixing process or over-saturating the joints during the cleanup phase. When you wipe a joint with a dripping sponge, you wash out the color on the surface, leaving the deeper grout darker. The chemical bond of the Portland cement is compromised, leading to a powdery finish and inconsistent shading across the floor or wall. High humidity also slows down the curing process, which allows minerals to migrate to the surface in a process known as efflorescence. This is particularly common in bathrooms and wet areas where the subfloor or wall board was not properly waterproofed before the tile was set. If the substrate is pulling moisture from the thin-set at different rates, the grout will never look uniform. This is why professional installers obsess over the mixing ratio and the dampness of the tile edges before they ever open a bag of grout.
“A floor is only as good as the subfloor beneath it; deflection is the enemy of every joint.” – Master Flooring Axiom
The physics of pigment migration
When you mix grout, you are initiating a chemical reaction that requires a specific molecular balance. If you add too much water to make it easier to spread, you are effectively diluting the pigment particles. As the water evaporates, those particles move. They cluster in some areas and vanish in others. This is the primary cause of shading issues. Furthermore, the speed at which the grout dries is dictated by the porosity of the tile. A ceramic tile with a high absorption rate will pull water out of the grout faster than a dense porcelain or a stone slab. This creates a differential in the curing time. In a shower, the presence of latent moisture in the mortar bed can travel upward through the grout joints. This is why you often see darker spots near the drain or the corners. It is not a stain. It is a signal that the assembly is holding water. Unlike hardwood floors which expand and contract based on ambient humidity, grout is rigid and shows its distress through color variation and cracking.
| Grout Type | Water Sensitivity | Pigment Stability | Acclimation Needs |
|---|---|---|---|
| Sanded Cement | High | Moderate | 24-48 Hours |
| Unsanded Cement | Very High | Low | 24-48 Hours |
| High-Performance Polymer | Low | High | None |
| Epoxy Grout | Zero | Maximum | None |
Why your tap water is ruining the finish
The minerals in your local water supply are often the culprits behind a blotchy finish. Calcium, lime, and iron found in hard water react with the pigments in the grout. This can create a white hazy film or even orange tinting in lighter grouts. Professionals who value their reputation use distilled water for mixing. This eliminates the variables. In regions with heavy limestone deposits in the water, like parts of the Midwest or the South, using tap water for grout is asking for a callback. The same logic applies to hardwood floors when applying water-based poly. The chemical purity of your liquids determines the longevity of the finish. If you used a bucket that previously held thin-set or drywall mud, the residue will contaminate the grout. Purity is a requirement for a consistent color. I have seen entire kitchens ruined because an installer used a dirty sponge that had been sitting in a bucket of gray water. The cross-contamination creates streaks that are impossible to scrub out once the cement has reached its initial set.
The danger of the wet sponge
The biggest mistake a DIYer or a cheap contractor makes is using a sponge that is too wet during the cleanup. You want a damp sponge, not a soaking one. Every drop of water that runs down the wall or sits in a joint is actively pulling pigment out of the grout. This is called washing the joint. It leaves the grout looking faded and sandy. The surface becomes porous and will trap dirt much faster than a properly cured joint. This is why I tell my crews to ring out the sponge until no more water can be squeezed out. We use a microfiber cloth for the final haze removal to avoid adding any more moisture to the system. If you are installing laminate or hardwood floors nearby, you must be careful not to track this excess moisture onto those surfaces. Water is the enemy of almost every flooring material during the installation phase. A wet grout sponge can ruin a nearby oak plank just as easily as it ruins a grout line.
“Consistency in the mix is the only way to ensure the integrity of the color across a large field of tile.” – TCNA Handbook Reference
Fixing the color without ripping it out
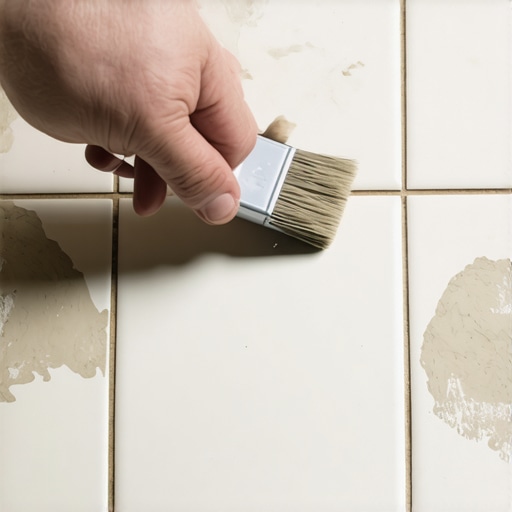
To fix blotchy grout, you must first determine if the issue is surface efflorescence or a deep pigment deficiency. If it is efflorescence, a mild acidic cleaner or a specialized grout haze remover can often strip away the white mineral deposits to reveal the true color underneath. However, if the pigment has been washed out, you will need to use a high-quality grout colorant or stain. These are epoxy-based coatings that penetrate the grout and provide a permanent, uniform color. Unlike cheap grout pens, professional colorants are designed to last for years and also act as a sealer. Before applying a colorant, the grout must be completely dry and free of any previous sealers. You apply it with a small brush, working it into the pores, and then wipe the excess off the tile face. This is a tedious process, but it is the only way to achieve a perfect color match when the original installation was botched. It is a structural fix that also addresses the aesthetic failure.
The master checklist for perfect grout
- Always use distilled water for mixing cementitious grout products.
- Measure the water volume with a graduated cylinder to ensure a 100 percent match between batches.
- Mix the grout at low RPMs to avoid introducing air bubbles into the paste.
- Allow the grout to slake for ten minutes before the final stir.
- Use a grout float at a 45-degree angle to pack the joints to their full depth.
- Keep the cleanup sponge damp but never dripping wet.
- Ensure the room temperature is between 60 and 80 degrees Fahrenheit for optimal curing.
Environmental factors and regional climates
The weather outside your job site dictates how you handle the grout bucket. In the swampy humidity of Houston, grout stays wet for hours, which increases the risk of pigment migration and shading issues. You have to be extremely conservative with your cleanup water in those conditions. Conversely, in the dry heat of Phoenix, the grout can flash dry. This sucks the moisture out before the cement can properly hydrate, leading to weak joints and chalky colors. In these arid environments, I sometimes recommend a light misting of the joints after they have set to ensure the hydration process completes. This is the same principle used when curing concrete slabs in commercial construction. You have to respect the climate. If you treat a bathroom in Maine the same way you treat a bathroom in Florida, you are going to have failures. A master floor installer knows that the air in the room is just as important as the tile on the floor.
The myth of the waterproof grout
People love to talk about waterproof LVP or waterproof grout. The truth is that cementitious grout is naturally porous. It will always absorb some moisture. Even if you use a sealer, it is only a temporary barrier. For a truly waterproof solution, you have to move to epoxy grouts. Epoxy does not use water for its curing process. It is a two-part chemical reaction. Because there is no water evaporation, the color is 100 percent consistent from the bucket to the floor. It is harder to install and more expensive, but it eliminates the blotchiness problem entirely. It also has a much higher shear strength, making it ideal for high-traffic areas or commercial kitchens. If a client tells me they want zero maintenance and perfect color, I tell them to buy epoxy. If they want the classic look of cement, I tell them they have to trust my process and my distilled water. There are no shortcuts in the world of high-end flooring architecture. You either do the prep work or you do the repair work. There is no middle ground. { “@context”: “https://schema.org”, “@type”: “HowTo”, “name”: “How to Fix Blotchy Grout Color”, “step”: [ { “@type”: “HowToStep”, “text”: “Clean the grout joints thoroughly with a pH-neutral cleaner to remove any surface dust or oils.” }, { “@type”: “HowToStep”, “text”: “Test for efflorescence by applying a mild acidic solution to a small area; if the white haze disappears, clean the entire floor with this solution.” }, { “@type”: “HowToStep”, “text”: “If color is still inconsistent, apply a professional-grade grout colorant using a toothbrush or specialized applicator.” }, { “@type”: “HowToStep”, “text”: “Wipe away excess colorant from the tile surface within the time frame specified by the manufacturer, usually 10 to 30 minutes.” } ] }