
The Coffee Filter Trick for Applying Polyurethane Without Bubbles
I once walked into a house where a $15,000 wide-plank walnut floor was cupping so bad it looked like a potato chip because the installer didn’t check the crawlspace humidity before laying the first board. It was a nightmare of epic proportions. The homeowner was crying, the contractor was ghosting them, and the wood was literally screaming as it pulled away from the subfloor. My knees have the scars from thirty years of fixing mistakes like that. People think flooring is just about picking a color at a showroom. They are wrong. It is a war against moisture, physics, and the microscopic debris that ruins a perfect finish. I smell like sawdust and WD-40 most days, and I have learned that the smallest tools often make the biggest difference. If you want a floor that looks like glass, you have to stop thinking like a decorator and start thinking like a structural engineer. This includes how you apply your final topcoat.
The microscopic physics of surface tension
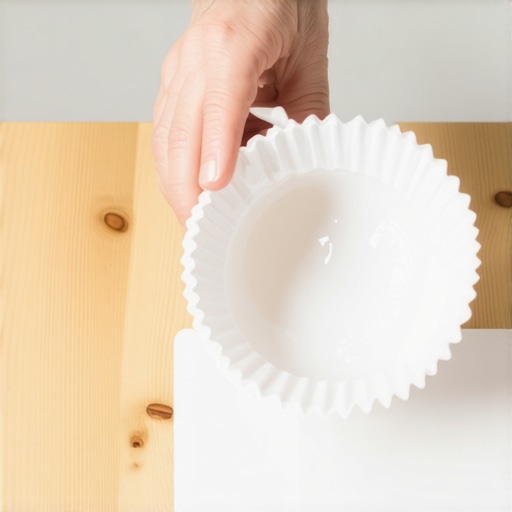
Applying a coffee filter trick for polyurethane works by utilizing a non-linting, high-density paper medium that eliminates air entrapment during the final wiping stage. This method ensures polyurethane molecules level out across hardwood floors without the micro-bubbles typically introduced by synthetic bristles or foam cells. When you use a standard brush, the air trapped between the bristles is forced into the liquid, creating tiny craters as the finish cures. A coffee filter has a specific pore structure designed to let liquid pass while holding back even the smallest particulates. In the world of high-end finishing, surface tension is the force that either helps you or destroys you. If the tension is too high, the finish beads up. If you break that tension with a smooth, lint-free applicator like a coffee filter, the liquid flows into the grain of the wood at a molecular level. This is especially important when you are working with site-finished oak or maple where the cellular structure is open and ready to suck up moisture. You are not just painting a surface, you are creating a chemical bond. Unlike laminate, which has a factory-pressed wear layer of aluminum oxide, site-finished floors require you to be the factory. You are the quality control department. If you leave a single bubble, it becomes a point of failure where moisture can enter. This is the same logic we use when sealing grout in a bathroom. You want a total seal. In showers, if the grout is not sealed, the subfloor eventually rots. On a hardwood floor, if the poly is bubbled, the wood eventually grays and decays.
“A floor is only as good as the subfloor beneath it; deflection is the enemy of every joint.” – Master Flooring Axiom
Why foam brushes fail the grit test
A foam brush fails the grit test because its open-cell structure acts like a vacuum for microscopic dust particles that settle on the floor during the drying process. These brushes trap air and release it directly into the polyurethane film, leading to unsightly bumps and a rough texture that ruins the aesthetic. I have seen guys spend days sanding a floor down to 120 grit, making it smooth as a baby’s arm, only to ruin it in the last twenty minutes with a five-cent foam brush. The foam cells are too large. They hold too much product, which leads to heavy spots and runs. When the polyurethane starts to off-gas, those air pockets expand. A coffee filter, by contrast, is a closed-web material. It cannot hold air. It only holds the finish. This allows for a thin, even application that the pros call a wipe-on finish. While it takes more coats to build up the same mil-thickness as a heavy brush, the result is significantly more durable. Thinner coats cure harder and faster. A thick coat of poly can stay soft for weeks, especially if the humidity is high. You want a finish that is hard enough to resist the scrape of a chair leg or the claws of a dog. Thick, bubbly finishes are soft finishes. They peel. They flake. They make me want to retire and move to a cabin in the woods.
The chemical bond of polyurethane molecules
The chemical bond of polyurethane molecules depends on the evaporation rate of solvents and the cross-linking of polymers during the oxidative curing process. Using a coffee filter allows for a controlled release of these solvents, preventing the skinning effect that traps gases beneath the surface. When you apply poly too thick, the top layer dries first. This creates a skin. The solvents underneath are still trying to escape, and they push up, creating a bubble. If you use the coffee filter trick, you are applying a layer so thin that the solvents can escape freely. This is the science of the cure. We measure this in mils. A typical floor finish should be about 3 to 4 mils thick when dry. If you try to do that in one shot, you are asking for trouble. You need to build it up. It is like building a skyscraper. You do not just pour a hundred floors of concrete at once. You pour one, let it set, and move to the next. The same goes for your floor. This is even more critical if you are working near showers or areas with high moisture. The bond must be absolute. If there is any gap in the polymer chain, water will find it. Water is the universal solvent, and it is patient. It will wait for a bubble to pop and then it will move into the wood, causing the boards to swell and the finish to fail.
| Method | Bubbling Risk | Lint Residue | Build Thickness |
|---|---|---|---|
| Foam Brush | High | Low | Medium |
| Natural Bristle | Medium | High | High |
| Coffee Filter | Very Low | Zero | Low |
| Lambswool Applicator | Low | High | Very High |
The ghost in the expansion gap
The expansion gap at the perimeter of a room is the most ignored part of a hardwood floor installation, yet it is where most finish failures begin. If you do not seal the edges properly with a thin, bubble-free coat of poly, moisture from the walls can seep into the end-grain. End-grain is like a bunch of tiny straws. It sucks up moisture faster than the face of the board. I always tell people that the floor needs to breathe, but it should not drink. You need a gap of at least 1/2 inch around the perimeter for a solid oak floor. This gap is hidden by your baseboards and shoe molding. If you lock that floor in tight against the drywall, it has nowhere to go when the humidity hits in the summer. It will buckle. It will rip the tongues right out of the grooves. And if your finish is thick and brittle, it will crack at the joints. A thin, flexible finish applied with the coffee filter method moves with the wood. It is a structural component of the floor system. People think laminate is better because it does not move as much, but even laminate needs an expansion gap. If you lock down a floating floor under a heavy kitchen island, you have killed it. It cannot move, so it will peak at the seams. It is basic physics.
“Wood is hygroscopic; it never stops moving, even after it is cut, sanded, and finished.” – NWFA Technical Manual
The 1/8 inch that ruins everything
A subfloor deviation of more than 1/8 inch over a ten-foot span will cause polyurethane to pool in low spots and thin out over high spots, leading to uneven wear and finish failure. Most guys skip the leveling compound. They think the underlayment will hide the dip. It won’t. I spent three days grinding concrete on a job last month just so the floor wouldn’t click like a castanet. If the floor is not flat, the boards will flex when you walk on them. This flex puts stress on the finish. Over time, that stress causes the polyurethane to lose its bond with the wood. You get what we call white line syndrome, where the finish turns white at the edges of the boards. It looks terrible and it is a sign that your floor is failing. You have to get the subfloor right before you even think about the finish. I use a straightedge and a level on every single job. No exceptions. If a homeowner tells me they want to save money by skipping the prep, I walk away. I have my reputation to think about. I am not going to be the guy who installed a floor that squeaks and cracks because the joists were sagging.
Final preparation and execution checklist
The final preparation for a bubble-free floor involves a multi-stage decontamination process that removes every trace of dust, oil, and skin cells from the wood surface. If you touch the wood with your bare hands after the final sanding, the oils from your skin will prevent the polyurethane from sticking. It is called a fish-eye. It is a little crater where the finish just refuses to flow. You have to be a fanatic about cleanliness. I wear booties and nitrile gloves. I vacuum the floor three times, then I use a tack cloth, then I vacuum again. Only then am I ready to use the coffee filter trick. You fold the filter into a small square, dip it into the poly, and wipe with the grain. Do not go back and forth. Long, smooth strokes are the key. It is a slow process, but it is the only way to get a professional result. Below is the checklist I follow for every high-end finish job:
- Check the moisture content of the wood using a pin-meter.
- Verify that the ambient temperature is between 65 and 75 degrees Fahrenheit.
- Ensure the HVAC system is off to prevent dust from blowing through the vents.
- Vacuum the floor using a HEPA filter to catch micro-particles.
- Wipe the surface with a lint-free cloth dampened with mineral spirits.
- Apply the first coat of polyurethane using the coffee filter method in a small, inconspicuous area.
- Wait for the specific dry-to-touch time before applying subsequent layers.
While most people want the thickest underlayment, too much cushion actually causes the locking mechanisms on LVP or laminate to snap under pressure. The same logic applies to polyurethane. People think a thick coat is a strong coat. In reality, multiple thin coats are far superior. The coffee filter trick is the gold standard for those who actually care about the longevity of their work. It takes patience, which is something a lot of modern installers lack. They want to get in and get out. I want to build a floor that your grandkids can walk on. That is the difference between a contractor and a craftsman. You have to respect the material. You have to understand the chemistry. And you have to be willing to spend hours on your knees with a coffee filter to get that perfect, glass-like sheen. If you do it right, you will never have to worry about bubbles, lint, or peeling. You will just have a beautiful, durable floor that stands the test of time.