
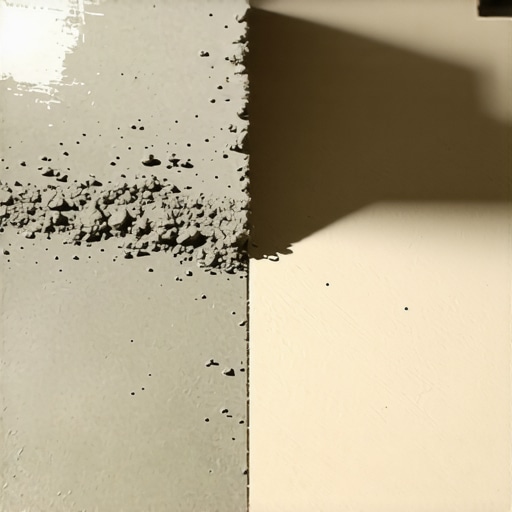
I spent three days grinding concrete on a job last month just so the floor wouldn’t click like a castanet. Most guys skip the leveling compound. They think the underlayment will hide the dip. It won’t. I was working on a high-end remodel where the previous installer had left ridges of old thin-set under a layer of cheap foam. When the homeowner walked across their new floor, it sounded like a bag of potato chips being crushed. I had to rip the whole thing out, get on my knees with a seven-inch diamond cup wheel, and eat dust for eight hours. That is the reality of the trade. If you do not respect the subfloor, the subfloor will humiliate you. Removing old thin-set is not a cosmetic choice. It is a structural engineering requirement for any lasting floor installation.
The danger of a neglected subfloor
Thin-set removal is the process of stripping away hardened cementitious adhesive to reveal a clean concrete slab. Failure to remove this material results in bond failure for new tile and height inconsistencies for laminate or hardwood. A flat surface is the only way to ensure structural integrity of the finished floor system. You cannot expect a new layer of modified thin-set to bridge the gap over old, brittle peaks. It just does not work that way. The chemistry of the bond depends on the new adhesive penetrating the pores of the concrete. If those pores are clogged with twenty-year-old gray sludge, your new floor is basically floating on a prayer. I have seen thousand-dollar showers fail because someone tried to skim coat over old ridges instead of doing the hard work of mechanical removal. When we talk about showers, the waterproofing membrane requires a substrate that is not only flat but also free of sharp protrusions that could puncture the fabric or liquid-applied barrier.
Mechanical separation of modified polymers
Modified thin-set contains polymers that create a chemical and mechanical bond with the concrete substrate. To remove it, you must overcome the tensile strength of these polymers through percussive force or abrasive grinding. Standard thin-set is brittle, but polymer-modified versions are resilient and fight back against the blade. The physics here are simple. You are trying to shear a cementitious product away from a similar cementitious product. Because they share a similar density, the bond is often stronger than the material itself. This is why you often see chunks of the actual slab coming up if you are too aggressive with a jackhammer. You need to understand the Mohs scale of the material you are dealing with. Concrete is hard, but the diamond segments on a grinding wheel are harder. The friction generates heat, which can actually soften the polymers in the thin-set, making them gummy. This is why high-quality dust extraction is not just about your lungs, it is about keeping the surface cool so the diamonds can actually cut instead of just smearing the gunk around.
“A floor is only as good as the subfloor beneath it; deflection is the enemy of every joint.” – Master Flooring Axiom
The diamond cup wheel advantage
Diamond cup wheels are the professional standard for concrete surface preparation because they provide a uniform profile. These tools use industrial diamonds embedded in a metal matrix to shave down high spots and remove old adhesive efficiently. Using a hammer and chisel is for people who have too much time and not enough skin on their knuckles. If you want it done right, you get a variable speed grinder. You want a shroud that hooks up to a HEPA vacuum. Without that shroud, you will be breathing silica dust for the next decade, and your customer’s house will be ruined. I prefer a turbo-row cup wheel for thin-set. The segments are angled to kick the debris out and away from the center. It bites into the concrete and leaves a CSP (Concrete Surface Profile) of about a 2 or 3. That is perfect for when you are laying down grout for new tile or prepping the area for laminate underlayment. If the slab is too smooth, the new glue has nothing to grab. If it is too rough, you waste a fortune in self-leveler.
| Tool Type | Ideal Use Case | Speed Rating |
|---|---|---|
| Manual Floor Scraper | Loose, brittle thin-set | Very Slow |
| Demolition Hammer | Thick, heavy ridges | Moderate |
| Angle Grinder w/ Diamond Wheel | Flatness and total removal | Fast |
| Floor Buffer with Scraper Attachment | Large open areas | Very Fast |
Why chemical strippers usually fail
Chemical adhesive removers are designed to break down mastic or carpet glue, but they are largely ineffective against thin-set. Since thin-set is cement-based, it does not dissolve in solvents; it requires mechanical force to break its crystalline structure. I see guys trying to soak old thin-set in citrus strippers. It is a waste of money. All you do is create a slippery, acidic mess that makes the real work even harder. You might soften the top 1/64th of an inch, but the bond to the concrete remains untouched. The only time chemicals belong on a subfloor is after the mechanical removal is done and you are cleaning up some oily residue. For hardwood floors, you need a bone-dry, porous surface. If you use chemicals, you risk contaminating the slab, which could lead to your expensive oak planks popping up in six months because the moisture barrier failed to stick. Stick to the grinder. It is loud, it is heavy, but it actually works.
- Inspect the floor for any protruding nails or screws that could shatter a diamond segment.
- Set up a heavy-duty dust containment system with a 2-stage HEPA vacuum.
- Use a 7-inch grinder for large floors and a 4.5-inch grinder for tight corners.
- Keep the grinder moving to avoid digging deep gouges into the concrete slab.
- Wear a P100 respirator because silica dust is a permanent lung visitor.
Preparing for laminate and hardwood transitions
Subfloor flatness is non-negotiable when installing laminate or hardwood floors over concrete. Most manufacturers require the floor to be flat within 1/8 inch over 10 feet to prevent locking mechanism failure. If you leave even a small hump of thin-set, your laminate will bridge over it. Every time you step on that spot, the joint flexes. Eventually, the tongue snaps off. Then you have a floating floor that actually moves. It is the same for engineered hardwood. People think the thick underlayment is a cure-all. It is not. Too much cushion is actually a bad thing. If the underlayment is too soft, the floor has too much vertical travel. You want the slab to be like a mirror. Not shiny, but flat. I always run a 10-foot straight edge across the room after I am done grinding. If I see light under that bar, I am not done. I have seen guys try to fill the low spots with cardboard or extra foam. That is hack work. You grind the highs and fill the lows with a high-compressive strength leveling compound. This is the only way to ensure the warranty on the flooring stays valid.
“Substrate preparation is 90% of the job; the flooring is just the finishing touch.” – TCNA Technical Manual
The 1/8 inch rule that dictates your failure
When we talk about the 1/8 inch rule, we are talking about the difference between a floor that lasts forty years and a floor that fails in four. The physics of weight distribution require a solid base. If you have a shower floor where the thin-set was not fully removed, the new tile will have air pockets underneath. Those air pockets collect moisture. Moisture leads to mold. Mold leads to a phone call I do not want to take. You have to be meticulous. Use a hand-held grinding block for the edges where the big machine can’t reach. Look at the color of the concrete. If it is still gray and dusty, you are good. If you see white or tan patches, that is old adhesive. It has to go. This is especially true for grout lines. If the substrate is uneven, the tiles will sit at different heights, creating lippage. You cannot fix lippage with grout. Grout is just the sand that fills the gaps. If the tiles are not on the same plane, the grout will crack and fall out within weeks. Do the work now or do it twice. The choice is yours, but my knees won’t let me do it twice for free.