
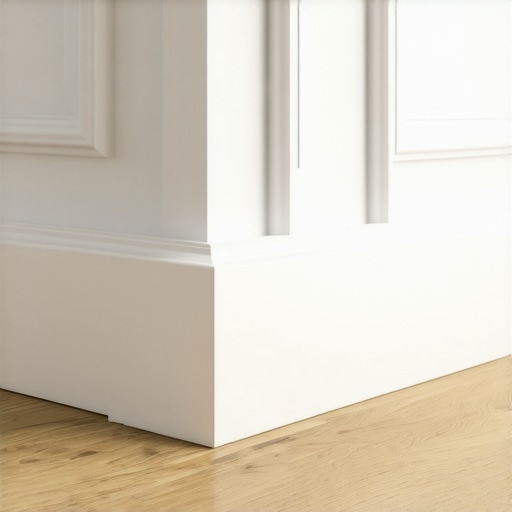
The air in my shop always smells like a mix of WD-40 and freshly cut red oak. It is a scent that carries the weight of twenty-five years on my knees, crawling across subfloors with a moisture meter in one hand and a level in the other. I have seen every mistake a weekend warrior can make, and most of them start with a lack of respect for the physics of wood. Homeowners always ask why their waterproof vinyl is buckling or why their laminate looks like it is trying to climb the walls. Usually, it is because they locked it under a heavy kitchen island or a baseboard that was nailed too tight, killing the floor ability to breathe. I once spent three days grinding concrete on a job just so the floor would not click like a castanet. A floor is a performance surface, not a decoration. If you do not give it the room it needs to expand and contract, it will destroy itself. The expansion gap is the most misunderstood part of a floor. It is the lungs of the installation. When that gap gets too wide for the baseboard to cover, people panic. They think they need to rip it all out. They do not. They just need to understand the geometry of quarter round and the structural reality of their home. [image_placeholder_1]
The physical necessity of perimeter expansion gaps
Expansion gaps provide the essential space required for floating and fixed floors to move in response to changes in temperature and relative humidity. Without a minimum gap of one quarter inch to one half inch, flooring materials like laminate and hardwood will swell and buckle against vertical obstructions. This movement happens at a cellular level. Wood is hygroscopic. It drinks water from the air. When the humidity in a room jumps from thirty percent in the winter to sixty percent in the summer, every single plank grows. If you have forty planks across a room and each one grows by just a fraction of a millimeter, that total growth adds up to a massive force. That force has to go somewhere. If it hits a wall, the floor has no choice but to lift. I have seen solid oak floors rip the nails right out of the subfloor because some architect wanted a zero threshold look without an expansion joint. It was a disaster. The industry standards are clear on this.
“A floor is only as good as the subfloor beneath it; deflection is the enemy of every joint.” – Master Flooring Axiom
We use quarter round because baseboards are often only half an inch thick. In a large room, your floor might need more than half an inch of room to breathe. That is where the quarter round comes in as the secondary defense. It covers the gap while allowing the floor to slide underneath it like a piston in a cylinder.
The geometry of quarter round versus shoe molding
Quarter round molding features a profile that is a perfect ninety degree arc, typically measuring three quarters of an inch by three quarters of an inch. Shoe molding is narrower and taller, designed to be less obtrusive while still covering the joint where the baseboard meets the floor. Choosing between them is not just about looks. It is about the math of the gap. If your installer got lazy and left a three quarter inch gap, a standard half inch shoe molding will fall right into the hole. You need the meat of a full quarter round. The radius of a three quarter inch quarter round gives you a massive amount of horizontal coverage. It is the heavy hitter of the molding world. I prefer solid pine or oak over the compressed sawdust stuff they sell at the big box stores. The MDF stuff swells the second a mop touches it. If you are working in a bathroom near showers or in a kitchen, solid wood or PVC is the only way to go. You have to think about the wear layer of the floor too. If you are installing a thin laminate with a low mil thickness, a heavy quarter round can look bulky. But if you have a thick, wire brushed engineered hardwood, the quarter round adds a layer of architectural depth. It hides the rough cut edges of the floor where the saw blade might have chipped the veneer. We are talking about hiding sins here, and quarter round is the best priest in the business.
The 1/8 inch that ruins everything
Precision in measuring the gap width determines whether the molding will sit flush or leave a shadow line that highlights floor unevenness. If the molding is nailed into the flooring rather than the wall, it pins the floor and causes joint separation during the next seasonal shift. This is the mistake that kills floors. You must nail the quarter round into the baseboard or the wall studs. Never, under any circumstances, should a nail pass through the molding and into the floor. If you do that, you have just created a fixed point. When the floor tries to shrink in the dry winter air, it will pull against that nail. The locking mechanism on your laminate will snap. Or, the wood will split. I have seen it a hundred times. You need a pneumatic pin nailer, preferably twenty three gauge, to keep the holes small. The angle of the nail should be slightly downward but strictly into the vertical surface. We also have to talk about subfloor levelness. If your subfloor has a dip, your quarter round will follow that dip, leaving a gap at the top. You think you can just caulk it, but caulk is for plumbers. A real pro knows that you might have to scribe the molding to the floor. You take a compass, trace the contour of the floor onto the molding, and then plane it down. It is tedious work. It makes your back ache and your eyes sting from the dust. But it is the difference between a floor that looks like it was thrown together and one that was built by a master.
| Molding Type | Standard Dimensions | Horizontal Coverage | Best Use Case |
|---|---|---|---|
| Standard Shoe | 1/2″ x 3/4″ | 0.5 Inches | Small gaps, modern trim |
| Quarter Round | 3/4″ x 3/4″ | 0.75 Inches | Large gaps, traditional homes |
| Base Shoe | 7/16″ x 11/16″ | 0.43 Inches | Tight tolerances, hardwood |
| Extra Wide QR | 1″ x 1″ | 1.0 Inches | Severe installation errors |
Why your subfloor is lying to you
Subfloors often hide structural deficiencies like high spots or moisture pockets that cause the finish floor to sit higher or lower than intended. These variances create uneven expansion gaps that standard quarter round cannot easily hide without professional scribing techniques. You walk onto a job site and the concrete looks flat. It is not. It is a series of hills and valleys. If you are laying floor over a crawlspace in a humid area like New Orleans or Houston, that subfloor is a sponge. It is breathing moisture into the underside of your floor. The TCNA and NWFA are very specific about moisture vapor transmission rates. You need a calcium chloride test or a pinless meter reading before you even think about trim. If the moisture is too high, the floor will swell more than the calculated expansion gap allows. Then your quarter round is useless. I have seen floors push so hard they actually moved the baseboards. You have to seal the subfloor. Use a high quality moisture barrier. In showers or wet areas, your grout choice matters too. If the floor meets a tiled shower, you do not use quarter round. You use a color matched caulk or a transition strip. But if the hardwood runs up to a bathtub, you better be using a rot resistant wood like white oak or a synthetic composite. The physics of water do not care about your aesthetic. Capillary action will pull water under that quarter round and start a mold farm if you are not careful.
Essential steps for a professional perimeter finish
- Measure the widest point of the gap to ensure the molding selection covers the entire void.
- Acclimate the quarter round in the room for at least forty eight hours to stabilize its moisture content.
- Use a miter saw with an eighty tooth carbide blade to prevent splintering the finish.
- Apply a thin bead of wood glue to mitered corners for a permanent bond.
- Set the nail gun depth to ensure pins are slightly recessed for easy filling with putty.
- Vacuum the expansion gap thoroughly before installation to remove debris that could rattle.
The chemistry of adhesives and the ghost in the expansion gap
Adhesive selection for mitered joints and the absence of adhesive on the floor surface are critical for maintaining the integrity of a floating system. Using the wrong glue or accidentally bonding the molding to the planks will lead to mechanical failure of the flooring joints. When you are hitting those outside corners, you want a fast setting cyanoacrylate adhesive or a high quality wood glue. You are not just nailing. You are building a frame. But that frame must remain independent of the floor. Think of the floor as a shifting tectonic plate. The quarter round is the bridge over the fault line. It has to be anchored to the stable ground of the wall. I see guys all the time using construction adhesive to stick quarter round down. It is lazy. It is wrong. It ruins the floor. And let us talk about the finish. If you are staining the quarter round to match hardwood floors, you have to do it before you nail it down. Otherwise, you are getting stain on your brand new floor. You use a pre stain conditioner on pine to prevent blotchiness. You want the grain to pop. You want it to look like it grew there. If you are painting it to match the baseboard, use a high quality enamel that can take the hits from a vacuum cleaner. The bottom edge of the quarter round takes more abuse than any other part of the house trim. It gets kicked, scuffed, and hit with wet mops. A cheap builder grade paint will peel in six months. Use a urethane alkyd hybrid. It flows like oil but cleans up like water. It creates a hard shell that protects the wood. This is the structural engineering of beauty. It is about durability as much as it is about hiding that ugly gap.
“Floating floors require perimeter relief to accommodate hygroscopic expansion; any restriction will result in cumulative tension and eventual failure.” – NWFA Technical Guide