
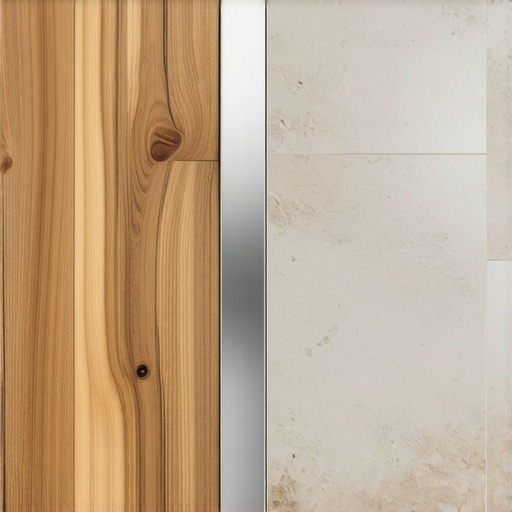
Listen, your floor does not care about your Pinterest board. I have spent twenty-five years on my knees with a moisture meter and a mallet, and I can tell you that the most beautiful hardwood floors in the world will fail if you ignore the laws of physics. Most guys skip the leveling compound. They think the underlayment will hide the dip. It won’t. I spent three days grinding concrete on a job last month just so the floor wouldn’t click like a castanet. That job is the reason I am writing this. People want the zero-threshold look because they saw it in a magazine, but they do not understand that wood and tile are two different species of material that hate each other at a molecular level. One moves, the other stays still. If you do not give them a buffer, they will fight until one of them breaks. Hardwood floors are hygroscopic, meaning they drink water out of the air and grow. Tile is a rigid ceramic or stone that is bonded to the slab with a crystalline cement lattice. When these two meet, the transition strip is the only thing keeping your investment from buckling into a heap of expensive kindling.
The unseen war between oak and ceramic
Transition strips are necessary because wood and tile expand and contract at different rates due to temperature and humidity fluctuations. Without a transition strip, the expanding wood will exert lateral pressure against the rigid tile edge, leading to cracked grout, snapped tongues and grooves, or floor cupping. It is a mechanical necessity for structural longevity. Wood is a bundle of cellulose tubes. When the humidity in your house hits sixty percent in the summer, those tubes fill with water and the entire plank gets wider. Tile, however, is a static material. When you butt wood directly against tile, there is no place for that expansion to go. The force has to be relieved somewhere, and usually, that means the wood floor starts to lift off the subfloor. I have seen fifteen thousand dollar wide-plank walnut floors cupping so bad they looked like potato chips because the installer thought he was too good for a T-molding. You need that gap. The transition strip covers the expansion space while allowing both materials to exist in their own physical reality.
“A floor is only as good as the subfloor beneath it; deflection is the enemy of every joint.” – Master Flooring Axiom
Why your subfloor is lying to you
Subfloor height differences and levelness are the primary reasons why a transition strip is required to bridge the gap between rooms. Rarely are two adjacent rooms perfectly level with one another, especially when one uses a thick mortar bed for tile and the other uses a thin underlayment for laminate or hardwood floors. If you do not use a transition, you create a trip hazard and a point of structural failure. When I walk onto a job site, the first thing I do is pull out a ten foot straightedge. If that floor has a dip of more than an eighth of an inch over ten feet, we have a problem. Many homeowners think they can just build up the thin-set to meet the wood. That is a recipe for disaster. Excessively thick thin-set will shrink as it cures, pulling the tile down and creating an uneven lip. This is where the physics of deflection comes in. If the subfloor flexes under your weight, and there is no transition to isolate that movement, you will hear a crunching sound. That is your grout turning back into sand. A proper transition strip allows each floor to move vertically without affecting the neighbor.
The danger of the zero threshold dream
Zero-threshold transitions are often technically impossible or structurally unwise because they require the subfloor to be recessed at different depths to accommodate varying material thicknesses. While architects love the look of a flat transition, it often compromises the moisture barrier or the expansion requirements of the wood. Achieving a flush transition between three-quarter inch solid oak and a quarter-inch porcelain tile requires surgical precision in the subfloor preparation. You are looking at grinding the concrete or shimming the plywood with extreme accuracy. Even then, you still need a silicone-filled expansion joint between the two materials. If you use grout at the junction of wood and tile, it will crack within three months. Wood moves, grout does not. The transition strip is a mechanical cover that hides the messy reality of this movement. It provides a finished edge to the tile, protecting the glaze from chipping, and it hides the raw cut end of the hardwood planks.
Managing the moisture bridge near showers
Moisture protection at the junction of wet and dry zones is a critical function of the transition strip in modern home design. In areas near showers or kitchens, the transition strip acts as a barrier that prevents topical water from seeping into the raw end-grain of the hardwood floors or the core of laminate. When you have a tiled bathroom meeting a wood hallway, the humidity levels are never equal. The bathroom is a tropical rainforest every morning. Without a proper transition and a bead of high-quality sealant, that moisture will travel under the floor. Once water gets into the subfloor, you are looking at mold and rot. I have pulled up floors where the plywood was as soft as wet cardboard because the installer didn’t use a moisture-resistant transition. A metal or stone threshold at the bathroom door creates a physical break that keeps the wood dry and the tile stable.
The structural reality of different heights
| Material Pair | Typical Height Difference | Recommended Transition Type | Movement Allowance |
|---|---|---|---|
| Solid Wood to Tile | 1/4 inch to 1/2 inch | Reducer or T-molding | High |
| Laminate to Tile | 1/8 inch to 3/8 inch | Overlap Reducer | Moderate |
| Engineered Wood to Tile | 0 to 1/4 inch | T-molding or Slim-cap | Moderate |
| LVP to Tile | 1/8 inch to 1/4 inch | Multi-purpose Reducer | Low |
The chemistry of the bond and the grout
Adhesion failure occurs when different flooring materials are joined without a transition because the shear forces of wood movement break the bond of the tile mortar. The chemical composition of modified thin-set is designed to hold tile to a stable substrate, not to resist the lateral tugging of a three-ton floor system expanding in the summer. When the wood moves, it pulls on the tile. If they are locked together with grout or a rigid bead of caulk, the bond will fail. This is why we use transition strips. They allow for a floating joint. I always tell people that a floor is a living thing. The lignin in the wood cells is still reacting to the environment decades after the tree was cut down. You cannot fight that with glue. You have to design for it. A transition strip is essentially a mechanical hinge that lets the two floors breathe without tearing each other apart at the seams.
How expansion kills a floor without a gap
Expansion gaps are the lifeblood of a hardwood installation and the transition strip is the only way to hide those gaps from view. Most manufacturers require a minimum of a half-inch expansion space around the entire perimeter of a room. When that room meets another floor type, you cannot just close that gap. If you butt the wood tight to the tile, the floor has nowhere to go but up. I have seen floors buckle six inches off the ground in the middle of a room because the installer didn’t leave a gap at the transitions. It is a terrifying sight. You can hear the floor popping like gunshots as the wood fibers crush each other. By using a T-molding or a reducer, you maintain that crucial half-inch gap while keeping the floor looking seamless to the untrained eye. It is the professional way to handle the physics of a moving surface.
“A floor is only as good as the subfloor beneath it; deflection is the enemy of every joint.” – Master Flooring Axiom
A comparison of wood hardness levels
When choosing your transition material, you must consider the Janka hardness scale to ensure the strip does not wear out faster than the floor. A soft pine transition strip in a high-traffic doorway will look like a beaver chewed on it within a year. I always recommend matching the species of the transition to the floor or using a metal profile for maximum durability. For example, Red Oak has a Janka rating of 1290, which is standard for residential use. If you are using Brazilian Cherry at 2350, a soft oak transition will look battered very quickly. The chemistry of the wood matters just as much as the height. A dense wood transition will resist the impact of rolling suitcases and heavy foot traffic better than a generic store-bought piece of hemlock or pine.
Checklist for professional transitions
- Check subfloor levelness with a 10-foot straightedge before installation.
- Measure the total height of both finished floors including underlayment and mortar.
- Ensure a minimum expansion gap of 1/4 inch to 1/2 inch depending on the wood species.
- Select a transition strip that matches the Janka hardness of the flooring material.
- Use a high-quality polyurethane adhesive for the transition track to prevent loose strips.
- Verify that the transition does not trap the floating floor, allowing it to move freely.
- Apply a color-matched silicone bead at the tile edge for a moisture-tight seal.
The ghost in the expansion gap
The hollow sound of a floor without a transition is the first sign of an impending structural failure caused by trapped air and vertical movement. If you walk over a transition and hear a click, the installer failed you. It means there is a void. I spent half my career fixing these ghosts. Usually, it is because the installer didn’t level the subfloor or they tried to use a transition strip that was too tall for the gap. They stuffed it with cardboard or shims. That is bush-league work. A professional transition should feel as solid as the rest of the floor. This requires the installer to understand the modulus of elasticity of the wood and the compression strength of the underlayment. If the underlayment is too soft, the wood will dip as you step on the transition, eventually snapping the molding. You need a firm base and a perfectly fitted piece of trim. Anything less is just a trip hazard waiting to happen.
Regional climate factors and floor movement
The weather where you live dictates the size of the transition gap you need. In the swampy humidity of Houston or Miami, solid wood is a death wish without massive expansion gaps and heavy-duty transitions. The air is so thick you could drink it, and the wood knows it. In those regions, the wood will expand significantly more than it would in the dry heat of Phoenix. If you are in Arizona, your problem is the opposite. The heat will shrink your baseboards until they show a gap, and your wood floor will pull away from the transitions. You need a transition strip with a wider flange to hide the shrinkage. I have seen guys from out of state come into a dry climate and install floors like they are back in the Midwest. Within a year, every transition had a visible gap because they didn’t account for the regional moisture equilibrium. You have to build for the local climate, not the factory specifications.
The final word on structural integrity
A transition strip is not an accessory. It is a structural component of a flooring system. It is the bridge between two worlds. Whether you are dealing with laminate, hardwood floors, or tile in showers, the junction is where the most stress occurs. If you want a floor that lasts thirty years, you do not cut corners on the transitions. You grind the concrete, you level the subfloor, and you install a high-quality molding that respects the physics of the materials. Do not let anyone tell you that a bead of caulk is just as good. It isn’t. Your floor deserves better than a shortcut. Invest in the right materials, follow the NWFA and TCNA guidelines, and you will have a floor that stays flat and silent for as long as you own the house. It is about pride in the craft and respect for the physics of the home.