
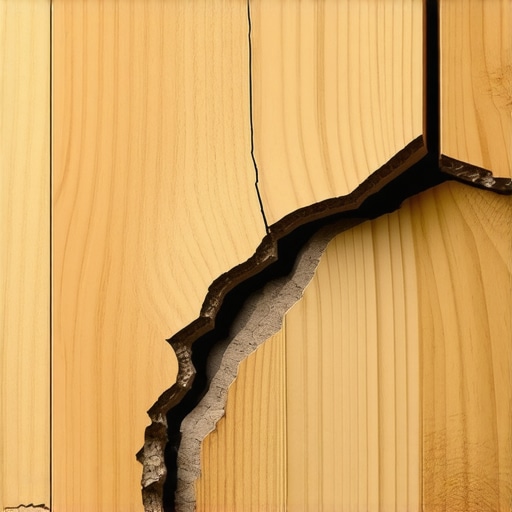
Most guys skip the leveling compound. They think the underlayment will hide the dip. It won’t. I spent three days grinding concrete on a job last month just so the floor wouldn’t click like a castanet. The homeowner thought I was crazy. They saw the bags of self-leveler and the diamond grinder and asked if I was building a bunker. I told them the floor is a machine. If the base is crooked, the machine breaks. Laminate isn’t just plastic wood. It is a precision-engineered locking system that relies on perfectly flat geometry. When you ignore the subfloor, you are setting a trap for your own feet. You can buy the most expensive planks in the world, but if they are sitting on a valley, those tongues will snap within a year.
The subtle fracture that kills a floating floor
The tapping block mistake is the most common cause of premature laminate failure because it creates micro-fractures in the High-Density Fiberboard core. When an installer strikes a tapping block that is not perfectly flush with the plank, the kinetic energy is focused on the tip of the tongue rather than the meat of the joint. This localized pressure causes the urea-formaldehyde resins that bind the wood fibers to shatter at a microscopic level. You might not see the damage immediately. The floor looks fine during the walk-through. However, as the seasons change and the floor undergoes thermal expansion, those weakened fibers begin to separate. Eventually, the locking mechanism loses its grip, leading to unsightly gaps and peaking that no amount of repair kit can fix.
Why your subfloor is lying to you
Subfloor flatness is measured by a standard of 3/16 of an inch over a 10-foot radius to ensure the structural integrity of floating floor joints. Many DIY installers assume that a thick foam underlayment will compensate for a wavy plywood subfloor or a pitted concrete slab. This is a dangerous misconception. Underlayment is designed for sound dampening and moisture protection, not structural leveling. When a laminate plank spans a dip in the subfloor, it creates a bridge. Every time you walk over that spot, the plank flexes downward. This movement is called deflection. In a floating system, the tongue and groove joints are the only things holding the floor together. Constant vertical deflection puts immense shear stress on the tongues. If you previously damaged those tongues with a heavy-handed tapping block, the floor will fail at the first sign of pressure. I have seen entire living rooms ruined because the installer was too lazy to use a straightedge and a bag of patch. You cannot hide a bad foundation with a pretty surface.
“A floor is only as good as the subfloor beneath it; deflection is the enemy of every joint.” – Master Flooring Axiom
The 1/8 inch that ruins everything
Expansion gaps at the perimeter must be at least 1/4 to 3/8 of an inch to allow the entire floor plane to move as a single unit. One of the biggest mistakes I see is installers pushing the laminate tight against the drywall or the baseboards. They think a tight fit looks professional. In reality, it is a ticking time bomb. Laminate is composed of wood fibers, and those fibers react to atmospheric humidity. When the humidity rises, the floor grows. If there is no gap at the edges, the floor has nowhere to go but up. This creates pressure on the tongues and grooves. Combine this pressure with a fractured tongue from a bad tapping technique, and you get a catastrophic failure. I have seen floors buckle so hard they actually lift the baseboards off the wall. Always use spacers. If you don’t have 1/4 inch of breathing room, you are building a floor that will eventually tear itself apart. This is especially true near heavy objects like kitchen islands, which act as anchors and prevent the floor from sliding naturally.
The physics of the tongue and groove joint
The internal chemistry of laminate cores involves wood fibers compressed at high pressure with thermosetting resins to achieve specific density ratings. To understand why the tapping block is so dangerous, you have to look at the cellular structure of High-Density Fiberboard (HDF). Unlike solid hardwood floors, which have long, continuous grain structures, HDF is made of pulverized wood particles. These particles are held together by a chemical bond. When you hit the joint with a hammer, you are trying to overcome the friction between the tongue of the new plank and the groove of the previous one. If the tapping block is held at an angle, the force is not distributed across the entire surface of the tongue. Instead, the force is concentrated on a single point. This creates a stress riser. Once a crack starts in the resin-heavy core, it propagates through the rest of the plank. This is why professional installers use a pulling bar for the final row and a high-quality, weighted tapping block for the rest of the field. A cheap plastic block from a big-box store often has mold flashing or uneven edges that can nick the very surface you are trying to protect.
A hierarchy of installation tools
Professional flooring tools are engineered to distribute force evenly across the delicate edges of modern click-lock systems. Not all tools are created equal. A rubber mallet is often too soft and absorbs too much energy, forcing the installer to strike harder. A framing hammer is far too hard and will shatter the block or the plank. The sweet spot is a 16-to-20-ounce dead-blow hammer. Inside a dead-blow hammer, there is steel shot that moves forward on impact, preventing the hammer from bouncing back. This ensures that 100 percent of the energy is transferred into the tapping block to seat the plank. The block itself should be made of a high-density polyethylene or a scrap piece of the flooring itself. Using a scrap piece is actually one of the best ways to protect the tongues because the profiles match perfectly. However, you must be careful not to use a piece that is already damaged. One wrong swing and you have sent a shard of HDF into the groove of your expensive new floor.
| Material Property | Laminate (HDF) | Engineered Wood | Solid Hardwood |
|---|---|---|---|
| Core Density | 800-900 kg/m3 | 500-700 kg/m3 | 600-800 kg/m3 |
| Moisture Sensitivity | High (Edges) | Moderate | Very High |
| Installation Method | Floating | Glue/Nail/Float | Nail/Staple |
| Acclimation Time | 48 Hours | 72 Hours | 7-14 Days |
The regional humidity trap for laminate
Environmental conditions dictate the success of a laminate installation because the wood fiber core reacts to the specific grains of moisture in the air. If you are installing in a swampy climate like New Orleans, your expansion gaps need to be generous. If you are in a dry climate like Denver, you might see the floor shrink more than expected. Most people ignore the acclimation process. They bring the boxes home from the store and start clicking them together an hour later. That is a recipe for disaster. The planks need to sit in the room where they will be installed for at least 48 hours to reach an equilibrium moisture content. If you install cold, dry planks into a warm, humid room, they will expand. If you used a bad tapping block technique, the resulting expansion will snap those weakened tongues like toothpicks. It is not just about the temperature; it is about the relative humidity. I always carry a hygrometer. If the room is above 60 percent humidity or below 30 percent, I don’t install. I wait until the HVAC system has stabilized the environment.
Grout and showers vs laminate reality
Laminate floors are fundamentally incompatible with wet environments like showers or areas requiring traditional grout because the HDF core is highly absorbent. I often hear homeowners ask if they can put laminate in a bathroom. I tell them only if they want a sponge for a floor. Even the so-called waterproof laminate is usually only water-resistant on the surface. The weak point is always the joint. If water sits on the joint, it eventually seeps into the HDF core. Once that core absorbs water, it swells. This is called edge-swell, and it is irreversible. Unlike tile where grout provides a semi-permeable or sealed barrier, laminate joints are open. If you have used a tapping block incorrectly and micro-fractured the tongue, you have essentially opened a door for moisture to enter. The capillary action will pull water deep into the plank, causing the decorative layer to peel away from the core. For bathrooms and showers, stick to porcelain tile or luxury vinyl plank with a stone polymer core. Laminate belongs in dry living spaces where its acoustics and warmth can be appreciated.
Hardwood floors comparison and durability
Hardwood floors offer superior longevity compared to laminate because they can be sanded and refinished multiple times over several decades. While laminate is a great budget-friendly option, it is a temporary floor. Most laminate has a lifespan of 15 to 20 years. Solid hardwood can last 100 years. The difference lies in the wear layer. Laminate uses an aluminum oxide paper layer over a printed image. Once you scratch through that layer, the floor is done. Hardwood is wood all the way through. However, hardwood is much more difficult to install. You aren’t just clicking pieces together; you are nailing into a subfloor and managing the natural movement of a living material. Laminate was invented to give the look of hardwood without the cost, but it requires much more precision during the click-together phase. If you ruin the tongues of your laminate, you can’t just nail it down to fix the problem. You have to replace the whole plank. This is why the tapping block technique is so vital. It is the one moment in the installation where you can either ensure the floor lasts 20 years or ensure it fails in two.
- Ensure the subfloor is flat within 3/16 inch over 10 feet.
- Acclimate the flooring for at least 48 hours in the installation room.
- Use a high-quality dead-blow hammer and a matching tapping block.
- Check every tongue for micro-fractures before clicking into place.
- Maintain a 3/8 inch expansion gap around all vertical obstructions.
- Never install laminate in full bathrooms or laundry rooms.
- Vacuum the subfloor twice to remove every grain of grit before laying underlayment.
“A floor is only as good as the subfloor beneath it; deflection is the enemy of every joint.” – Master Flooring Axiom
The chemistry of the wear layer
The durability of a laminate floor is determined by its AC rating, which measures the resistance of the aluminum oxide top layer to abrasion. Most people look at the thickness of the plank, but the thickness doesn’t tell you how well it will wear. A 12mm plank with an AC3 rating will wear out faster than an 8mm plank with an AC5 rating. The aluminum oxide is essentially liquid sandpaper that is baked onto the surface. It is incredibly hard. This hardness is what protects the photographic layer from your dog’s claws and your kids’ toys. However, this hardness also makes the surface brittle. If you strike the plank too hard with a tapping block, you can actually cause the wear layer to chip at the edge. These chips are often invisible to the naked eye until dirt gets into them. Once a chip occurs, the moisture protection is gone. Every time you mop, a tiny bit of water gets under that wear layer. This is why I always tell people to be gentle. You aren’t driving a stake into the ground; you are nudging a precision component into its housing.
The final check for a silent floor
A successful laminate installation is silent, stable, and shows no visible gaps or peaks at the joints. Before you put the baseboards on, walk every square inch of that floor. If you hear a click or a pop, you have a problem. It usually means there is a piece of debris in the groove or the subfloor has a dip you missed. Or, it means you snapped a tongue during the install. If you find a bad plank, take the floor apart and fix it now. It is a pain in the neck, but it is better than living with a clicking floor for the next decade. Remember that laminate is a system. The underlayment, the planks, the expansion gaps, and the subfloor all have to work together. If one part of the system is compromised by poor technique or bad prep, the whole thing fails. Respect the material, use the right tools, and stop hitting the planks like they owe you money.