
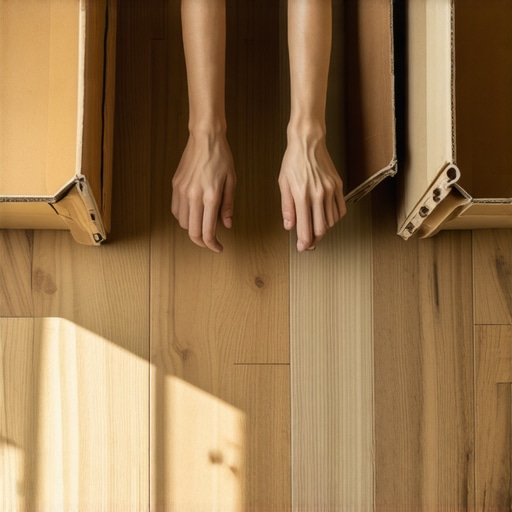
I once walked into a house where a five thousand dollar laminate installation looked like a cheap barcode because the installer pulled planks straight from the box without looking at the grain. It was a visual disaster. The owner was furious because three identical knots were sitting right next to each other in the center of the foyer. This is the hallmark of a rookie mistake. Professional floor installation is as much about logistics and pattern randomization as it is about the physical act of clicking planks together. When you fail to mix your boxes, you are gambling with the aesthetic integrity of your entire home. A floor is a performance surface, and its visual rhythm dictates how the eye perceives the space. If you want a floor that looks like real hardwood floors and not a series of repeating stamps, you must learn the art of the box shuffle.
The visual disaster of the stair step pattern
Mixing three boxes of laminate simultaneously prevents pattern grouping and ensures a natural distribution of grain variations throughout the room. Most manufacturers only use a handful of unique photographic prints for an entire production run. If you pull from a single box, you will likely install identical planks side by side, creating a jarring, artificial appearance. This process of randomization is mandatory for achieving a professional finish that mimics high end materials. I have spent twenty five years fixing floors where people ignored this rule. They end up with a stair step of identical knots that ruins the flow of the room. You have to think like a curator. You are building a mosaic, not just laying down sticks. The goal is to hide the fact that this is a factory product. You want the guests to wonder if it is solid oak or a high tech composite. That illusion dies the moment two identical planks touch.
The physics of the photographic layer
Laminate flooring relies on a high resolution photographic layer protected by a melamine resin wear layer that dictates the final look of the plank. This photographic layer is printed on large decorative paper rolls which are then pressed onto a high density fiberboard core. Because the printing cylinders have a fixed circumference, the patterns repeat every few feet. When these boards are cut and boxed at the factory, identical patterns often end up in the same carton. This is why grabbing from three or four boxes at once is the only way to break the cycle. You are essentially fighting the manufacturing process to create a unique organic look. The light reflectivity of the wear layer also matters. Some planks have an embossed in register finish which aligns the texture with the image. If you group these identical textures, the light will hit them in a way that highlights the repetition. This makes the floor look plastic and cheap. I always tell my guys to treat every box like a deck of cards. You have to shuffle them before you play the hand.
“A floor is only as good as the subfloor beneath it; deflection is the enemy of every joint.” – Master Flooring Axiom
Why your subfloor is lying to you
Subfloor flatness is the single most important factor in the longevity of a laminate floor because any dip will cause the locking mechanisms to flex and eventually snap. You might think your plywood or concrete is flat, but a three foot level is not enough to prove it. You need an eight foot or ten foot straight edge. If you have a dip larger than one eighth of an inch over ten feet, the floor will bounce. This is called deflection. Over time, that bounce fatigues the tongue and groove system. I have seen beautiful floors destroyed in six months because the installer thought the underlayment would fill the gaps. It will not. Underlayment is for sound dampening and moisture protection, not for structural leveling. If you hear a clicking sound when you walk, that is the sound of your floor dying. I spent three days last month grinding a concrete slab just to get it within tolerance for a wide plank installation. It was dusty and miserable, but that floor will last forty years because it is sitting on a dead flat plane. Do not skip the prep work. The prep is the job. The installation is just the reward.
The math behind the expansion gap
Every floating floor requires a minimum expansion gap of three eighths of an inch around the entire perimeter to allow for seasonal movement. Laminate cores are made of wood fibers, and those fibers react to humidity. Even if you live in a climate controlled environment, the floor will expand and contract. If you pin the floor against a wall or a heavy kitchen island, it has nowhere to go. It will eventually buckle or peak at the seams. This is why I hate seeing people install heavy cabinetry on top of a floating floor. It locks the floor in place. It is a death sentence for the locking system. You need to maintain that gap at every vertical obstruction, including door frames and pipes. Use spacers during the install and do not remove them until the last row is in. People worry about the gap being ugly, but that is what baseboards and quarter round are for. They hide the engineering gap that keeps your floor from exploding in the summer humidity.
Laminate Performance Metrics
| Metric | Standard Requirement | Pro Grade Recommendation |
|---|---|---|
| Subfloor Flatness | 3/16 inch per 10 feet | 1/8 inch per 10 feet |
| Acclimation Time | 48 Hours | 72 Hours Minimum |
| Expansion Gap | 1/4 inch | 3/8 inch for large spans |
| Wear Layer (AC Rating) | AC3 for Residential | AC4 or AC5 for Longevity |
| Relative Humidity | 35% to 55% | 40% to 50% Constant |
The ghost in the expansion gap
Moisture is the silent killer of all fiberboard based flooring products because it attacks the core from the bottom up. If you are installing over concrete, you must use a vapor barrier. Concrete is a sponge. It holds moisture for decades. I have seen floors that looked perfect for two years suddenly start to swell because a heavy rain raised the water table under the slab. The moisture migrates through the concrete and into the bottom of the laminate. The core swells, the edges rise, and the floor is ruined. You can check this with a calcium chloride test or a pinless moisture meter. If the slab is emitting more than three pounds of moisture per thousand square feet, you are in trouble. This is also why laminate does not belong in showers or wet bathrooms. While the top surface is waterproof, the joints are the weak point. If water sits on the joint, it seeps into the core. If you want that look in a bathroom, use luxury vinyl or tile with epoxy grout. Do not try to force a material into an environment where it was never meant to survive.
Essential Installation Checklist
- Check subfloor for flatness using a 10 foot straight edge.
- Acclimate all boxes in the room for at least 72 hours.
- Confirm the moisture content of the subfloor is within manufacturer specs.
- Open at least three boxes and shuffle the planks.
- Maintain a 3/8 inch expansion gap around all walls.
- Stagger end joints by at least 12 inches for structural integrity.
- Undercut door jambs so the floor can slide underneath.
The chemical bond of modern adhesives
While most laminate is click lock, some high traffic applications benefit from a perimeter glue or a specialized joint sealant. This is common in light commercial settings where spills are frequent. Using a PVA glue in the tongue and groove can create a secondary barrier against topical moisture. However, you have to be careful. If the glue is not rated for the specific core density of your laminate, it can cause the fibers to swell prematurely. I prefer using a wax based joint sealer during the assembly process. It provides a level of water resistance without the mess of a permanent glue. When you are looking at the chemistry of these floors, you are looking at melamine resins and aluminum oxide. Aluminum oxide is what makes the floor hard. It is a mineral that is suspended in the wear layer. It is essentially sandpaper in reverse. It protects the image from your dog’s claws and your children’s toys. The thicker the wear layer, the longer the floor stays matte and beautiful. If you buy cheap stuff, it will look shiny and scratched within two years.
“Adhesion is a surface phenomenon; if the surface is contaminated, the bond will fail regardless of the glue quality.” – TCNA Technical Manual
The 1/8 inch that ruins everything
Precision at the start of the job determines the success of the finish because a small error in the first row compounds over the width of the room. If your first row is not perfectly straight, every subsequent row will be harder to click together. You will find yourself using a tapping block with more force, which eventually damages the fragile tongues of the planks. I always snap a chalk line. I do not trust walls. Walls are never straight. I follow the chalk line and shim the gap against the wall to maintain that line. This ensures that the locking mechanisms are under zero stress. When you force a floor together, you are pre loading it with tension. When the house settles or the temperature changes, that tension has to go somewhere. Usually, it results in a gap or a peak. I have seen guys use a hammer and a pry bar like they were framing a deck. You have to be gentle. It is a precision engineered product. Treat it with respect and it will stay quiet and stable for a lifetime. If you have to hit it that hard, something is wrong with your subfloor or your alignment.