
I once walked into a house where a $15,000 wide-plank walnut floor was cupping so bad it looked like a potato chip because the installer didn’t check the crawlspace humidity. That same job had a flight of stairs where every single tread corner was chewed up because someone thought standard wood filler was a structural material. It is not. My name is built on the physics of the subfloor and the chemistry of the bond. When you are staring at a chipped corner on a white oak or hickory tread, you are looking at a mechanical failure of the wood fibers under impact. This is not a cosmetic smudge. It is a structural void in a high traffic zone that requires a repair with higher tensile strength than the wood itself. I have spent twenty five years with sawdust under my nails and a moisture meter in my pocket. I do not care about the aesthetics if the chemistry of the repair is flawed. A stair tread is a lever. Every time a human foot hits that leading edge, it applies hundreds of pounds of pressure per square inch. If your repair is brittle, it will eject like a stone from a slingshot.
The structural physics of stair edges
Stair tread corners fail because of shear stress and cellular dehydration in the wood grain. To fix a chipped hardwood stair, you must understand the Janka hardness scale and how laminate or solid wood reacts to epoxy resin and structural adhesives. Most homeowners try to use a water-based wood putty, but that is a mistake for a load-bearing edge. You need a two-part wood epoxy that creates a mechanical bond with the cellulose fibers. The stair nose is the most vulnerable part of your flooring system. It takes the brunt of every step. When a corner chips, it is usually because the wood was too dry or the grain was oriented in a way that allowed for a clean cleavage plane. Red oak, for example, has large open pores that can act like perforated paper if hit at the right angle. You aren’t just filling a hole. You are rebuilding a structural component.
“A floor is only as good as the subfloor beneath it; deflection is the enemy of every joint.” – Master Flooring Axiom
Why wood putty fails on corners
Standard wood fillers lack the internal cohesion required to maintain an edge under foot traffic. A chipped stair tread needs a repair compound with high impact resistance and flexural strength. If you use a shrinking solvent-based filler, it will pull away from the stair tread walls within weeks. Wood is a living material. It breathes. It expands and contracts with the relative humidity of the room. In a dry winter, that tread is shrinking. In a humid summer, it is swelling. A rigid, brittle filler cannot move with the wood. It will crack. It will fall out. You need a material that mimics the density of the wood while providing a chemical grip that exceeds the strength of the lignins holding the wood fibers together. I have seen guys try to use grout or even hot glue. It is an insult to the craft. You need a two-part polyester or epoxy resin that you mix on a scrap piece of cardboard until the catalyst is fully integrated. This creates a thermal reaction that hardens the mass into a synthetic stone.
The molecular bond of two part wood epoxies
Two part epoxies provide a chemical cross-linking that creates a permanent bridge across the damaged wood grain. This repair method works for hardwood floors, stair treads, and even engineered wood components. The isocyanates and polyols in the resin react to form a polymer chain that is impervious to moisture. When you prep the chip, you cannot just slap the goo on. You have to abrade the surface. I use an 80-grit sandpaper to create a profile. You want the surface to look like a mountain range under a microscope. This gives the epoxy more surface area to grab onto. If the surface is smooth, the repair will peel off like a scab. You also need to clean the area with denatured alcohol. Any oils from feet or cleaning products will act as a bond breaker. I have seen repairs fail because the homeowner used a floor wax the day before. The epoxy just sat on top like water on a duck’s back. It will not hold. You must get down to the raw, thirsty fibers of the wood.
| Material Type | Janka Rating (Lbf) | Best Repair Compound | Cure Time |
|---|---|---|---|
| Red Oak | 1290 | Two-Part Epoxy Resin | 30-60 Minutes |
| White Oak | 1360 | Two-Part Epoxy Resin | 30-60 Minutes |
| Hard Maple | 1450 | Polyester Wood Filler | 20-40 Minutes |
| Hickory | 1820 | High-Density Resin | 60+ Minutes |
Sculpting the perfect tread profile
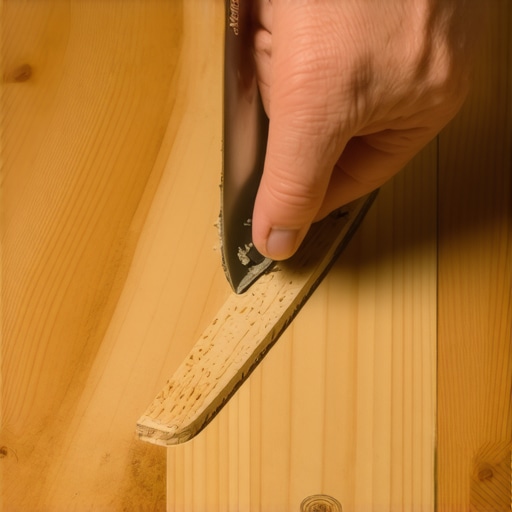
Reconstructing a corner requires a steady hand and a knowledge of the original tread radius. You must use blue painter’s tape to create a formwork or dam around the stair nose. This prevents the liquid resin from sagging or running down the stair riser. I like to overfill the chip slightly. You want a humped-up area that you can later sand back to perfection. If you try to get it flush while it is wet, you will fail. Gravity is your enemy here. As the resin cures, it will settle. By overfilling, you ensure that the center of the repair is dense and solid. Once it hits the “leathery” stage, which is usually about 15 minutes in, you can take a sharp chisel and shave off the bulk of the excess. This saves you an hour of sanding later. But be careful. If you pull too hard, you will rip the whole plug out. It is a game of timing. It is a game of patience. You are a sculptor now, not just a floor guy. The smell of the resin is sharp, like a chemical fire, but that is the smell of a bond that will last fifty years.
Matching the wood grain and stain
Color matching is a secondary concern to structural integrity but it is what the homeowner sees first. You should use dry pigment powders mixed directly into the wet epoxy to match the base tone of the hardwood. Do not rely on surface stains alone. If the repair is deep, a surface stain will look translucent and fake. You need depth. I keep a kit of burnt umber, raw sienna, and titanium white pigments. You mix them in until the wet glob matches the wet wood. Remember, wood looks darker when it is wet. If you match the dry wood, your repair will be too light once you apply the finish. This is where most guys screw up. They forget the refractive index of the polyurethane. Also, you can use a fine-tip graining pen to draw the wood pores back into the hardened resin. It is a trick I learned from a furniture restorer. If you don’t break up the solid color of the epoxy, it will stand out like a sore thumb. You need to mimic the chaos of nature. Real wood is messy. Your repair should be too.
- Assess the chip for loose fibers and remove them with a pick.
- Clean the void with denatured alcohol to remove wax and oils.
- Tape off the surrounding area to protect the healthy finish.
- Mix the two-part epoxy with a 1:1 or 2:1 ratio as specified.
- Apply the resin and overfill by approximately one-sixteenth of an inch.
- Wait for the initial set before carving the rough shape.
- Sand with 120-grit, then 180-grit, then 220-grit for a smooth finish.
- Apply a matching topcoat of polyurethane or oil finish.
Long term maintenance of high impact areas
A repaired corner is only as durable as the maintenance routine of the household. You must avoid steam mops and harsh chemicals that can degrade the epoxy bond over time. The heat from steam can cause the wood cells to swell at a different rate than the synthetic repair, leading to delamination. I tell my clients to treat their stairs like a fine piece of furniture. You wouldn’t take a pressure washer to a Chippendale chair. Don’t do it to your treads. Also, watch the humidity in your home. If you live in a place like Chicago where the winters are bone-dry, your wood will shrink and pull away from the walls. This creates gaps where the repair can become stressed. Use a humidifier to keep your home between 30 and 50 percent relative humidity. This keeps the wood stable. It keeps the repairs tight. A floor is a system. If one part of the system is out of whack, the whole thing starts to fail. I have seen $50,000 installations ruined because someone left a window open during a rainstorm. Wood is a sponge. It never forgets.
“Wood moves. It is the first law of the forest and the first law of the floor.” – NWFA Technical Manual
The 1/8 inch that ruins everything
Precision in sanding the repair is what separates a master from a weekend warrior. If you leave even a fraction of a millimeter of a high spot, the foot traffic will catch it. This mechanical snag will eventually rip the epoxy plug out of the stair tread. I use a sanding block, never my bare fingers. Your fingers are soft and will sand out the wood around the repair faster than the repair itself, creating a divot. A hard block ensures that the repair becomes perfectly planar with the surrounding wood. It is a tactile experience. You close your eyes and run your hand over it. If you can feel it, you aren’t done. The transition must be undetectable to the touch. This is the level of detail required for a high-end restoration. While most people want the thickest underlayment or the flashiest finish, too much cushion or a poorly executed repair actually causes the locking mechanisms on modern floors to snap under pressure. On a solid tread, a poor repair is just a trip hazard waiting to happen. Do it right or don’t do it at all. My knees are shot from doing it right for three decades, but my floors are still standing. That is the only metric that matters in this business. Put the work in now or pay me to fix it later. The choice is yours.