The invisible tide beneath your feet
I once walked into a house where a $15,000 wide-plank walnut floor was cupping so bad it looked like a potato chip because the installer didn’t check the crawlspace humidity. The homeowner was devastated. The contractor was defensive. The reality was simple. The physics of water vapor do not care about your budget or your timeline. I spent two decades as a master installer, and if there is one thing I have learned, it is that a floor is more than a surface. It is the top layer of a complex structural sandwich. When that sandwich sits on top of a damp crawlspace, you are inviting a chemical and physical war that you will lose unless you understand the science of moisture migration. Smelling like oak dust and floor wax is part of the job, but the real work happens before a single plank is laid. You have to treat the subfloor like a performance engine. If the timing is off, the whole thing blows up. Most guys in the trade today want to slap down some click-lock and get paid. They ignore the moisture meter. They ignore the psychrometric charts. They ignore the simple fact that wood is a hygroscopic material that will always seek equilibrium with its environment. This guide is for the person who wants to do it right, following the strict standards of the National Wood Flooring Association and the Tile Council of North America. We are going to look at why floors fail and how to stop it at the molecular level.
Why moisture ruins solid wood and laminate
Moisture ruins flooring by causing dimensional instability through cellular swelling and adhesive failure. When water vapor enters wood fibers, it fills the cell walls, causing them to expand. This leads to cupping, crowning, and buckling. In laminate, moisture causes the high-density fiberboard core to swell and crumble, destroying the locking mechanisms. Every flooring material has a specific relationship with water. Solid hardwood is a living product. It breathes. It moves. When the humidity in a crawlspace rises, the bottom of the flooring boards absorb that vapor. The bottom of the board expands while the top, exposed to the air-conditioned interior, remains stable or even shrinks. This differential is what creates the cup. You cannot sand a cupped floor flat until the moisture issue is resolved, or you will end up with a crowned floor once the boards eventually dry out. This is a basic rule of wood physics that many skip.
“A floor is only as good as the subfloor beneath it; deflection is the enemy of every joint.” – Master Flooring Axiom
Laminate flooring is even more sensitive to direct liquid and sustained high humidity. While the wear layer is often plasticized and tough, the edges are the Achilles heel. Once vapor penetrates those seams, the wood fibers inside the core board act like a sponge. They expand and never fully return to their original shape. This is why you see those peaked seams that look like little mountains across the floor.
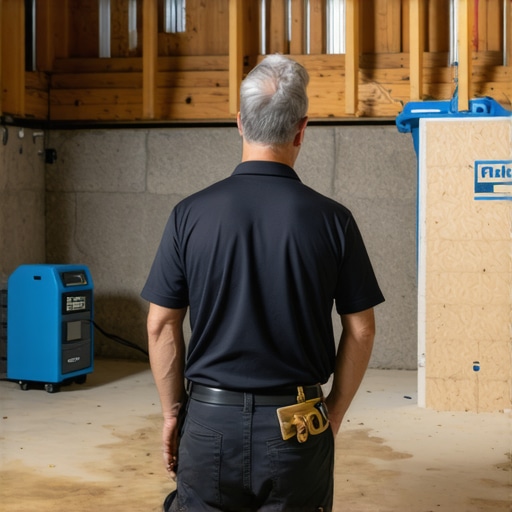
The chemistry of vapor retarders
A vapor retarder is a material that slows the rate of water vapor transmission through a floor assembly. It is measured in perms, where a lower perm rating indicates a more effective barrier against moisture movement. For crawlspaces, a 6-mil polyethylene sheet is the industry standard for covering the soil. The goal is to separate the earth’s natural moisture from the structural framing and the finished flooring. This is not just about laying plastic down. It is about the chemical integrity of the seal. You need to overlap seams by at least six inches and use a high-quality vapor tape to create a continuous envelope. If you leave even a small gap, the stack effect in the home will pull moisture up through that hole like a chimney. This concentrated vapor stream will hit the underside of your subfloor and cause a localized failure that looks like a leak. I have seen guys use cheap duct tape that fails after six months because of the high humidity environment. You need a tape designed for crawlspace encapsulation.
| Material Type | Maximum Moisture Content (MC) Difference | Acclimation Time Requirement |
|---|---|---|
| Solid Hardwood (Under 3 inches) | 4 percent | Until equilibrium is met |
| Solid Hardwood (Over 3 inches) | 2 percent | 7 to 14 days minimum |
| Engineered Hardwood | 3 percent | 48 to 72 hours |
| Laminate Flooring | No MC difference (Requires Barrier) | 48 hours |
The ghost in the expansion gap
The expansion gap is a mandatory space left around the perimeter of a floor to allow for natural movement. Without this gap, the floor will eventually hit a wall or a door frame as it expands due to seasonal humidity changes, causing it to buckle in the center. I see people shove the planks tight against the drywall all the time. They think the baseboard will cover it, so it does not matter. It matters. A 20-foot run of oak can move as much as an eighth of an inch or more depending on the species and the humidity swing. If that floor has nowhere to go, the energy has to be released somewhere. It usually goes up. This is the ghost that causes floors to creak and pop in the middle of the night. It is the sound of tension being released.
“Successful floor installation requires the installer to account for the environmental conditions of the site both during and after installation.” – NWFA Technical Manual
When you are working over a crawlspace, that expansion gap is even more critical because the moisture swings are typically more dramatic than they are on a second-story installation.
Why your subfloor is lying to you
Your subfloor is lying to you because surface readings do not reflect the internal moisture levels of the wood. Using a pin-less meter might give you a quick result, but to truly understand the risk, you need a pin-style meter that can reach the core of the plywood or OSB. A subfloor can feel dry to the touch while still being saturated at the core from months of crawlspace exposure. You need to take at least 20 readings for every 1,000 square feet. Do not just check the middle of the room. Check the corners. Check near the exterior walls where the humidity is highest. If the subfloor is within 2 to 4 percent of the moisture content of your finished flooring, you are in the safe zone. If the gap is wider, you are looking at a disaster. Most people want the thickest underlayment they can find, thinking it adds luxury. In reality, too much cushion actually causes the locking mechanisms on LVP and laminate to snap under pressure because it allows for too much vertical movement. You want a high-density, low-profile underlayment that provides support rather than bounce.
The Crawlspace Remediation Checklist
- Remove all organic debris and wood scraps from the crawlspace soil.
- Level the soil to prevent water from pooling in low spots.
- Install a 6-mil or 10-mil polyethylene vapor barrier over 100 percent of the ground.
- Overlap all seams by 6 to 12 inches and seal with waterproof seam tape.
- Extend the vapor barrier at least 6 inches up the foundation walls and fasten it.
- Verify that the crawlspace has adequate ventilation or is fully encapsulated with a dehumidifier.
- Check the subfloor moisture content from the underside using a deep-pin meter.
The 1/8 inch that ruins everything
The 1/8 inch rule states that a subfloor must be flat within one-eighth of an inch over a ten-foot radius. If there is a dip or a hump larger than this, the flooring will deflect every time someone walks on it, eventually fatiguing the joints. This is especially true for click-lock systems. People think the underlayment will hide the dip. It won’t. I spent three days grinding concrete on a job last month just so the floor wouldn’t click like a castanet. When you are over a crawlspace, you are usually dealing with wooden joists. Joists crown and sag. You must use a long straightedge to find these deviations. If the subfloor is not flat, you need to sand down the high spots or use a high-quality self-leveling compound or plywood shims to fill the lows. Ignoring this step is the fastest way to ensure your new floor feels cheap and sounds worse. It is the structural engineering of the floor that dictates the lifespan, not the color of the stain.