I spent three days grinding concrete on a job last month just so the floor wouldn’t click like a castanet. That is the reality of high-end flooring. Most guys skip the leveling compound and they think the underlayment will hide the dip. It won’t. I have seen fifteen thousand dollar wide-plank walnut floors look like potato chips because the installer ignored the moisture in the crawlspace. When it comes to grout, the stakes are just as high. You can pick the most expensive Italian porcelain, but if your grout lines are patchy or off-color, the whole project looks like a cheap DIY disaster. I have been on my knees with a moisture meter and a level for twenty five years. I do not look at a floor as a decoration. I look at it as a structural engineering challenge. Matching grout is not about an artistic eye. It is about chemistry, physics, and the precise control of hydration.
The science behind grout color failure
Custom grout color matching requires a deep understanding of the hydration process and pigment suspension within the cementitious matrix. Most color failures occur because of inconsistent water-to-powder ratios or the presence of minerals in tap water that react with the portland cement during the curing phase. Grout is essentially a mixture of cement, aggregate, and pigments. When you add water, you trigger a chemical reaction called hydration. If you add too much water, you dilute the pigments. As the water evaporates, it leaves behind microscopic voids. These voids scatter light differently, making the grout look lighter or washed out. This is why your grout looks dark when wet but turns a chalky white three days later. It is a physics problem, not a manufacturing defect. Professional installers use distilled water for custom matches to ensure that no stray minerals like iron or calcium interfere with the iron oxide pigments used to create the color. We also monitor the ambient humidity of the room. High humidity slows down evaporation, which can lead to darker, more consistent tones, while a dry desert environment can cause flash-curing and blotchiness.
“A floor is only as good as the subfloor beneath it; deflection is the enemy of every joint.” – Master Flooring Axiom
The ghost in the expansion gap
Expansion gaps are the most overlooked structural requirement in flooring installations involving hardwood floors and laminate. These gaps allow for the natural movement of materials due to seasonal humidity shifts, preventing the floor from buckling or putting lateral pressure on adjacent tiled surfaces and grout lines. If you butt your hardwood floors directly against a tiled shower entry without a proper transition, the expansion of the wood will crush your grout. I have seen grout lines pulverized into dust because the installer did not leave a quarter inch of breathing room. Laminate is even more temperamental. It moves as a single raft. If you pin it down with heavy cabinetry or skip the perimeter gaps, it will find the weakest point to release that energy. Usually, that is at the threshold where it meets your beautiful custom-colored grout. This structural tension causes hairline fractures. You might think you have a grout color problem, but you actually have a subfloor movement problem. You must respect the physics of the materials. Wood grows. Tile stays still. The gap is the peacekeeper between these two warring states.
| Grout Type | Pigment Stability | Water Resistance | Best Application |
|---|---|---|---|
| Sanded Grout | High | Moderate | Joints wider than 1/8 inch |
| Unsanded Grout | Moderate | Low | Polished stone and thin joints |
| Epoxy Grout | Extreme | 100 percent | Showers and high-traffic areas |
| High-Performance Cement | Very High | High | Universal applications |
The secret pigment ratio for custom blends
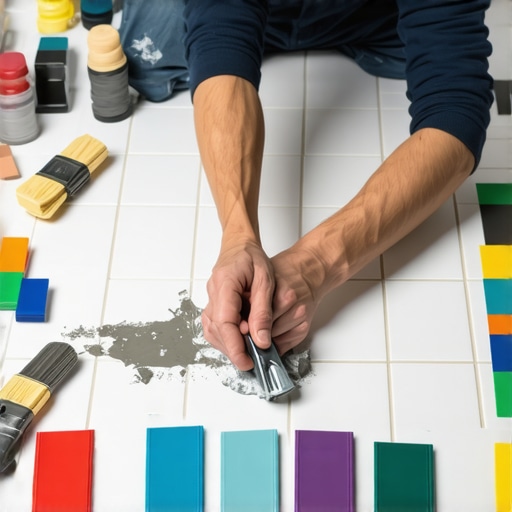
Creating a custom grout color involves dry-blending base powders before introducing any liquid to ensure even distribution of iron oxide particles. By using a digital scale to measure pigments by weight rather than volume, an installer can replicate a specific shade across multiple batches without variation. Most people try to mix color into wet grout. That is a mistake. You will get streaks. You need to take two or three standard grout colors, like a Bright White and a Charcoal, and blend the dry powders in a bucket. Use a drill mixer on a low setting to avoid entraining too much air. Once the dry powder looks uniform, you perform a biscuit test. You mix a tiny amount with water, smear it on a piece of cardboard, and dry it with a hair dryer. Cement colors change drastically as they lose moisture. The hair dryer gives you the cured color in five minutes instead of twenty four hours. This is the only way to verify a match for existing showers or old tile work. If the biscuit is too light, you add more dark powder to the dry mix. If it is too dark, you add white. It is a precise, iterative process that requires patience and a clean workspace.
Why your subfloor is lying to you
Subfloor deflection and moisture vapor emission rates are the primary causes of grout cracking and discoloration in modern homes. Even if a floor looks flat, a subfloor that lacks the necessary stiffness will flex under load, causing the rigid grout joints to fail and the pigments to flake away. I have spent days grinding concrete to hit the TCNA standard of one eighth of an inch of variation over ten feet. If you ignore a dip in the subfloor, your tile will bridge that gap. When you walk on it, the tile bends. Tile is not meant to bend. The grout is the first thing to give. It will crack and pop out. Furthermore, moisture coming up through a concrete slab carries salts. This is called efflorescence. These salts react with the grout and create a white, crusty film that ruins your custom color. You must use a high-quality moisture barrier or an uncoupling membrane like Schluter-Ditra. This membrane creates a small air space that allows the subfloor to move independently of the tile. It also manages vapor pressure, protecting your grout color from the chemical onslaught of the slab below.
- Check the subfloor for deflection using the L/360 standard.
- Measure the moisture content of the wooden subfloor or concrete slab.
- Vacuum all dust from the grout joints to ensure a mechanical bond.
- Use a high-quality grout additive instead of water for increased flexibility.
- Apply a penetrating sealer only after the grout has fully cured for 72 hours.
The 1/8 inch that ruins everything
The width of a grout joint dictates the type of material required and the final visual impact of the color match. Using the wrong grout for a specific joint width leads to shrinkage cracks and color loss as the material fails to bond with the edges of the tile. If your joint is wider than one eighth of an inch, you must use sanded grout. The sand acts like rebar in concrete. It provides structural integrity and prevents the grout from shrinking as it dries. If you use unsanded grout in a wide joint, it will pull away from the walls of the tile, leaving a gap that looks like a dark shadow. Conversely, if you try to force sanded grout into a tiny sixteenth-inch joint, the sand grains will get stuck at the surface. You will end up with a weak, porous joint that absorbs dirt and changes color within a month. I see this in custom showers all the time. People want those invisible lines, but they don’t use the right chemistry to achieve them. You need to match the aggregate size to the gap size. It is basic geometry. If you miss this, no amount of custom color matching will save the look of the floor.
“Cementitious grout is a porous material that lives and breathes with the environment; treat it with the same respect as the tile itself.” – Master Flooring Axiom
The chemistry of grout additives and sealers
Modern grout additives replace water with acrylic or latex resins to enhance color consistency and reduce the porosity of the finished joint. These polymers wrap around the cement particles, creating a denser matrix that resists staining and eliminates the need for post-installation sealing. I often tell clients to skip the cheap bags of grout at big-box stores. Those are fine for a backsplash, but for a floor, you want the high-performance stuff. These modern grouts use advanced pigments that are more resistant to UV fading. They also include antimicrobial agents that prevent mold from growing inside the grout structure. When you use a high-performance additive, the color you see in the bucket is much closer to the color you get on the floor. It eliminates the guesswork. Also, remember that sealers are not a magic shield. A penetrating sealer goes into the pores of the grout. If you apply it too early, you trap moisture inside. This can lead to a condition called cloudy grout, where the moisture turns the sealer into a white haze. You have to wait. Patience is the hallmark of a master installer. If the instructions say wait three days, you wait four. The chemistry does not care about your schedule.