The Painter’s Tape Hack for Splinter-Free Hardwood Cuts
I once walked into a house where a $15,000 wide-plank walnut floor was cupping so bad it looked like a potato chip because the installer didn’t check the crawlspace humidity. It was a tragedy written in timber. But even before the moisture got to it, the cuts were a mess. Every end-joint had these jagged, fuzzy edges where the saw blade had chewed through the wood fibers like a dull beaver. The installer tried to hide it with wood filler, but you can’t polish a mistake that fundamental. That is why I am a stickler for the fundamentals of the cut. I smell like sawdust and old floor wax most days, and I have spent more time on my knees with a moisture meter than I have in a bed. If you want a floor that looks like an architectural masterpiece rather than a weekend DIY project gone wrong, you start with how you treat the wood at the saw. A splintered edge is not just an aesthetic failure. It is a structural entry point for moisture and a sign that the installer does not respect the material. We are going to talk about the physics of the saw blade and the simple piece of blue tape that saves a three-hundred-dollar box of flooring from the scrap heap.
The science of the splinter free edge
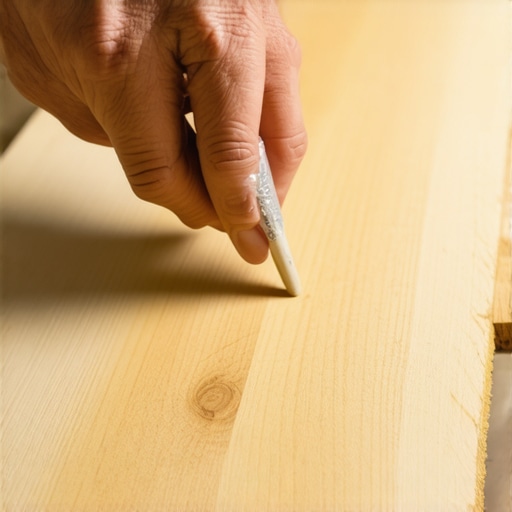
Painter’s tape prevents hardwood splintering by providing lateral tension to the surface wood fibers during the high-speed exit of the saw blade teeth. This mechanical reinforcement keeps the grain intact, stopping the carbide tips from lifting the finish layer or veneer away from the structural core of the plank. When you slap a piece of high-quality blue tape over your cut line, you are essentially creating a temporary laminate that holds the wood together at a molecular level while the steel does its work. Most guys just shove a piece of oak through a miter saw and wonder why the edges look like a serrated knife. It is because the wood fibers have no support. As the tooth of the blade exits the wood, it pushes the fibers upward or downward depending on the saw type. Without a counter-force, those fibers snap. The tape is that counter-force. I prefer a medium-tack tape. If you go too high-tack, you risk pulling the finish off a factory-finished plank, especially if it is a cheap, thin aluminum oxide coating. If you go too low-tack, it vibrates off before the blade even touches it. It is about that sweet spot where the adhesive grips the grain but respects the sealer.
The ghost in the expansion gap
Expansion gaps for hardwood floors must be maintained at a precise width of one-half inch to three-quarters of an inch around the entire perimeter of the room. This structural buffer allows for seasonal movement caused by fluctuations in relative humidity and ambient temperature, preventing buckling or crowning of the installed planks. People think the floor is static. It is not. It is a breathing, moving organism. If you pin it against a wall or a heavy kitchen island, it will find a way to move, usually by popping up in the middle of the room. I have seen 4,000 square feet of white oak lift four inches off the subfloor because some ‘pro’ forgot that wood grows when the humidity hits 70 percent. You need to understand the Equilibrium Moisture Content (EMC). Wood wants to be in balance with its environment. In the humid summers of the South, that wood is going to swell. In the dry winters of the North, it is going to shrink. The expansion gap is the insurance policy against the physics of nature. Do not ever think you can skip it. And do not think a baseboard is enough to hide a sloppy gap. You need to calculate the movement based on the species. Hickory moves more than White Oak. That is just the law of the woodshed.
Why your subfloor is lying to you
Subfloor levelness requirements dictate that a concrete slab or plywood deck must not deviate by more than one-eighth of an inch over a ten-foot radius. Using a self-leveling compound or grinding high spots is the only way to ensure the long-term integrity of the tongue and groove joints in engineered hardwood or solid timber. I spent three days grinding concrete on a job last month just so the floor wouldn’t click like a castanet. If the subfloor has a dip, the floor will flex every time you walk on it. That flex is called deflection. Over time, that deflection will snap the locking mechanisms on laminate or LVP, and it will cause squeaks in solid hardwood. The subfloor is the foundation of the house. If it is trash, the floor will be trash. I do not care how expensive your Italian walnut is. If it is sitting on a wavy subfloor, it will feel cheap underfoot. I use a ten-foot straightedge on every job. If I see light under that bar, I am not laying a single plank until the floor is flat. Not level, mind you. Flat. There is a difference. A floor can be sloped and still be flat enough for a good installation, but a floor that is wavy is a death sentence for your joints.
| Species Name | Janka Hardness Rating | Stability Rating | Common Usage |
|---|---|---|---|
| Hickory | 1820 | Medium | High-traffic family rooms |
| Hard Maple | 1450 | Low | Kitchens and modern spaces |
| White Oak | 1360 | High | Universal structural flooring |
| Black Walnut | 1010 | High | Luxury low-traffic areas |
| Red Oak | 1290 | Medium | Standard residential builds |
The chemistry of the bond
Modified thin-set mortars and polyurethane adhesives create a chemical bond that accounts for shear strength and moisture resistance in flooring installations. Choosing the correct trowel notch size ensures the proper coverage of adhesive, which prevents hollow spots and delamination over the lifespan of the floor. When you are moving from hardwood to a tile shower, the chemistry changes. You cannot use the same logic. In a shower, you are dealing with hydrostatic pressure and vapor transmission. You need a waterproofing membrane like Schluter-Kerdi. You need a grout that is not just a filler but a structural component. Most people think grout is just for looks. Wrong. Grout is there to handle the compression between tiles. If you do not mix it right, or if you use too much water, you end up with a porous, crumbling mess that invites mold to live behind your walls. I have ripped out showers that smelled like a swamp because the installer thought ‘waterproof’ meant he didn’t have to worry about the details. It always comes down to the details. The mil-thickness of your vapor barrier matters more than the color of the wood. The chemistry of the thin-set determines if that tile stays on the wall for twenty years or twenty days.
The one eighth inch that ruins everything
Vertical deflection limits defined by the TCNA and NWFA specify that a floor assembly must meet the L/360 standard for ceramic tile and hardwood systems. This mathematical ratio ensures that the subfloor system is rigid enough to prevent grout cracking and plank separation under dynamic loads like foot traffic or furniture. If your joists are too far apart, or if they are undersized, your floor is going to bounce. You can put the best grout in the world in those joints, but if the floor is moving an eighth of an inch every time the dog runs across it, that grout is going to crack. It is physics. You cannot fight it. You have to reinforce the subfloor. Sometimes that means adding a layer of 3/8-inch plywood. Sometimes it means sistering the joists. It is grunt work. It is dusty, back-breaking work. But it is the difference between a pro job and a hack job. I have seen guys try to use thick underlayment to hide a bouncy floor. That is a lie. Too much cushion under a floor is actually worse. It makes the locking joints on laminate and LVP work like a hinge. Hinges are for doors, not floors. If the joint acts like a hinge, it will fatigue and snap. Then you have a floating floor that is actually just a bunch of disconnected boards.
- Check subfloor moisture with a pin-type meter before starting.
- Acclimate the hardwood to the room’s temperature for at least 72 hours.
- Apply blue painter’s tape to both the face and the back of the cut line.
- Use an 80-tooth carbide blade for cross-cuts in hardwood.
- Ensure the saw blade is at full speed before entering the wood.
- Maintain a 68 to 72 degree Fahrenheit environment during installation.
- Vaccuum every row to ensure no debris gets trapped in the tongue and groove.
The mechanical reality of the saw blade
Saw blade tooth geometry such as Alternate Top Bevel (ATB) or Triple Chip Grind (TCG) determines the cleanness of the kerf in dense hardwoods. Using a high tooth count reduces the chip-load per tooth, which minimizes fiber tear-out and creates a smooth surface that requires minimal sanding before final finishing. If you are using a 24-tooth framing blade to cut your flooring, you might as well use a chainsaw. You need a finish blade. I look for something with at least 60 to 80 teeth on a 10-inch miter saw. The angle of the tooth matters. An ATB blade has teeth that are angled like a knife, slicing the fibers rather than punching through them. The tape hack works in tandem with this geometry. The tape holds the fibers down while the knife-like teeth slice through. It is a beautiful thing when a cut comes out so clean you can’t even tell where the factory edge ended and yours began. I also use a zero-clearance insert on my saw. It is a piece of wood or plastic that closes the gap around the blade on the saw table. This provides even more support for the bottom of the board. Between the tape on top and the zero-clearance insert on the bottom, the wood has nowhere to go but to stay exactly where it is. That is how you get a floor that looks like it was grown in place rather than slapped together with a circular saw and a prayer.