The grease trap hiding in your kitchen floor
Baking soda paste works as a desiccant and alkaline abrasive to lift lipids and organic oils from porous grout lines and ceramic tile surfaces through capillary action and chemical saponification. This method is effective for maintaining kitchen floors and preventing permanent staining in cementitious materials.
Most guys skip the leveling compound. They think the underlayment will hide the dip. It won’t. I spent three days grinding concrete on a job last month just so the floor wouldn’t click like a castanet. This same lack of respect for physics is why kitchen tiles end up looking like a greasy garage floor within three years of installation. People treat tile as if it is a solid sheet of glass. It is not. Even the densest porcelain has a degree of porosity, and that grout line between your tiles is essentially a hard sponge waiting to soak up every drop of bacon grease you drop. When you walk into a kitchen and smell a faint, rancid odor, you are smelling the structural failure of a cleaning regimen. The oil has moved past the surface. It is now part of the subfloor assembly via the grout joints.
The chemistry of the baking soda extraction
Sodium bicarbonate acts as a mild buffer that neutralizes acidic fatty acids found in cooking oils, creating a water-soluble salt that can be lifted from tile pores. This alkaline reaction is safe for glazed ceramic and porcelain, providing a non-toxic alternative to heavy degreasers.
When you mix baking soda with a small amount of water to create a thick paste, you are creating a poultice. In the world of high-end stone restoration, a poultice is the only way to reverse time. The physics are simple. The paste is a drying agent with a higher affinity for the oil than the tile has. As the water evaporates from the paste, it creates a vacuum effect. This vacuum pulls the liquid oil out of the microscopic valleys of the grout and into the drying mound of soda. If you just mop with soapy water, you are simply pushing the oil deeper into the substrate. You are hydrating the oil, making it more mobile, and allowing it to travel down to the thin-set. Once oil hits the thin-set, the chemical bond between the tile and the subfloor begins to degrade. I have seen entire kitchen floors delaminate because the homeowner mopped with too much water and too much grease for ten years.
“A floor is only as good as the subfloor beneath it; deflection is the enemy of every joint.” – Master Flooring Axiom
The danger to hardwood floors and laminate
Hardwood floors and laminate planks suffer irreversible damage when exposed to excessive moisture or abrasive pastes, leading to cupping, crowning, and delamination. Unlike tile, these organic materials react to hydroscopic stress and should never be treated with wet baking soda mixtures.
I have a physical reaction when I see people suggest putting a wet paste on hardwood floors. Wood is a living, breathing material. Even after it is milled into a 3/4 inch plank, it wants to return to the forest. If you put a wet baking soda paste on an oak floor to lift an oil stain, you are inviting a nightmare. The water in the paste will cause the wood fibers to swell. This is called grain raising. But worse, the alkalinity of the soda can react with the tannins in the wood, especially in white oak, turning it a permanent, bruised black. Laminate is even worse. Laminate is essentially a picture of wood glued to a densified sawdust core. If moisture from your cleaning paste hits the tongue and groove joint, that core will swell like a sponge. It will never go back down. You will have peaked joints that look like tiny mountains across your floor. There is no fix for that other than replacement. Stick to tile and grout for this method.
Surface Comparison for Oil Absorption
| Surface Type | Porosity Level | Oil Risk | Baking Soda Safe? |
|---|---|---|---|
| Glazed Porcelain | Low | Low | Yes |
| Unsealed Grout | High | Extreme | Yes |
| Solid White Oak | Medium | High | No |
| Laminate Core | Extreme | Catastrophic | No |
| Natural Travertine | High | Extreme | Yes (Caution) |
The 1/8 inch gap that ruins everything
Expansion gaps at the perimeter of a room are required by NWFA standards to allow for thermal expansion and moisture-related movement. When kitchen oil or cleaning fluids seep into these perimeter joints, they can cause structural rot or adhesive failure that is hidden by the baseboards.
A floor needs to breathe. Even a tile floor has a certain amount of movement. But when we talk about kitchen oil, it loves to migrate toward the edges. If your installer didn’t use a 100 percent silicone caulk at the change of plane, like where the tile meets the cabinets, that oil is going straight down into the subfloor. I have pulled up baseboards in twenty-year-old kitchens where the drywall was literally soaked in grease three inches up from the floor. No amount of baking soda will fix that. You have to understand the architecture of the installation. The paste is for the field, not the perimeter. If you have oil at the perimeter, you are looking at a deep cleaning of the wall assembly itself. This is why I insist on epoxy grout for commercial kitchens. It is non-porous. For a residential setting, you are likely dealing with standard cement grout, which is basically just a very hard dirt path for oil to follow.
“Cementitious grout is porous by nature and requires a penetrating sealer to resist moisture and oil infiltration.” – Tile Council of North America Guidelines
Deep Extraction Checklist
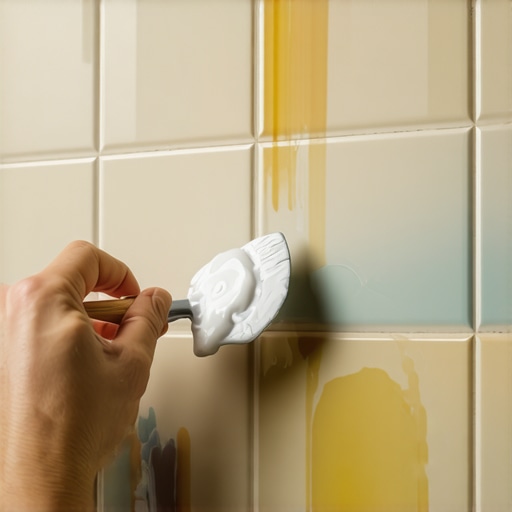
- Scrape away any solidified surface grease with a plastic putty knife to avoid scratching the glaze.
- Mix three parts baking soda to one part lukewarm distilled water until it reaches the consistency of peanut butter.
- Apply a half-inch thick layer of the paste directly over the stained grout or tile section.
- Cover the area with plastic wrap to slow the evaporation and allow the chemical transition to occur over 24 hours.
- Remove the dried paste with a dry brush first, then use a damp microfiber cloth for the residue.
- Re-seal the grout joint once the area is completely dry to prevent future oil penetration.
Showers and the moisture trap
Shower floors and bathroom tiles accumulate body oils and soap scum that require alkaline extraction to prevent biofilm growth and grout erosion. Using baking soda in wet environments helps maintain slip resistance and hygienic integrity of the waterproof assembly.
People forget that showers are basically vertical floors. The same oils that drop from your frying pan are dropping from your skin in the shower. These oils combine with calcium in the water to create soap scum, which is a literal wax. This wax fills the texture of your tile, making it slick. In my 25 years, I have seen more slip-and-fall incidents caused by oil buildup than by the water itself. A baking soda scrub in the shower is not just about looks. It is about restoring the coefficient of friction. If you have a mosaic floor in your shower, you have more grout than tile. That is a lot of surface area for oil to hide. You need to be careful with the chemistry here. If you use an acidic cleaner right after a baking soda treatment, you will get a violent fizzing reaction. While it looks cool, it can actually create enough internal pressure in a cracked grout joint to pop the grout right out of the channel. Always rinse thoroughly between steps. Your floor is a system. Treat it with the respect an engineered structure deserves.