The Invisible Shield for Natural Stone Showers
Most guys skip the leveling compound. They think the underlayment will hide the dip. It won’t. I spent three days grinding concrete on a job last month just so the floor wouldn’t click like a castanet. That same philosophy applies to sealing stone. People think they can just slap on a wet-look sealer and call it a day. Then they wonder why their expensive Carrara marble looks like a greased-up pizza box. You have to respect the stone structure first. Natural stone is a living, breathing structural material that demands an engineering mindset rather than a cosmetic one. If you treat your shower like a science project, you get a lifetime of beauty. If you treat it like a quick weekend DIY task, you get mold and discoloration.
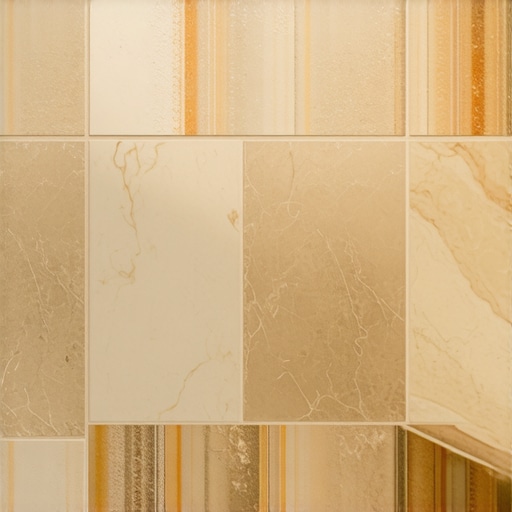
The microscopic reality of sedimentary rock
Natural stone is essentially a series of interconnected pores and microscopic voids that act as tiny straws. Sealing stone without changing its color requires the use of an impregnating sealer that penetrates the surface rather than a topical sealer that forms a film. These sub-surface protectors use fluorocarbon aliphatic resins to repel water and oils from within the stone structure. Unlike topical coatings that reflect light and create a plastic-like sheen, impregnators allow the stone to maintain its natural light refraction properties. When light hits an unsealed or properly impregnated stone, it enters the surface and scatters, giving the material its depth. A topical sealer creates a flat plane that bounce light back directly, which is what causes that artificial darkening or wet look that many homeowners want to avoid.
Why some sealers turn your marble yellow
The chemical composition of a sealer determines its long-term visual impact. Impregnating sealers are often solvent-based or water-based carriers for silanes or siloxanes. Solvent-based versions generally offer deeper penetration into dense stones like granite or slate but can carry a heavy odor during application. The reason many cheap sealers change the stone color is due to the quality of the solids left behind. Low-grade resins can yellow when exposed to UV light or the alkaline environment of a shower. In a shower, the chemistry is constantly under attack from soaps, skin oils, and hard water minerals. If the sealer is not breathable, it traps moisture behind the surface. This trapped moisture can lead to spalling or a dark, damp appearance that never goes away. Unlike hardwood floors which require a surface film for protection, stone needs to remain open to vapor transmission.
“A floor is only as good as the subfloor beneath it, and a stone seal is only as good as the molecular bond it forms within the pores.” – Master Flooring Axiom
The physics of the shower environment
A shower is a high-performance hydraulic system. Every time you turn on the water, you are subjecting the tile and grout to thermal expansion and moisture loading. In regions with high humidity, such as the coastal South, the drying time for stone is significantly extended. If you seal stone while it still holds internal moisture, you are effectively locking that water inside. This leads to a phenomenon called white haze or efflorescence, where minerals are carried to the surface but get trapped under the sealer. This is why acclimation and drying are the most ignored steps in the process. You cannot rush a stone installation. It is not like laminate where you click it together and walk away. Stone is an investment in geology.
Comparing Sealer Performance Metrics
| Sealer Type | Appearance Change | Breathability | Durability | Best For |
|---|---|---|---|---|
| Topical Acrylic | High Gloss | Low | 2 Years | Low Traffic Walls |
| Solvent Impregnator | None | High | 5 to 10 Years | Dense Granite and Marble |
| Water-Based Impregnator | None | Medium | 3 to 5 Years | Porous Travertine |
| Color Enhancer | High (Wet Look) | Medium | 3 to 5 Years | Rustic Slate |
The grout factor in stone preservation
Grout is the most porous part of your shower assembly. While we focus on the stone, the grout often acts as a wick for moisture. When sealing natural stone, the grout must be treated with the same high-quality impregnator. Most people fail to realize that if the grout absorbs water, that water can travel laterally behind the stone tile. This causes the edges of the stone to darken, a condition known as picture framing. By using a high-solids impregnating sealer, you create a hydrophobic barrier across both the stone and the grout line. This ensures that the entire surface tension remains high enough to bead water effectively without the need for a thick, darkening coating.
“The Tile Council of North America emphasizes that stone sealers are not waterproof barriers but rather soil inhibitors that provide time to clean spills before they stain.” – TCNA Standards Overview
Preparation steps for a transparent finish
Before any sealer touches the stone, the surface must be chemically clean. Any residue from grout haze or construction dust will be permanently bonded under the sealer if not removed. I use a pH-neutral stone cleaner and a soft nylon brush to agitate the pores. This mechanical action is vital. You cannot just wipe it with a rag. You need to pull the dust out of the microscopic crannies. Once cleaned, the stone must dry for at least twenty-four to forty-eight hours. I often use a moisture meter to ensure the stone is below 4 percent internal moisture before proceeding. If you skip this, you are gambling with the final color.
- Verify the stone is completely dry with a moisture meter
- Remove all grout haze using a pH-neutral stone cleaner
- Test the sealer on a leftover scrap piece of tile first
- Apply the sealer in small sections to ensure even coverage
- Buff away any excess sealer before it dries on the surface
- Allow the sealer to cure for 72 hours before using the shower
The 1/8 inch that ruins everything
Application technique is where most jobs fail. If you leave the sealer on the surface for too long, it begins to polymerize. This creates a sticky, cloudy residue that is a nightmare to remove. You must apply the impregnator until the stone stops drinking it, but you must wipe off every single drop of excess within five to ten minutes. The goal is for the sealer to live inside the stone, not on it. This is particularly true for dense marbles. If you leave a 1/8 inch puddle on a corner, it will dry into a shiny spot that ruins the natural matte aesthetic. I always keep a stack of clean, white microfiber towels nearby. If the towel gets damp, I switch to a fresh one. Consistency is the only way to ensure the color remains unchanged.
Regional variations in stone maintenance
In dry climates like Phoenix, stone can become brittle if not maintained, while in the swampy humidity of Houston, the risk is always mold. Your sealing schedule should reflect your environment. A shower in a humid climate may need a more frequent application of a breathable sealer to prevent the stone from holding onto organic matter. Unlike hardwood floors that might swell or laminate that might delaminate in these conditions, stone survives, but its appearance will degrade if the sealer fails. Always check the bead. If water no longer beads on the surface of your stone, the invisible shield has worn down and it is time for a reapplication.