I smell like WD-40 and oak dust today because I spent the morning ripping out a failed LVP installation in a house that should have had solid white oak. Most guys would just slap some plastic down and call it a day. I do not operate that way. Last month I walked into a job where a homeowner tried to dye their grout with a cheap bottle from a big box store. The lines looked like a disaster because the installer did not check the subfloor deflection. The tile was moving just enough to crack the cementitious bond of the grout, which meant the dye was just masking a structural failure. If your subfloor moves, your grout dies. It is that simple. Most people think grout is just a filler, but it is a structural component of the assembly that manages stress and moisture. When you decide to dye your grout, you are not just painting. You are performing a chemical intervention on a porous mineral substrate. This process requires a deep understanding of the Interfacial Transition Zone within the cement and the way pigments interact with calcium silicate hydrate.
The microscopic anatomy of a grout line
Grout is a porous matrix of Portland cement and aggregate that functions as a capillary network for moisture and stains. When you look at grout under a microscope, you see a jagged landscape of voids and crystals. These voids are where dirt, oils, and bacteria live. To successfully dye this surface, you must first evacuate those contaminants. Most homeowners use soap, which is a mistake. Soap leaves a fatty acid film that prevents the dye from bonding. You need a pH-neutral cleaner or a phosphoric acid solution to open the pores without destroying the integrity of the cement. If the grout is too dense, the dye sits on top and peels like a bad sunburn. If it is too porous, it sucks the pigment in and leaves a patchy mess. You are looking for a Goldilocks zone of porosity where the dye can achieve a mechanical bond with the cement crystals.
“A floor is only as good as the subfloor beneath it; deflection is the enemy of every joint.” – Master Flooring Axiom
Why your subfloor determines the life of your colorant
Subfloor rigidity is the primary factor in determining if a grout dye project will last more than six months. If your plywood or concrete slab has even a fraction of an inch of vertical movement, the grout lines will develop micro-fissures. These fissures are invisible to the naked eye but they are wide enough to break the film of an epoxy-based colorant. When I check a floor, I am looking for the L/360 standard, which means the floor should not deflect more than the span divided by 360. If you are working over a bouncy laminate floor or a poorly supported hardwood floors transition, your grout dye will fail. The movement creates shear stress that the pigment cannot handle. You must stabilize the subfloor before you even think about the aesthetics of the grout lines. I have seen guys try to dye grout in a shower where the pan was flexing. It is like trying to paint a rubber band. It does not work and it wastes everyone’s time.
The chemistry of epoxy colorants versus hardware store stains
Industrial epoxy grout colorants are technically coatings that create a permanent waterproof barrier over the existing cementitious material. Do not confuse these with the water-based stains you find in the clearance aisle. A true epoxy colorant contains high-solids resins that flow into the grout pores and then cross-link to form a hard, plastic-like finish. This is vital because it changes the grout from an absorbent sponge into a hydrophobic surface. In showers, this is the difference between a clean floor and a mold factory. The pigment particles in high-quality dyes are ground to a sub-micron level, allowing them to penetrate deep into the cement matrix. This is not just a surface film. It is an integrated color change. When you apply these, you are essentially re-engineering the surface of the floor to resist the chemical assault of hard water and acidic cleaners.
| Grout Type | Porosity Level | Best Dye Match | Longevity |
|---|---|---|---|
| Sanded Grout | High | Penetrating Epoxy | 10 to 15 years |
| Unsanded Grout | Medium | Topical Pigment | 5 to 7 years |
| Epoxy Grout | Low | Industrial Coating | 20 plus years |
A systematic guide to chemical preparation
Preparation is eighty percent of the labor in a successful grout restoration project and requires aggressive mechanical and chemical cleaning. You cannot just mop the floor and start. You need a stiff nylon brush and a professional grade degreaser. I recommend scrubbing every inch of the grout line until the rinse water comes up clear. If there is a sealer on the old grout, you must strip it. Sealers are designed to repel liquids, which means they will also repel your dye. You can test for sealer by dropping water on the grout. If it beads up, you have work to do. You must use a chemical stripper to remove that barrier. After stripping, you must neutralize the pH of the floor. If the surface is too acidic or too alkaline, the epoxy resins in the dye will not cure properly. This results in a tacky finish that attracts dirt faster than the original grout did.
- Deep clean every line with a high-pH alkaline cleaner to remove oils.
- Use a phosphoric acid solution to etch the grout if it is particularly dense.
- Rinse the floor three times with distilled water to ensure no residue remains.
- Dry the floor for at least twenty-four hours using high-velocity fans.
- Mask off any adjacent hardwood floors or baseboards to prevent staining.
Application techniques for a permanent mechanical bond
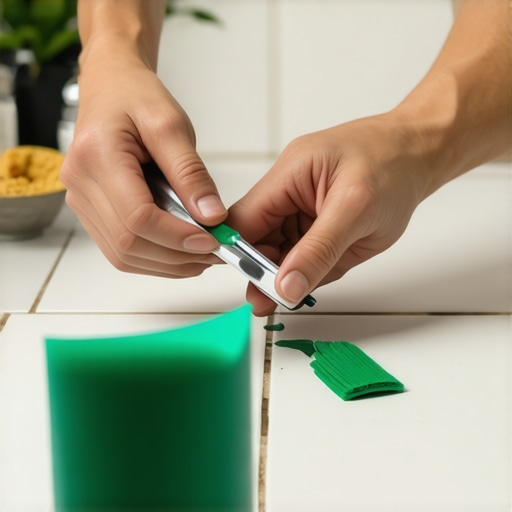
The application of grout dye must be done in small manageable sections to ensure the pigment is worked into the pores before it begins to tack. I use a small toothbrush-style applicator. You want to apply the dye in a circular motion. This forces the liquid into the crevices from multiple angles. Most people make the mistake of just wiping it on. That leaves air pockets. You need to work the material. Once a section is covered, let it sit for the exact amount of time specified by the manufacturer. Usually this is about five to ten minutes. Then you use a damp microfiber cloth to wipe the excess off the face of the tile. Do not use a soaking wet sponge. Too much water will emulsify the dye and pull it right out of the joint. You want to leave the pigment in the grout while keeping the tile clean. This is a tedious process that requires patience and a good set of knee pads.
“Proper surface preparation is more than half the battle in any restoration project.” – TCNA Handbook Guidelines
The impact of local humidity on cure times
Environmental conditions such as the swampy humidity of Houston or the dry heat of Phoenix significantly alter the evaporation rate of dye solvents. If you are working in a high-humidity environment, the dye will stay wet longer, which sounds good but it actually increases the risk of contamination. Dust and hair will settle into the wet lines. In a dry climate, the dye can flash-dry before you have a chance to wipe the tile clean. This leaves a hazy residue on the porcelain that is a nightmare to remove. I always suggest running the HVAC system at a steady seventy-two degrees for forty-eight hours before and after the job. This stabilizes the moisture vapor transmission rate of the subfloor. If the slab is pushing moisture up through the tile, it will push the dye right off the grout. This is why a moisture meter is the most important tool in my bag.
The mistake of ignoring the subfloor structure
While most people want the thickest underlayment, too much cushion actually causes the locking mechanisms on LVP or laminate to snap under pressure and ruins grout integrity. If you are working in a room where tile meets another surface, you must ensure the transition is rock solid. Any movement at the edge of the tile field will cause the grout dye to peel at the perimeter. People think they can hide a bad subfloor with a bit of color. They are wrong. I have seen ten thousand dollar tile jobs ruined because the installer used a cheap 1/4 inch underlayment that compressed over time. This compression creates a void under the tile. When you step on it, the tile sinks and the grout cracks. No amount of epoxy dye will fix a structural void. You have to address the substrate first. If your floor clicks like a castanet when you walk on it, put the dye bottle away and call a professional to stabilize the subfloor.
Maintaining the pigment against the assault of hard water
Long-term maintenance of dyed grout requires the total abandonment of harsh chemicals and abrasive scrubbing tools. Once you have successfully dyed the floor, you have a high-performance surface. You do not need bleach. Bleach is an oxidizer that will eventually break down the polymer bonds in the dye. Instead, use a specialized stone and tile cleaner with a neutral pH. The goal is to lift the surface dirt without disturbing the epoxy film. If you have hard water, the minerals will build up on top of the dye. This makes the grout look white or hazy. You might think the dye is fading, but it is actually just buried under calcium deposits. A gentle vinegar and water solution can remove these deposits, but you must be careful not to leave it on too long. A well-maintained dyed grout line can last twenty years if you treat it with respect. It is a structural finish, not a temporary fix.