Most guys skip the leveling compound. They think the underlayment will hide the dip. It won’t. I spent three days grinding concrete on a job last month just so the floor wouldn’t click like a castanet. That job taught me that if your first line is off by a hair, the whole room is a disaster. You cannot hide bad geometry with expensive wood. I have spent twenty-five years on my knees with a moisture meter and a level. I have seen fifteen thousand dollar walnut floors cup until they looked like potato chips because the installer did not understand the physics of the subfloor. A floor is not a decoration. It is a structural performance surface that must interact with the atmospheric conditions of the home. If you do not respect the chalk line, the wood will not respect you. Most homeowners believe that waterproof laminate or luxury vinyl plank allows them to ignore subfloor prep. They are wrong. Every floor, from solid white oak to click-lock engineered cores, depends on the straightness of the initial snap. I smell like oak dust and WD-40 most days, and I have learned that the only thing that does not lie in a house is a snapped line of blue chalk.
The geometry of a straight start
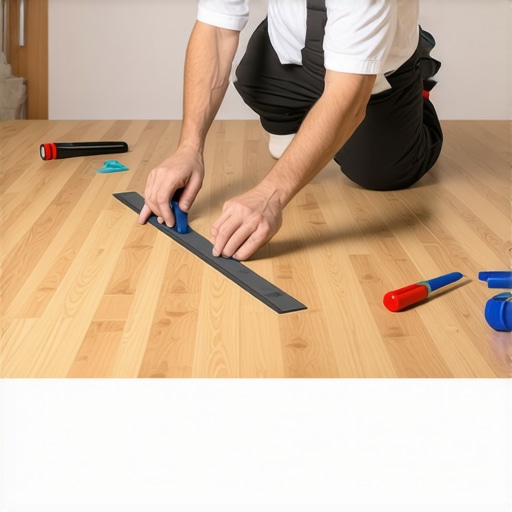
Establishing a straight start for hardwood floors requires a precise chalk line to define the primary baseline and ensure parallel alignment across the subfloor. This mechanical process prevents plank drifting and ensures the expansion gap remains uniform against the perimeter walls during the entire installation procedure. You must realize that walls are never truly straight. If you follow a wall without a chalk line, you are following a lie. The wall might bow inward or outward by half an inch over a twenty foot span. If you pin your first row of wood directly against that crooked plate, your entire floor will be crooked. By the time you reach the other side of the room, you will be cutting wedges that look like doorstops. I have seen it happen a hundred times. You need to find the center of the room or a primary reference wall and build a grid that ignores the mistakes of the framers. The chalk line is your source of truth in a world of bent studs and settling foundations.
“A floor is only as good as the subfloor beneath it; deflection is the enemy of every joint.” – Master Flooring Axiom
Physics of the snapping tool
The chalk line tool functions through string tension and powdered pigment adhesion to create a perfectly straight reference mark on the subfloor surface. The braided nylon cord must be fully saturated with calcium carbonate or ultramarine pigment to leave a high-visibility mark that survives the installation process. Not all chalk is the same. Red chalk is permanent. If you snap a red line on a subfloor and then decide to move it, you are stuck with that ghost line forever. Blue chalk is the standard because it stays visible but can be wiped away if the layout needs adjustment. White chalk is for guys who like to play it safe but often find it disappears under a layer of dust before they finish their first three rows. The string itself matters too. A thin, braided line gives a sharper mark than a thick, twisted cotton line. Twisted lines hold too much chalk and leave a blurry, wide mark that makes precision impossible. You want a line that is maybe a sixteenth of an inch wide. Anything wider and you are guessing where the edge of the board should go.
Why your subfloor is lying to you
A flat subfloor is the fundamental requirement for hardwood plank alignment, as vertical deviations can cause the chalk line string to deflect and produce a curved mark. You must grind high spots and fill low spots with cementitious leveling compound to ensure the chalk line stays true to the horizontal plane across the entire installation area. If you snap a line across a dip in the floor, the string will pull into that dip and create a curve. It is basic physics. You think you are laying a straight row, but you are actually following the contour of a valley. When you try to lock the next row in, it will not fit. You will start hitting it with a tapping block, trying to force it, and you will end up breaking the tongue or the groove. I have seen guys lose their minds trying to figure out why their boards are gapping, only to realize their subfloor looks like the rolling hills of Kentucky. You have to get that slab within an eighth of an inch over ten feet. No exceptions. If you do not have a ten foot straightedge, go buy one before you even touch a chalk box.
The 1/8 inch that ruins everything
Maintaining a consistent expansion gap of one-eighth to one-half inch is vital for hardwood floors to accommodate seasonal movement and moisture-induced swelling. The chalk line must be offset from the baseboard to account for this buffer zone, ensuring the flooring system does not buckle or cup during high-humidity cycles. People think the gap is just a suggestion. It is a requirement of the wood. Wood is a living material, even after it is cut and finished. It breathes. When the humidity hits eighty percent in August, those boards are going to grow. If they have nowhere to go, they will push against the wall until they have no choice but to lift off the subfloor. I have seen floors lift six inches off the ground, forming a literal bridge in the middle of a living room. All because the guy did not leave enough room for the wood to move. Your chalk line should be snapped exactly the width of the board plus the expansion gap away from your starting wall. If you are using three inch planks and need a half inch gap, your line goes at three and a half inches. Measure twice. Snap once.
| Layout Tool | Precision Level | Best Use Case |
|---|---|---|
| Braided Chalk Line | High | Long runs and primary baselines |
| Laser Level | Extreme | Cross-room alignment and verticality |
| T-Square | Medium | Individual plank cuts |
| Trammel Points | High | Large radius curves |
Establishing the master baseline
To establish a master baseline, you must measure parallel distances from the longest exterior wall and use the Pythagorean theorem or 3-4-5 triangle method to ensure squareness. This geometric verification ensures that hardwood planks run parallel to the sightline of the room, preventing a visually jarring skew in the finished floor. I start by picking the most visible wall in the house. This is usually the one that runs the length of the main hallway or the living room. I take three measurements, one at each end and one in the middle. I do not trust the ends alone. Then I find the average and mark my points. I pull the string taut, as tight as it will go without snapping. Then I lift it straight up, maybe four inches, and let it go. If you pull it to the side even a little bit, the line will be crooked. You have to pull it perfectly vertical. That snap sends a cloud of pigment into the pores of the subfloor, marking your destiny for the next few days of work. If that line is straight, your life is easy. If it is crooked, you are going to be fighting the wood until the last piece of trim goes down.
- Clean the subfloor of all debris and drywall mud before snapping.
- Measure the width of the room at three different points to find the average.
- Calculate the width of the final row to avoid slivers under the baseboard.
- Snap a test line to check chalk visibility on dark substrates.
- Secure the hook end of the line with a hardened nail to prevent slipping.
The ghost in the expansion gap
The expansion gap acts as a thermal and hygroscopic buffer, and its precise calculation is mandatory for solid hardwood installations according to NWFA standards. Using a chalk line to mark the exact limit of the flooring field ensures that the perimeter boards remain aligned even when the wall plate is irregular or bowed. I call it the ghost because you cannot see it once the baseboards are on, but you will definitely feel it if it is missing. Every joint in a floor is a moving part. When you have a hundred joints across a room, that movement adds up. You might have a quarter inch of total movement across a large room. If you do not have that gap, the pressure has nowhere to go but up. I have heard floors pop like gunshots in the middle of the night because the tension became too much. It is a sound that makes any real floor man sick to his stomach. Use your chalk line to define that boundary and stick to it. Do not let the boards creep toward the wall. Use spacers. Check your line every three rows to make sure you are still on track. Wood has a way of walking on you if you are not paying attention.
“Wood flooring is a hydroscopic material, expanding and contracting with the gain and loss of moisture in its environment.” – NWFA Technical Manual
Moisture and the chalk line bond
The chemical interaction between subfloor moisture and chalk pigment can affect the visibility and longevity of your layout marks. You must perform a calcium chloride test or use a pinless moisture meter to ensure the concrete slab or plywood deck is dry enough for the chalk to adhere without bleeding or fading. If the floor is damp, the chalk turns into a muddy paste. You will not be able to see your line, and worse, it can stain the underside of your wood. I have worked on jobs where the slab was so wet the blue chalk turned into a dark smear that looked like mold. That is a red flag. If your chalk is not snapping clean, your floor is not ready for wood. You need to wait, or you need to use a moisture barrier. I prefer a high-grade epoxy sealer on concrete, but even then, you have to be careful about how you mark your lines. Some sealers are so slick that chalk will not stick to them. In those cases, I use a felt-tip marker and a long straightedge, but I always go back to the chalk line for the long runs. It is the only way to be sure over thirty or forty feet.
Final verification of the grid
The final verification of your flooring grid involves cross-measuring from multiple reference points to confirm that the layout remains square and true. This quality control step prevents cumulative errors where a minor misalignment in the first row leads to significant gaps or binding in subsequent rows. I like to snap secondary lines every five feet. These are my check lines. As I move across the room, I measure back to my check lines. If I am off by a sixteenth, I can usually adjust it over the next few boards by opening or closing the joints just a hair. But if I wait until I am twenty feet out to check, I am in trouble. You cannot fix a half inch mistake without ripping the whole floor up. And nobody wants to do that. I have seen guys lose their profit for the whole week because they were too lazy to snap a check line. Do not be that guy. Trust the chalk, trust the math, and keep your eyes on the grid. A floor that is laid straight will last a hundred years. A floor that is laid crooked will be a headache until the day it is torn out. Take the time to snap the line. Your knees and your wallet will thank you later.