
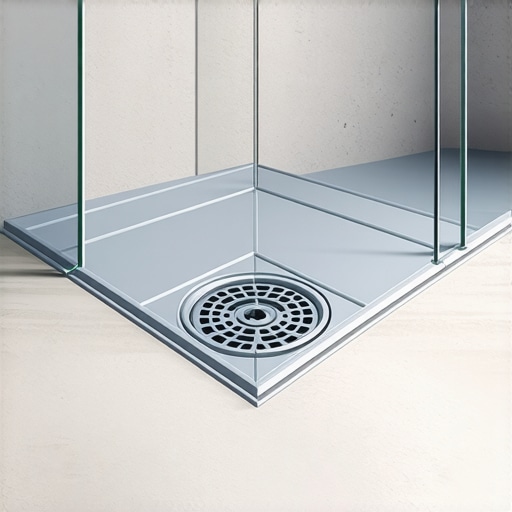
Mastering the Shower Slope for Flawless Drainage and Structural Integrity
I smell like WD-40 and oak dust most days. My knees have the permanent indentations of a man who has spent twenty five years crawling over subfloors with a moisture meter. I have seen the same mistake a thousand times. Most guys skip the leveling compound. They think the underlayment will hide the dip. It won’t. I spent three days grinding concrete on a job last month just so the floor wouldn’t click like a castanet. That job was for a luxury master bath where the previous installer thought he could eyeball the pitch. He was wrong. The result was a stagnant pool of grey water that rotted the floor joists. You don’t just build a shower. You engineer a water management system that respects gravity and the laws of fluid dynamics. If you treat a shower floor like a flat kitchen tile job, you are building a biological hazard.
The fundamental geometry of a shower floor
A successful shower floor requires a consistent slope of 1/4 inch per linear foot toward the drain assembly. This specific pitch ensures that surface water and moisture within the mortar bed move efficiently toward the weep holes. Failure to maintain this 2 percent grade leads to standing water and grout failure. In larger walk in showers, the pitch must remain uniform across all planes to prevent birdbaths or low spots where soap scum and bacteria accumulate. This is the baseline for all professional installations.
When we talk about the physics of a shower, we are talking about the evacuation of liquid. Water is heavy. It is also persistent. It finds the path of least resistance. If that path is not toward the drain, it will be into your wall studs. The 1/4 inch rule is not a suggestion. It is a mathematical necessity based on the surface tension of water and the friction coefficient of standard grout and tile. If you go shallower than 1/8 inch per foot, the water will simply sit there, held in place by its own molecular bond to the tile. If you go steeper than 1/2 inch per foot, the floor becomes a slip hazard. You are looking for that sweet spot where gravity overcomes surface tension without compromising the safety of the person standing on the wet tile.
Why the pre slope is a non negotiable step
The pre slope is the inclined layer of mortar beneath the waterproof liner that directs moisture toward the drain weep holes. Many amateur installers place their waterproof membrane directly onto a flat subfloor. This causes water that permeates the grout and mortar to sit trapped on the liner forever. A proper pre slope ensures that the entire system, from the tile surface to the subfloor, is tilted toward the plumbing. This prevents the sour smell of stagnant water and protects the structural integrity of the home.
“A floor is only as good as the subfloor beneath it, deflection is the enemy of every joint.” – Master Flooring Axiom
Imagine the anatomy of a traditional mud bed. You have the subfloor, then a moisture barrier, then the pre slope. We use a dry pack mortar, usually a 4 to 1 ratio of sand to Portland cement. It should feel like damp sand at the beach, just enough moisture to hold its shape when squeezed. We pack this onto the floor, pulling it from the perimeter down to the drain flange. We are creating a funnel. This is where the chemistry of Portland cement meets the mechanical requirement of drainage. The density of the pack is vital. If it is too loose, the floor will crack under the weight of the user. If it is too wet, it will shrink and pull away from the walls. We are looking for structural density that can support the static load of the tile and the dynamic load of a human body.
The microscopic reality of grout and moisture
Grout is a porous material that acts as a filter rather than a total waterproof barrier in most shower installations. Even high quality epoxy grout can experience vapor transmission or micro cracking over time. Because grout allows some water to pass through, the underlying slope and drainage system must be perfectly executed. The chemical composition of the grout, whether cementitious or resin based, determines how much water reaches the mortar bed. This is why the secondary drainage at the weep holes is the most important part of the assembly.
We need to talk about the molecular behavior of water in a cementitious matrix. When you finish your shower and turn off the tap, the water on the surface begins to evaporate, but the water that has soaked into the grout lines stays there. Through capillary action, that water travels downward. If you have used a cheap, non modified thin set, that water can eventually break down the bond between the tile and the substrate. This is why I demand highly modified mortars with high polymer content. These polymers create a hydrophobic bridge that protects the bond coat. If you are transitioning from a wet zone to a dry zone where you might have laminate or hardwood floors, the management of this moisture is even more critical. One small leak in a shower pan can travel under the baseboards and ruin a thousand square feet of expensive white oak in a matter of weeks.
| Slope Ratio | Pitch Per Foot | Drainage Efficiency | Safety Rating |
|---|---|---|---|
| 1:96 | 1/8 inch | Poor / Risk of Pooling | High |
| 1:48 | 1/4 inch | Optimal / Industry Standard | High |
| 1:24 | 1/2 inch | Aggressive / Rapid | Moderate |
| 1:12 | 1 inch | Excessive / Structural Only | Low |
The physics of the drain weep holes
Weep holes are small openings in the drain throat that allow water to escape from the mortar bed into the waste line. These holes are the last line of defense against subfloor rot and mold growth. If an installer clogs these holes with thin set or mortar, the shower pan becomes a saturated sponge that never dries out. Professional installers use crushed stone or specialized plastic spacers around the drain base to keep these pathways clear and functional at all times.
I have seen guys dump a bucket of thin set right over the drain flange. It makes me want to retire. When those weep holes are blocked, the water has nowhere to go. It sits in the mud bed. Eventually, the alkalinity of the concrete and the constant moisture create a perfect breeding ground for black mold. You will see it first as a darkening of the grout lines at the bottom of the shower. That is not dirt. That is a failing ecosystem beneath your feet. To prevent this, we use a handful of pea gravel around the drain before we pack the final mortar bed. This creates a high porosity zone where water can migrate freely to the holes. It is a simple mechanical solution to a complex moisture problem.
The structural interaction with surrounding materials
Integrating a shower floor with surrounding laminate or hardwood floors requires a rigid subfloor and a perfect moisture break. Because wood and laminate are sensitive to humidity and liquid water, the transition must include a vertical waterproof return and a proper expansion gap. Any deflection in the subfloor at this junction will cause the grout to crack and moisture to wick into the adjacent flooring materials. This is where most residential failures occur during the first year after a renovation.
- Verify subfloor thickness meets L/360 deflection standards for ceramic tile.
- Apply a liquid waterproofing membrane at least six inches up the wall studs.
- Check the moisture content of the subfloor using a pin meter before installation.
- Ensure the drain flange is bolted securely to the subfloor to prevent independent movement.
- Use a silicone based caulk at all plane changes rather than hard grout.
“Waterproof does not mean maintenance free, the slope is what does the heavy lifting for the life of the floor.” – TCNA Handbook Commentary
If you live in a high humidity region like the Gulf Coast, your shower floor is under constant thermal and hygroscopic stress. The moisture in the air slows down the evaporation process, meaning your mud bed stays wet longer. In these climates, I recommend a topical waterproofing system like a bonded membrane. This keeps the water entirely out of the mortar bed, allowing it to run off the surface of the tile directly into the drain. This is a more modern approach that bypasses the traditional weep hole system. However, even with a topical membrane, that 1/4 inch slope is still your god. If the slope is wrong, the water will just sit on top of the membrane, hidden under your tile, until it smells like a swamp.
The final bond and wear layer thickness
When we get to the actual tiling, people focus on the color. I focus on the mil thickness of the wear layer and the percentage of thin set coverage. For a shower floor, you need at least 95 percent coverage. You cannot have voids. Every void is a pocket where water can sit and grow things. I use a 1/4 inch by 3/8 inch square notched trowel and I back butter every single piece of stone or tile. It is tedious. It is hard on the back. But it is the only way to ensure the tile becomes a monolithic part of the floor. If you are using small mosaics, the slope is easier to follow, but the grout lines are more numerous. This increases the total surface area of porous material. You have to balance the aesthetic of the small tile with the reality that you are creating more pathways for water to enter the system. Precision is the difference between a floor that lasts fifty years and one that fails in five. It is all about the slope.